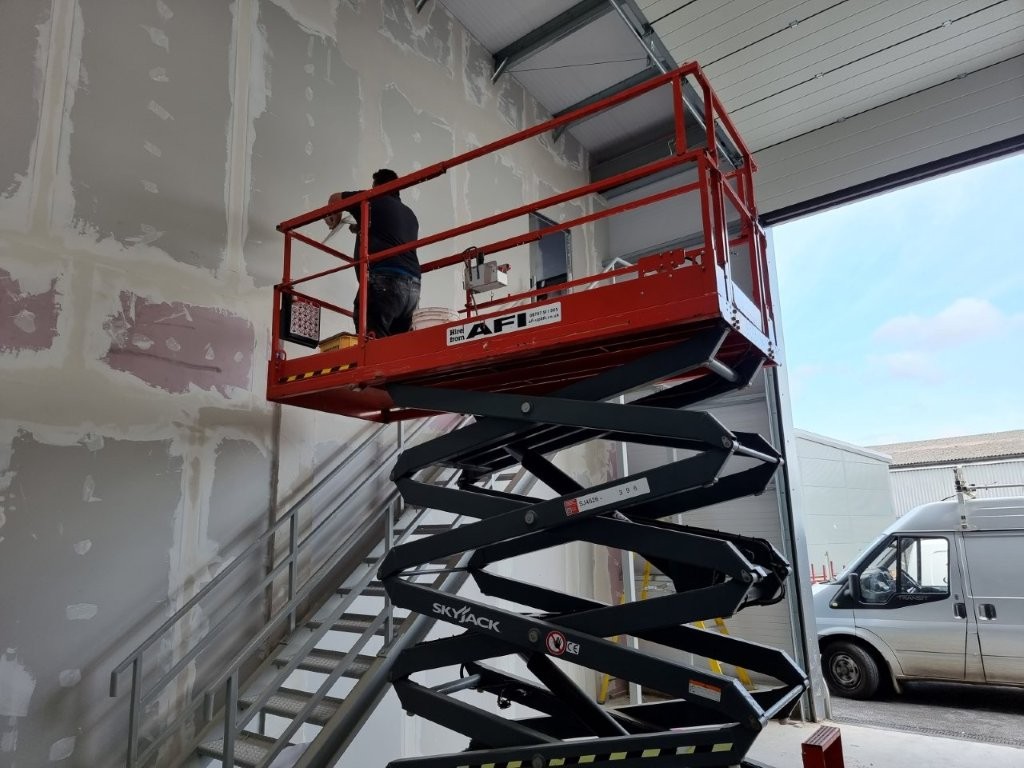
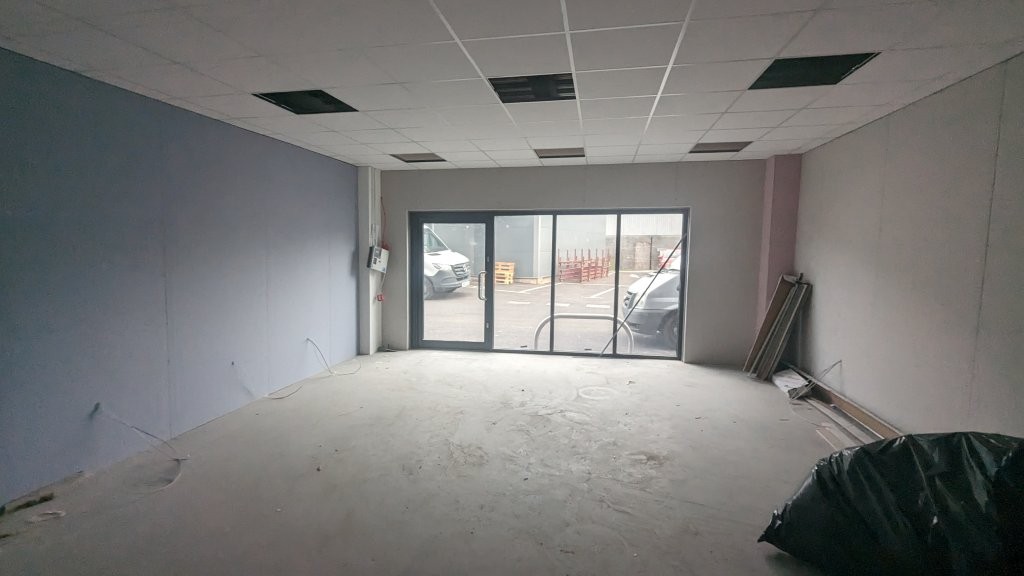
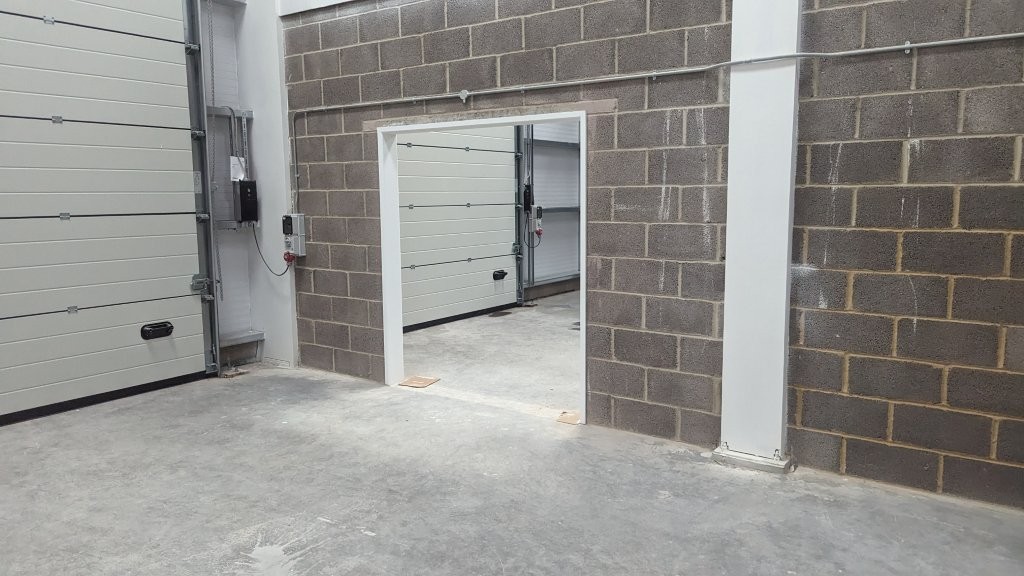
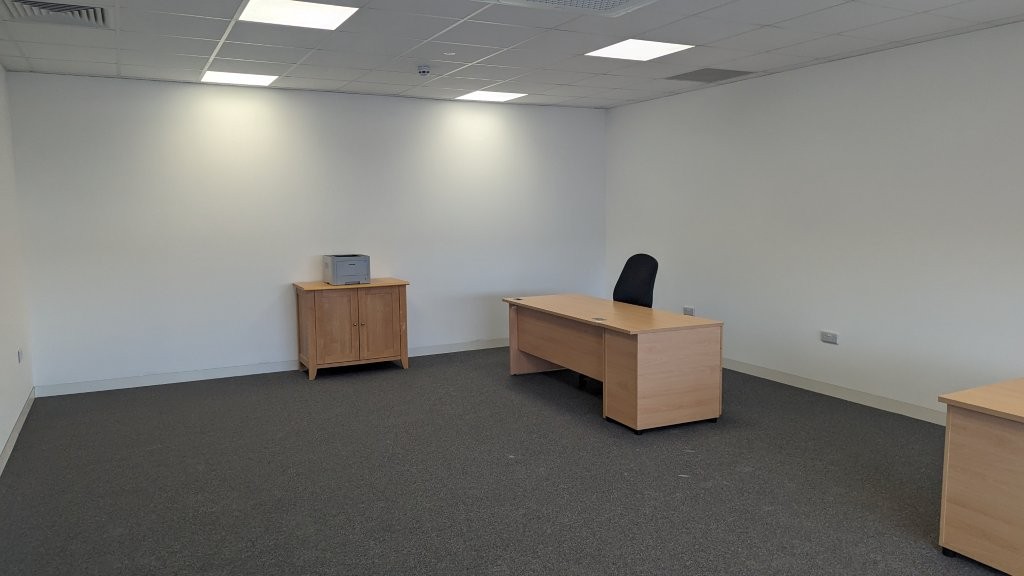
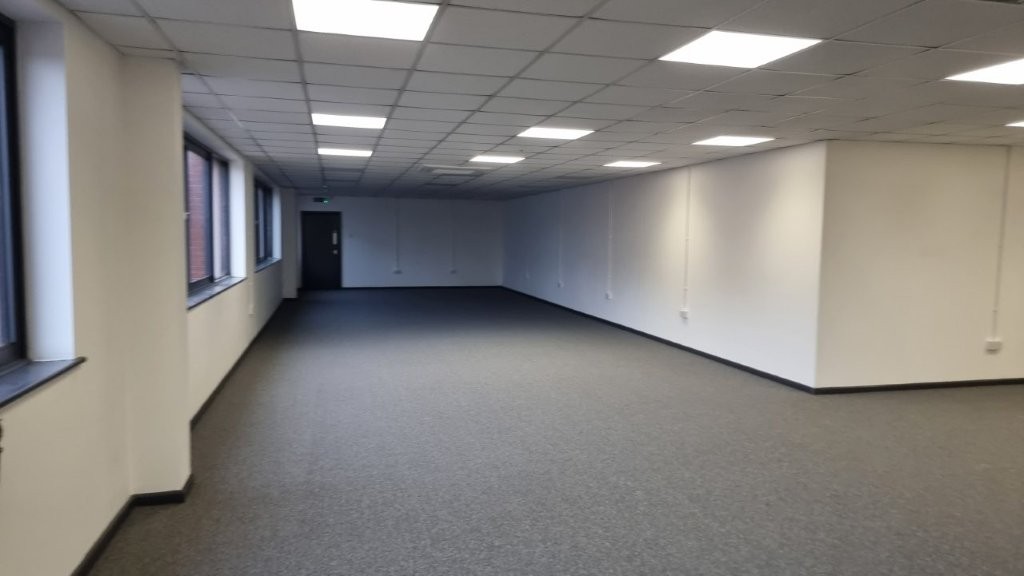
We do not turn away any project, even if it is a small one. This project was local to us, the new partition had to be a low cost demountable partition the same style as what they already have. The customer wanted to divide the room more for a visual separation so that the office functions could be split up. There was a wall there originally many years ago, but they took it out, and now they wanted it back in again.
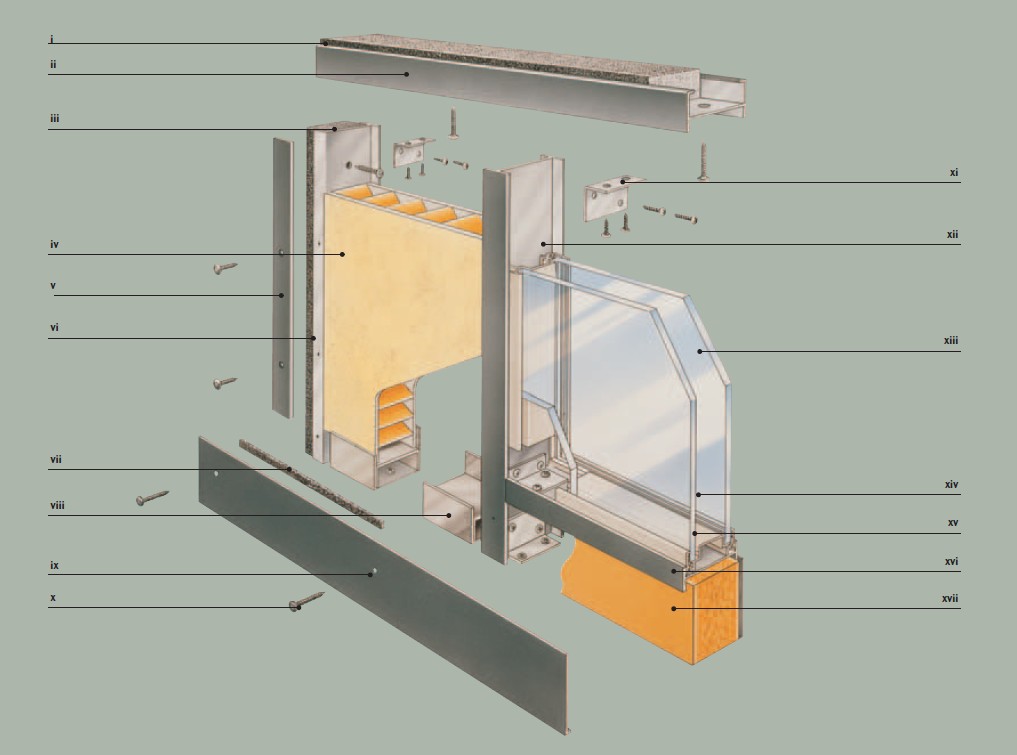
Demountable Partition
Exploded view of the 50mm composite partition system
The beauty of using demountable partitioning is that it is easy to put and remove, as none of the floors, ceiling and walls really get damaged and there is not a great deal of mess.
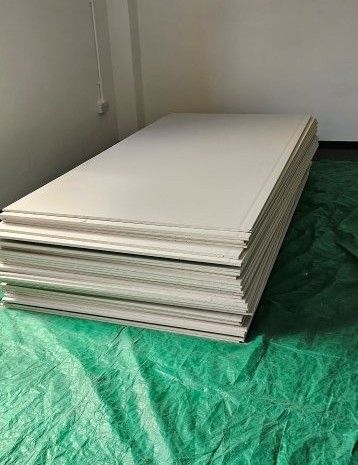
The important thing with this project was to make sure that the wall was the correct thickness, (50mm as opposed to 75mm), and to work out how to build it as economically as possible.
The 50mm composite panels are actually very heavy, around 40 kg. Unless you are used to carrying them, they can easily be damaged by nicking or scuffing the corners. The other problem with just a day to do the work is that the delivery has to be the previous day, as with only 1 day to build the wall, the fitter cannot spend half the day waiting for the delivery to turn up.
In this case, the customer said they would decorate the panels, this saves a days labour and the labour cost is actually quite expensive.
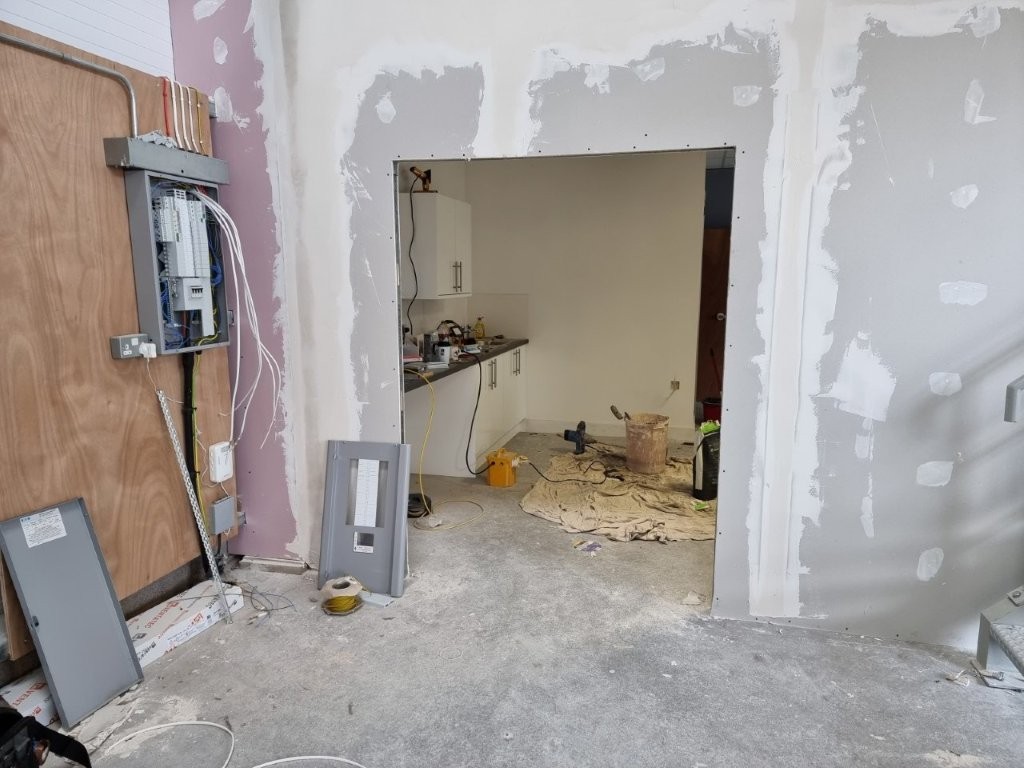
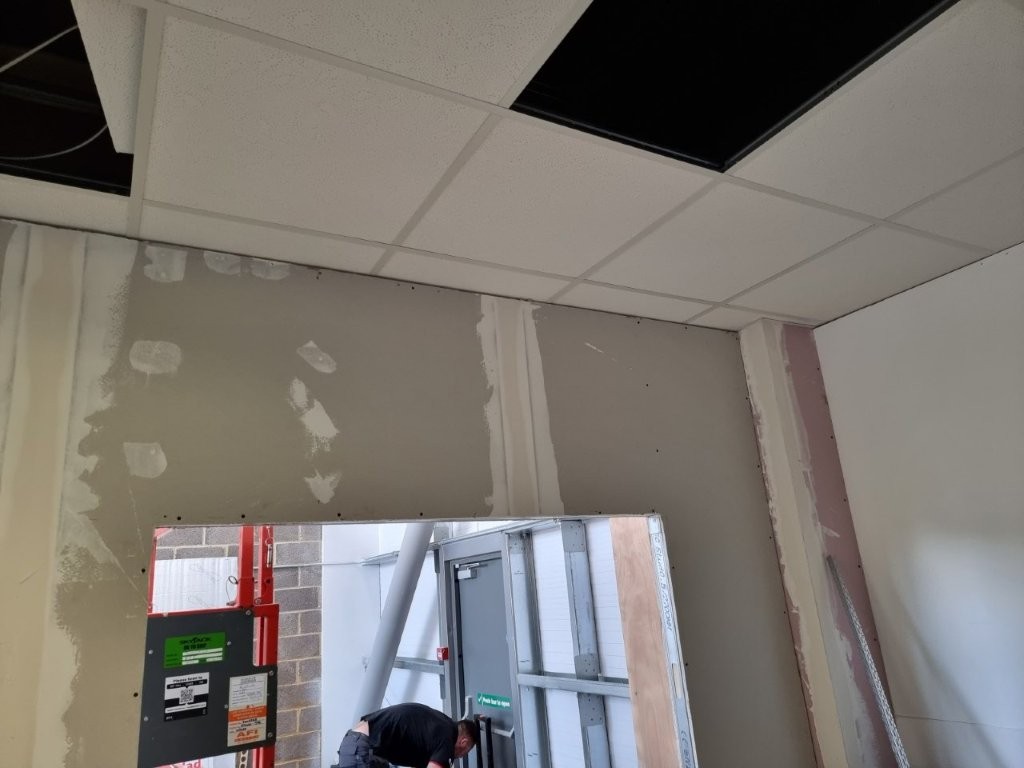
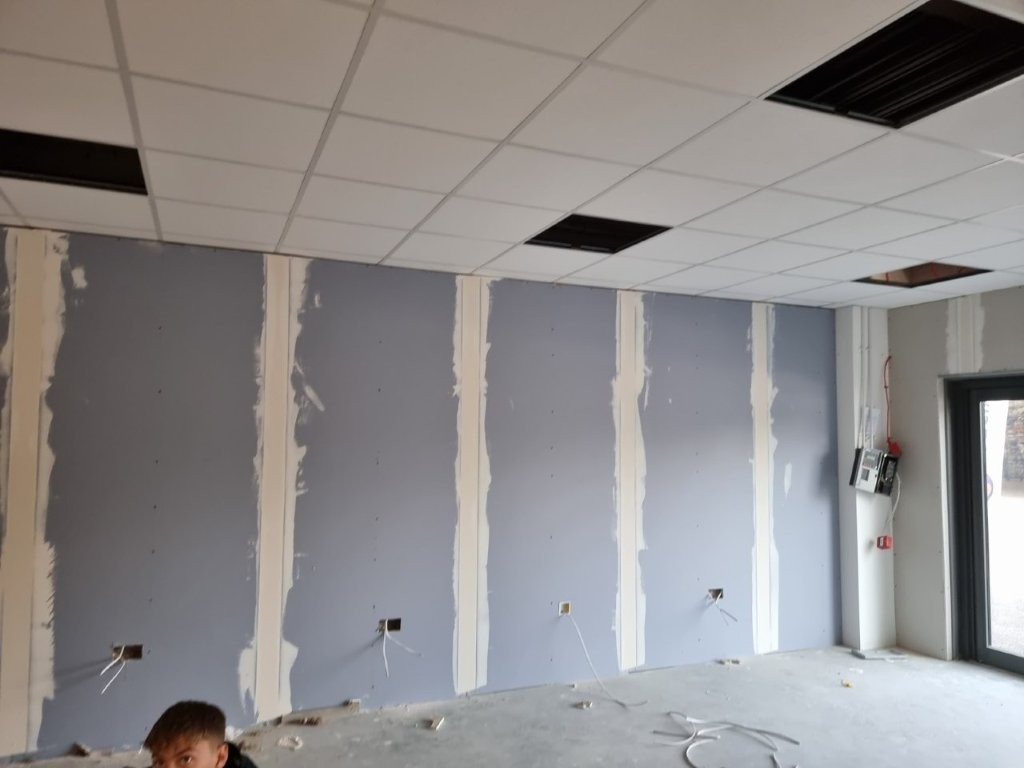
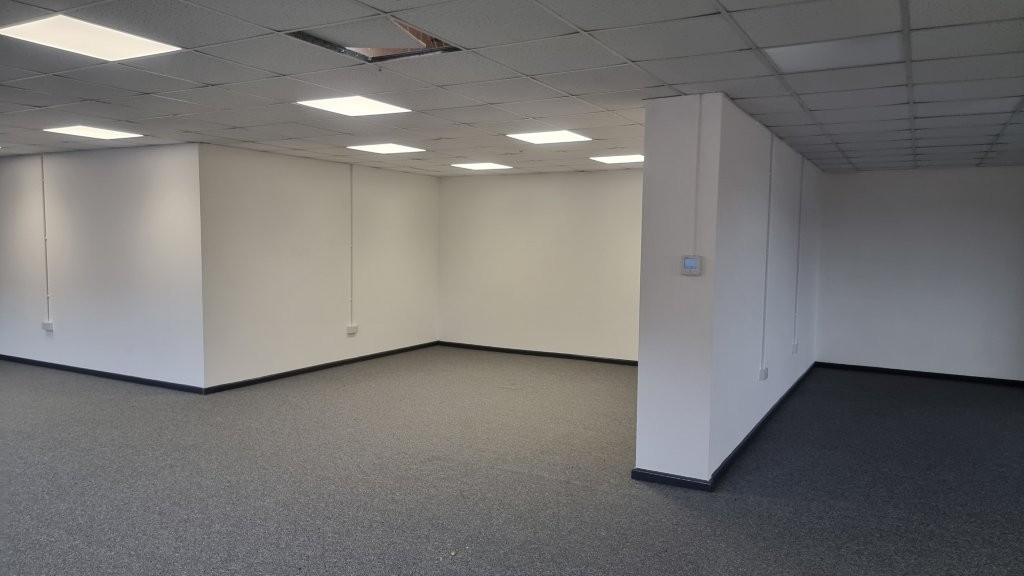
In order to fit the panels, they have to be cut, as well as the head channel to fit on the suspended ceiling, upright support posts between the panels, and the wall abutments at the edges.
As you can see from the photos, the panel also had to be cut around the perimeter trunking for a nice neat job.
Before and after Photos
Initial open plan room to divide
Perimeter trunking and radiator pipes to cut around
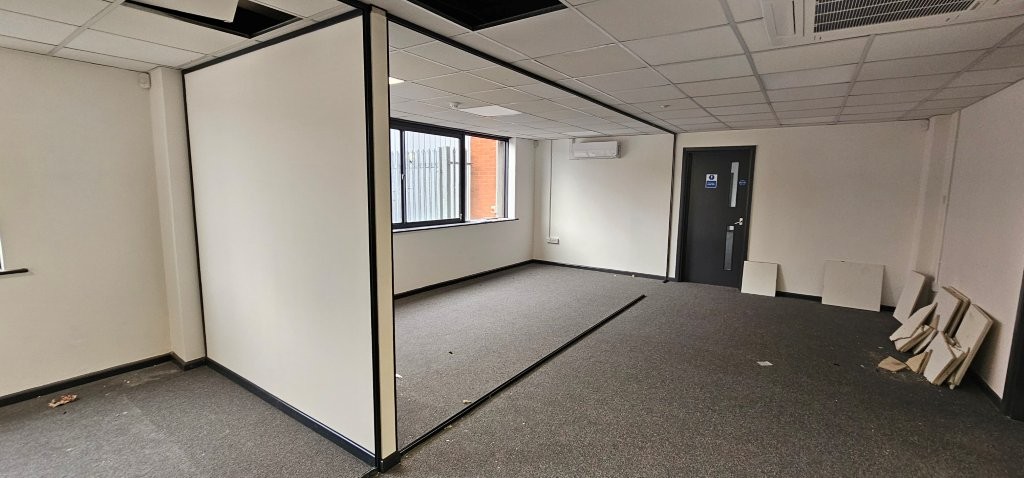
Completed Dividing wall
Vertical support posts between the panels
Neat cutting around the trunking
We are happy to look at small projects, we will try and help as much as we can, please do not hesitate to contact us on 01380 73 88 44, or email us at [email protected]
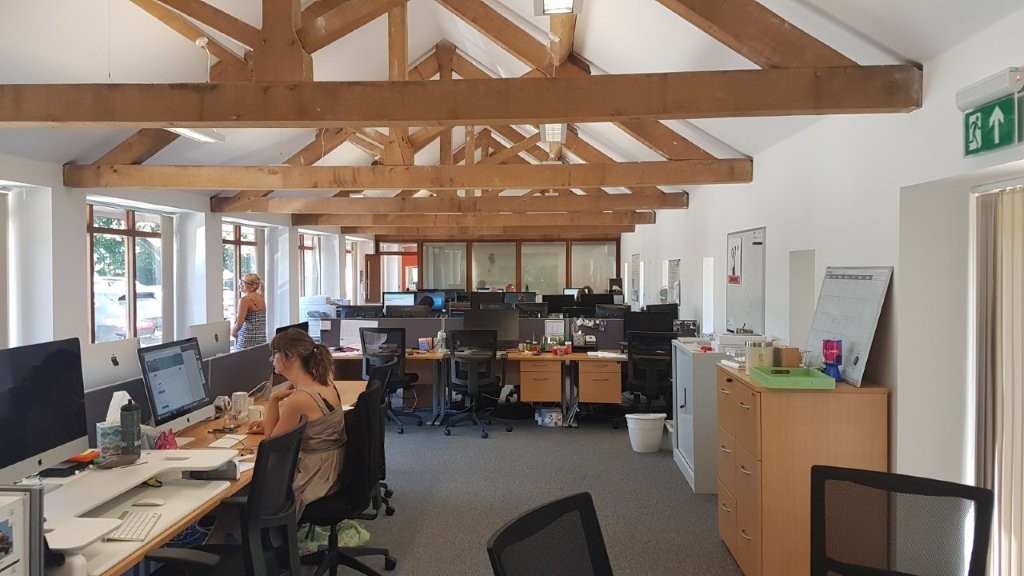
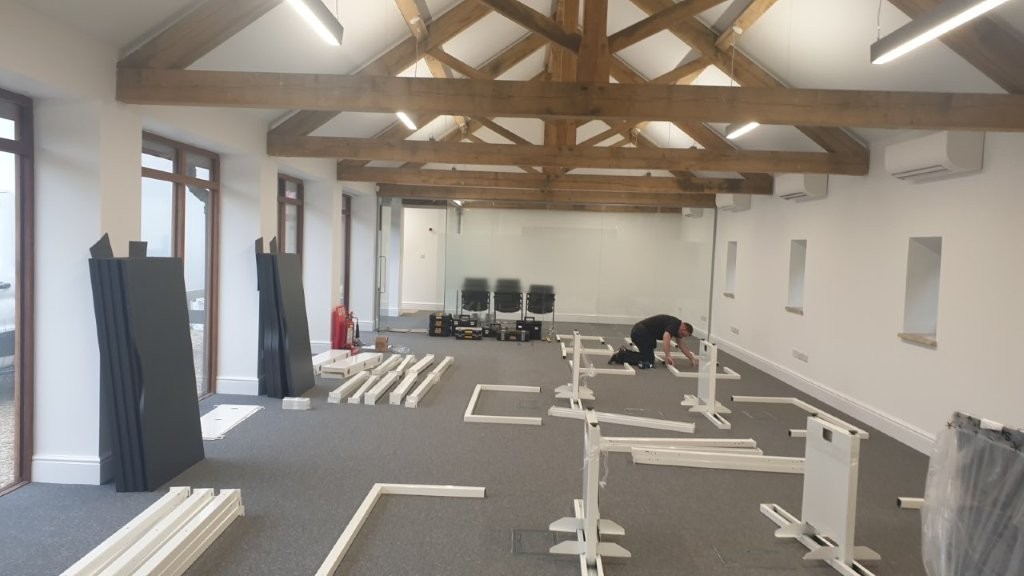
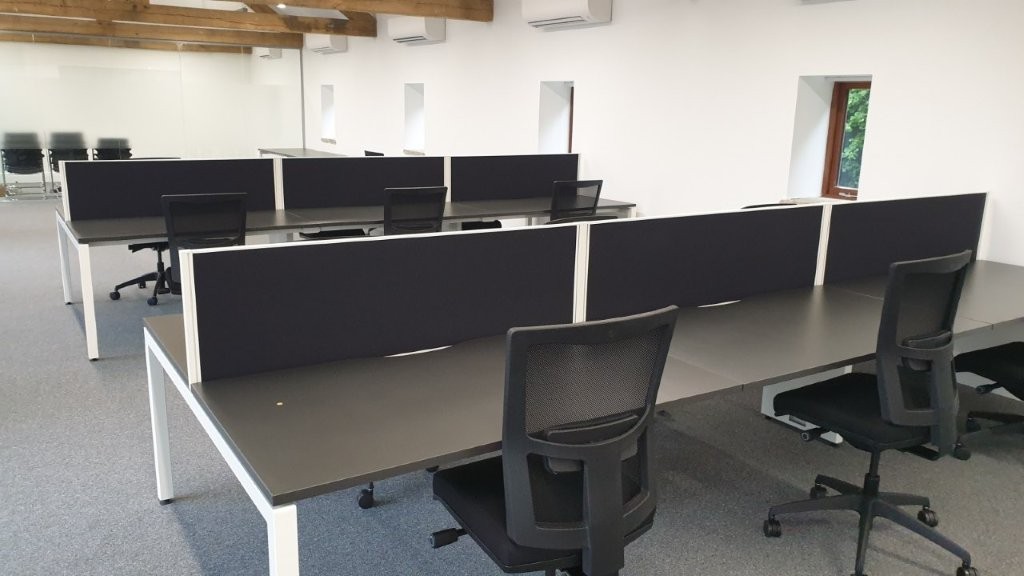
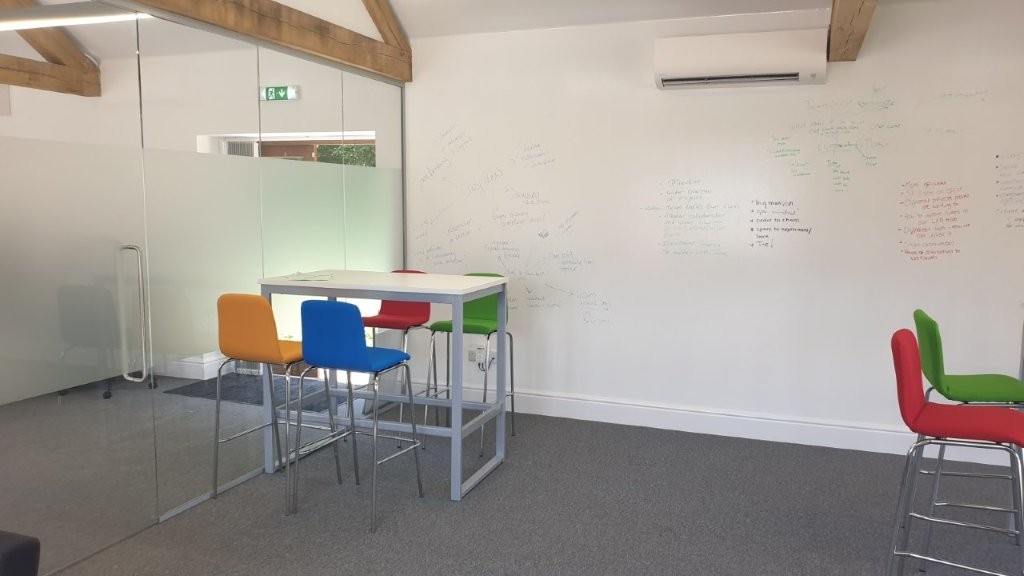
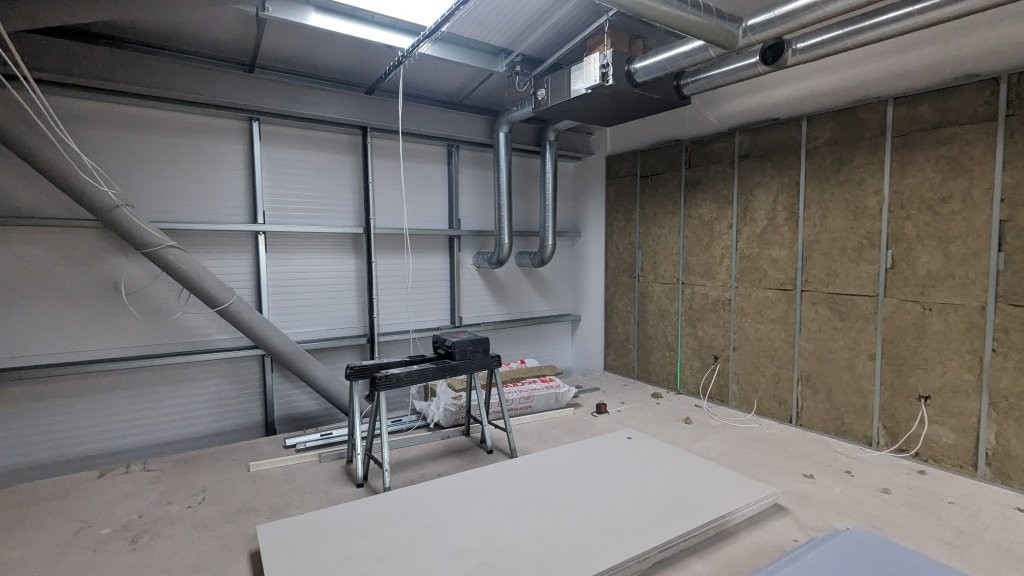
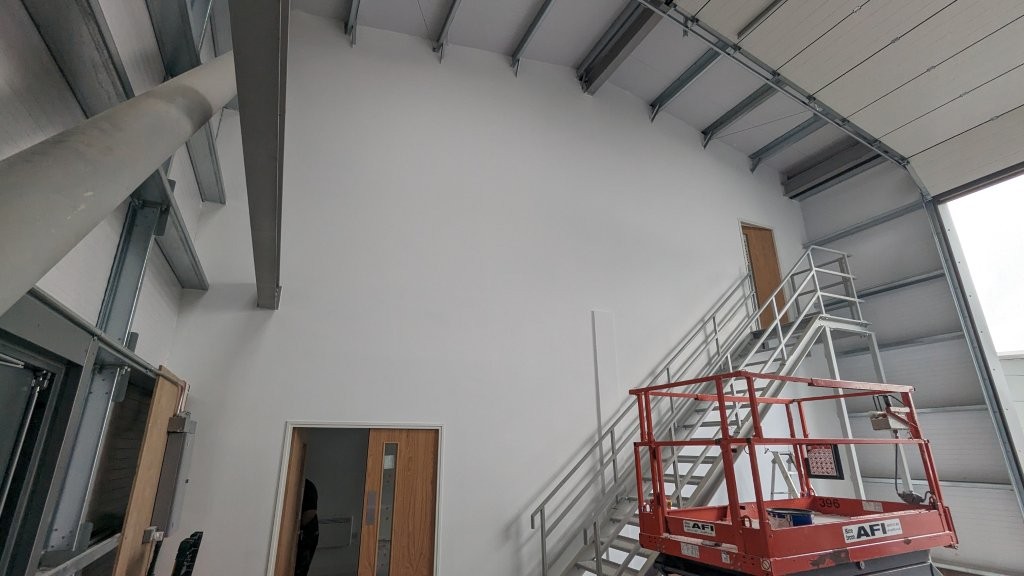
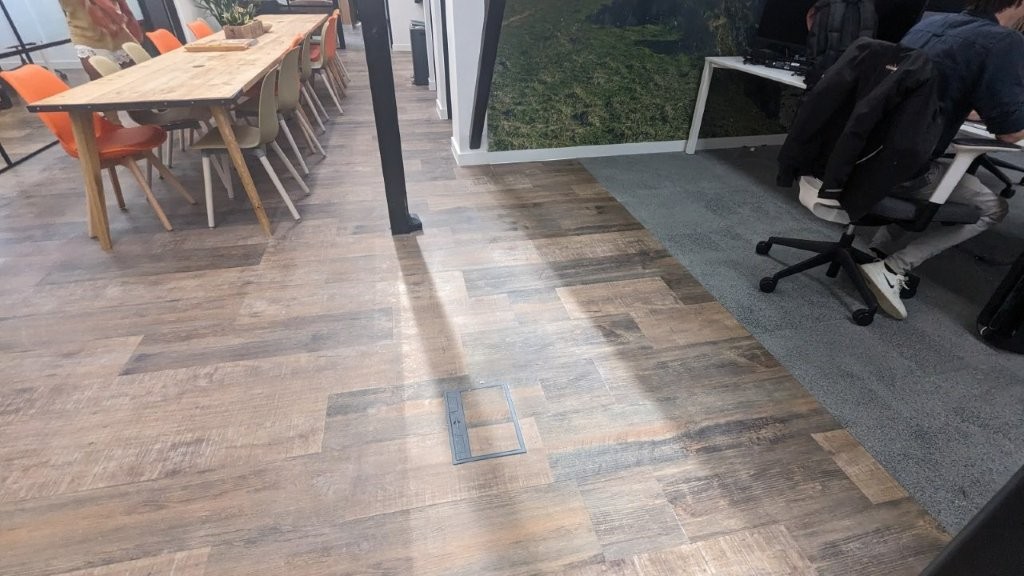
Although the main title to this project post relates to the Vaulted roof design of the space, half the value of the project was for office furniture. A mixture of desks, soft seating, chairs and stools all designed with a selection of vibrant colours. The desks had dark charcoal worktops and white desks frames which looked pretty cool.
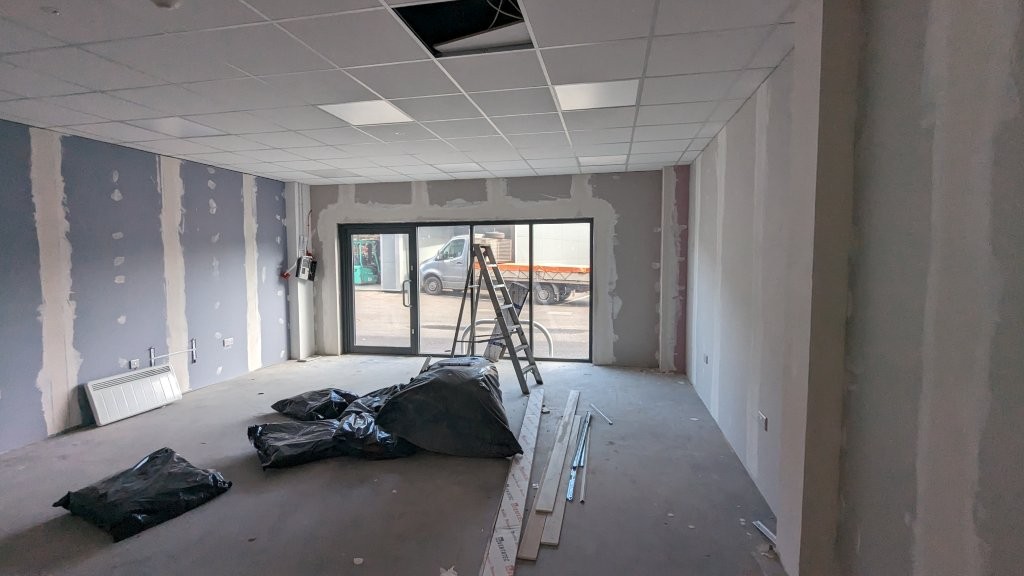
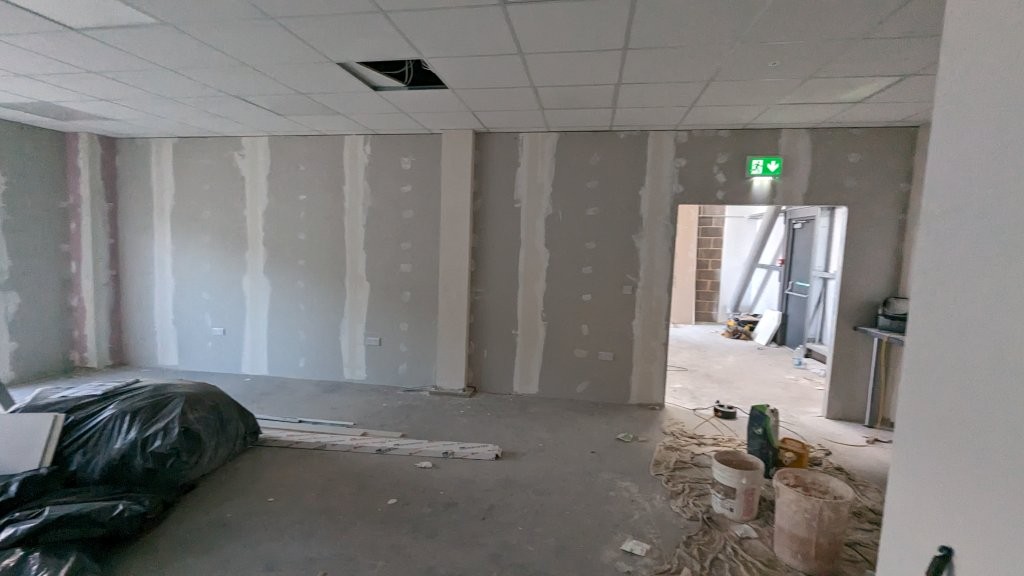
The customer was already in one building and wanted to expand into this one. They wanted a meeting room at one end by the main entrance like their existing space, that was built using an engineered timber system which would have cost an absolute fortune to build. We chose a different method, much more modern as well.
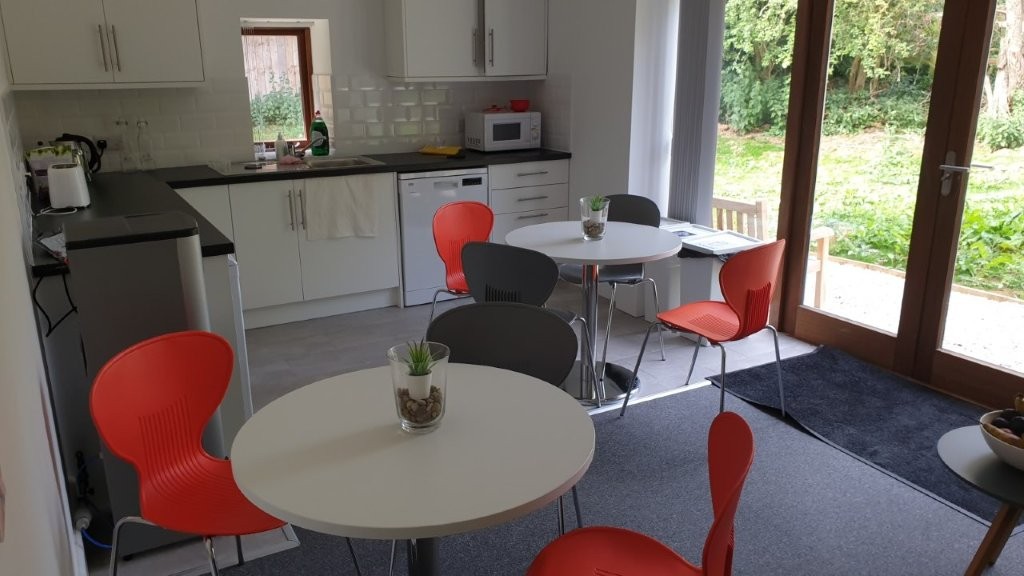
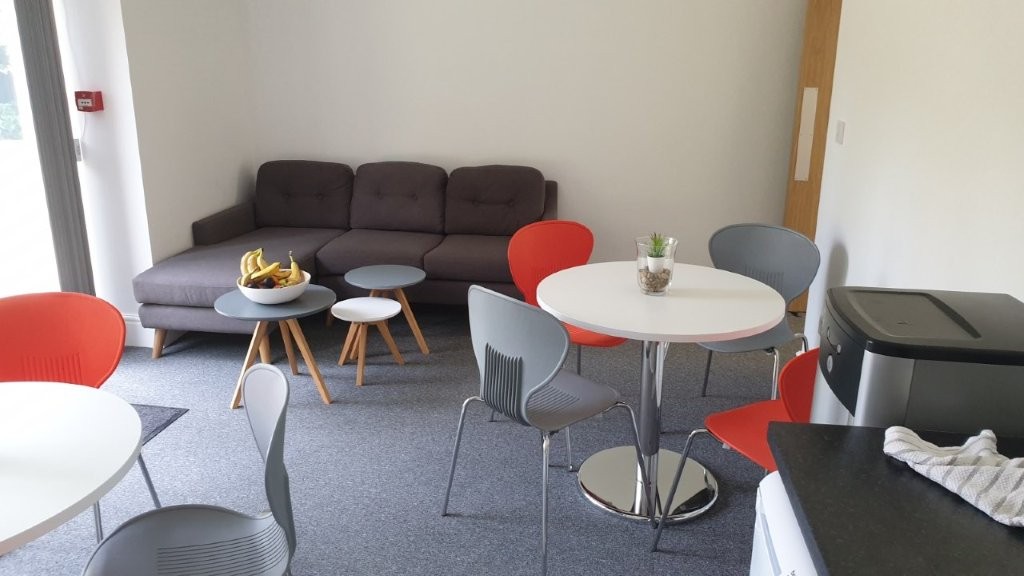
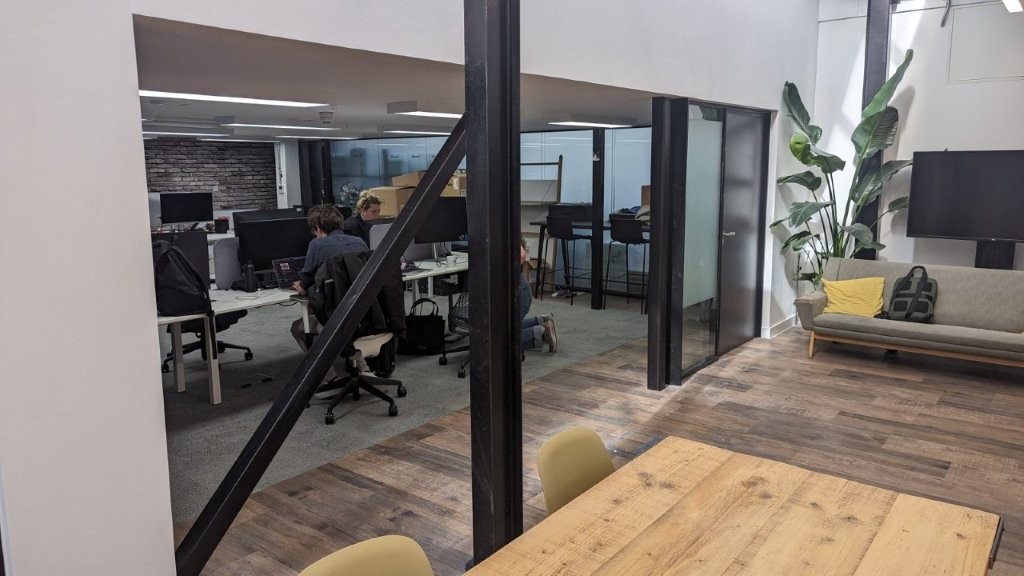
They also needed a breakout space away from the desks, where they could also brainstorm and do some problem solving away from the formality of meeting rooms. The space at the end of the building seemed ideal, so we allocated that space for that function.
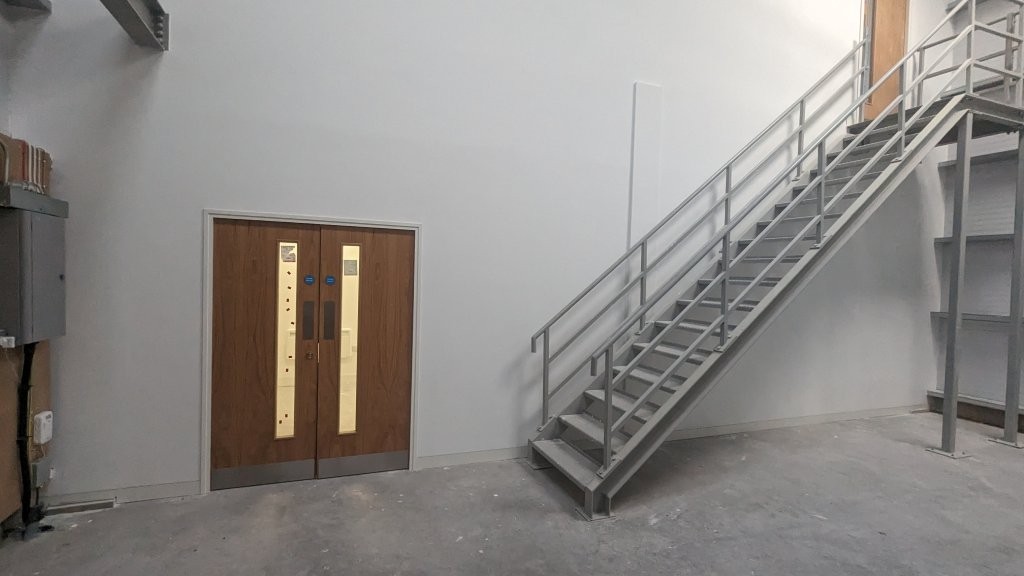
The Vaulted Roof
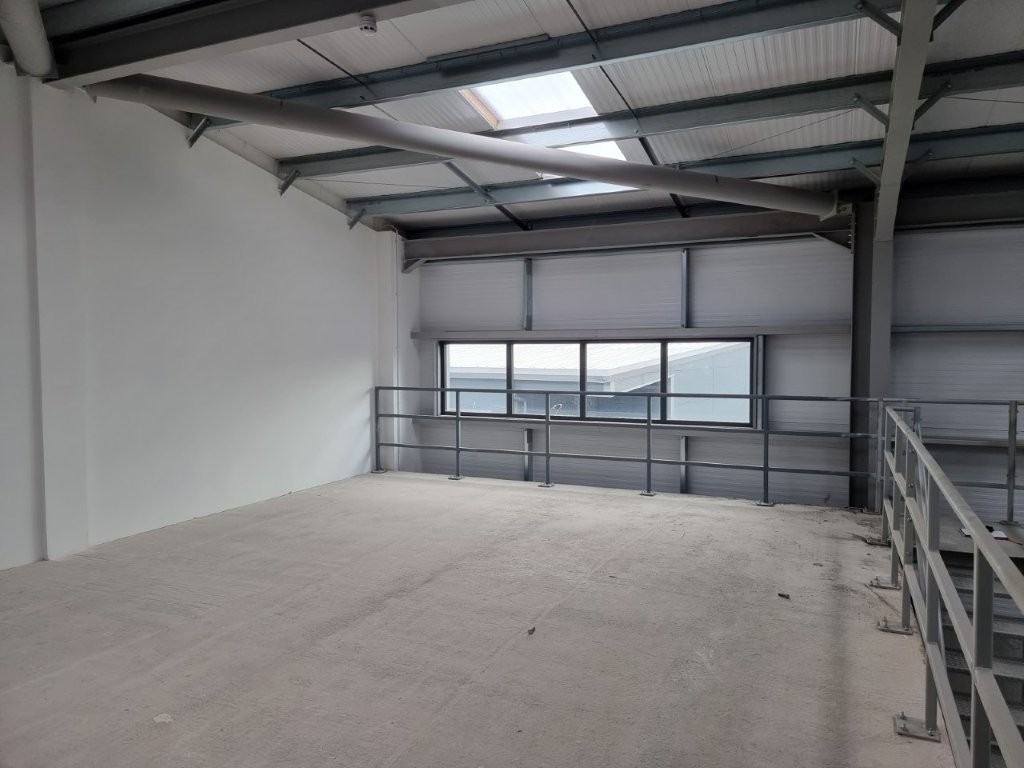
The actual office space looks lovely, nice open roof space with oak beams. The building as well is in an amazing environment, very rural, lots of nice space, plenty of parking. However, as is common with many spaces built by builders, it is not very practical. Looks nice, but for an office space, not great. All of the wall surfaces are hard plastered walls and painted, and the high roof offers little in acoustic performance, the saving grace was at least they had a carpet.
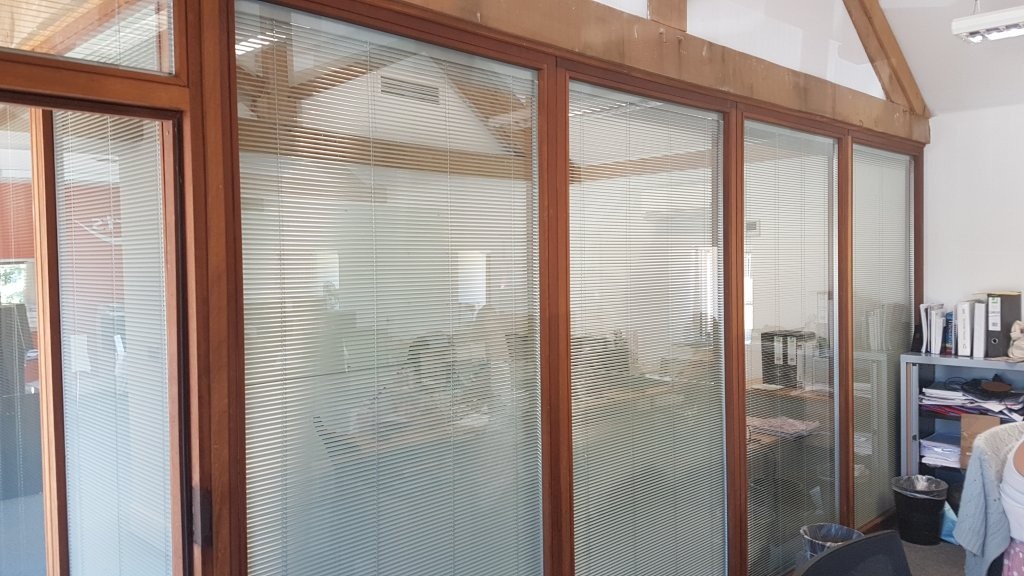
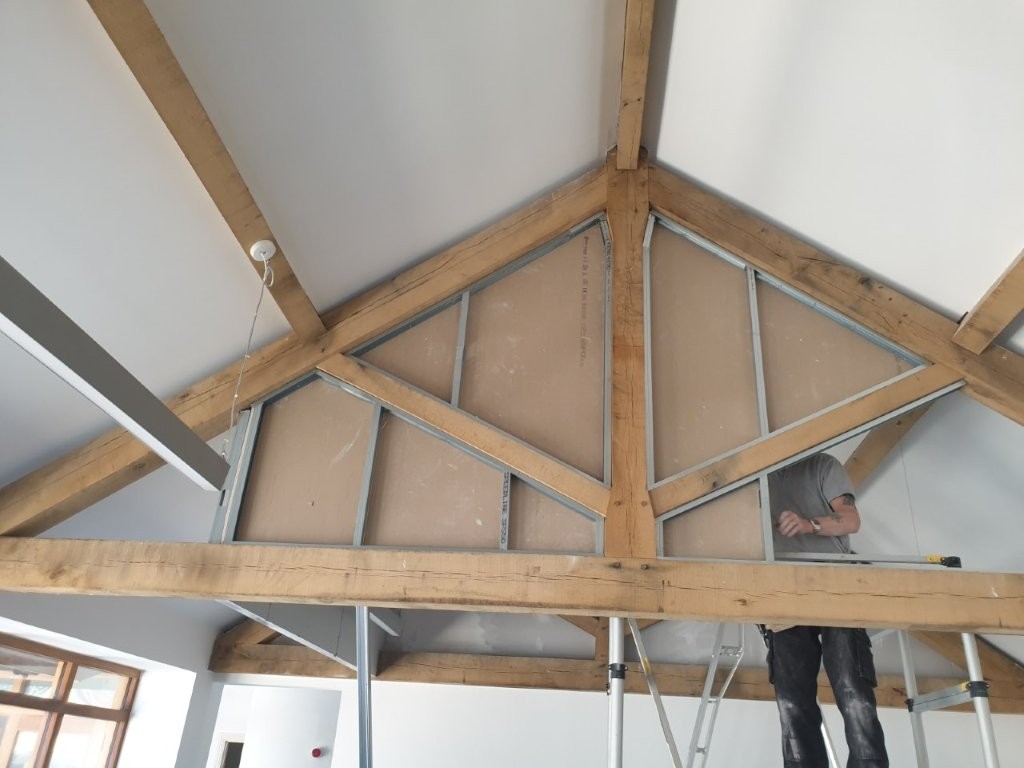
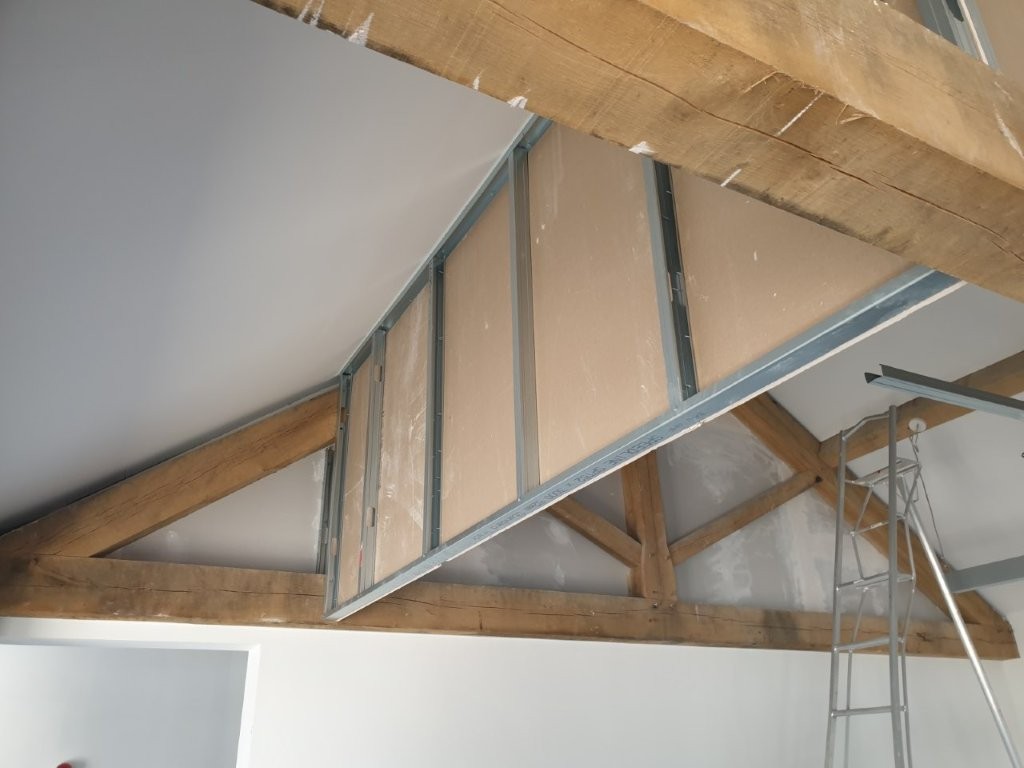
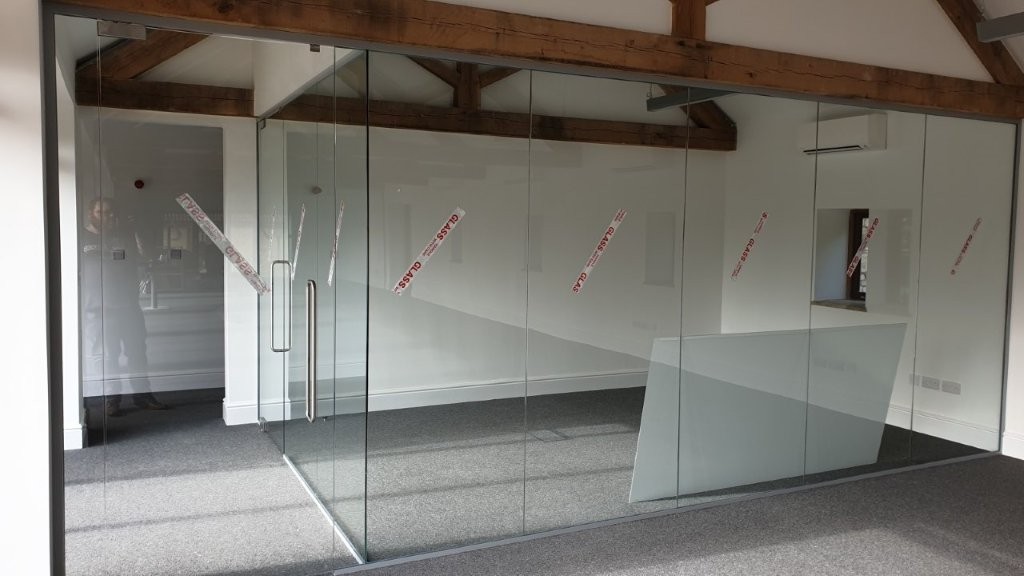
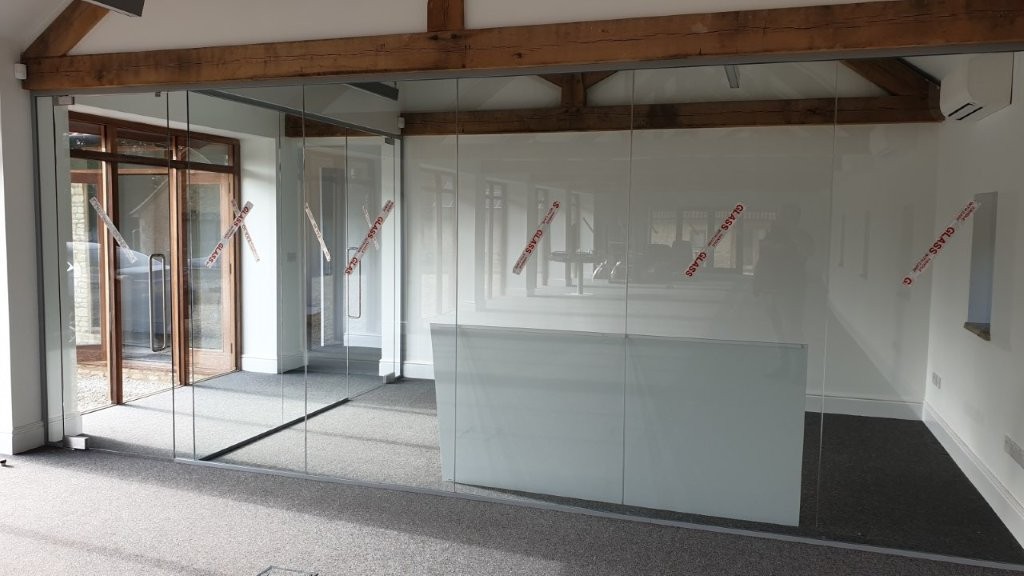
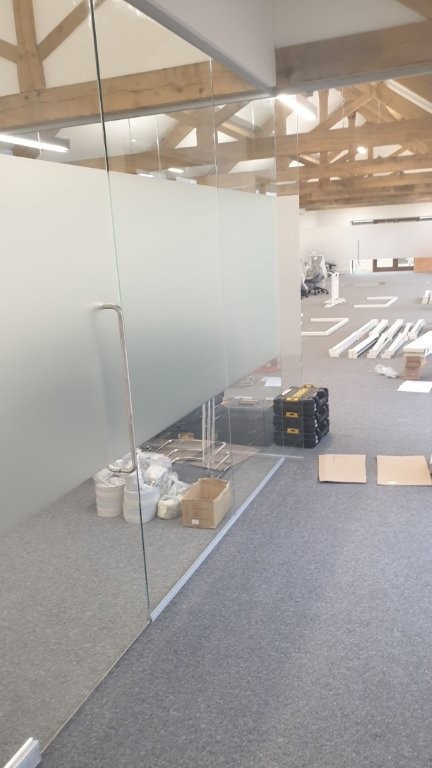
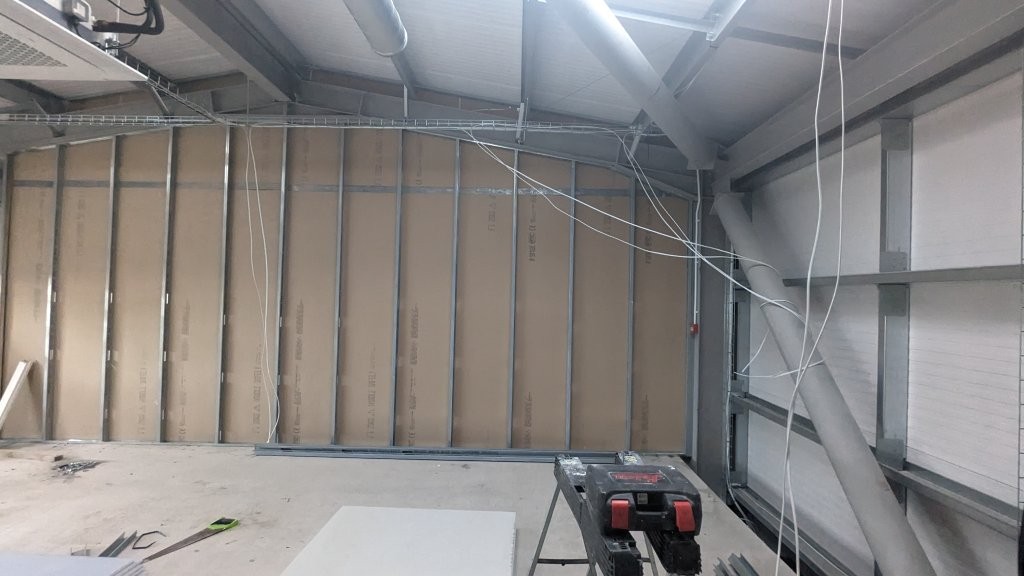
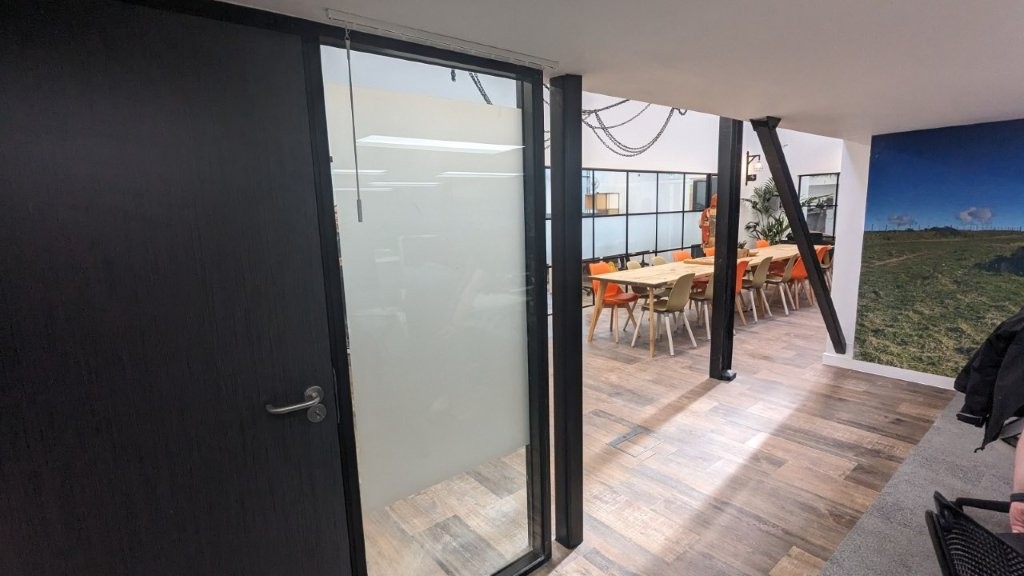
Separating off the space into rooms therefore presents a bit of a problem. They liked the idea of glass walls, so we could build up to the roof beams, and then above the gaps would need to be filled in to prevent noise going through the trusses.
The meeting room needed at the front would need the trusses blocked in, and a new timber beam run along the side with the wall above filled in, with glass underneath in an ‘L’ shape. Along with an entrance door into the main office space.
The ideas room at the end would be more straightforward, build the glass up to the truss, and then infill all of the gaps above.
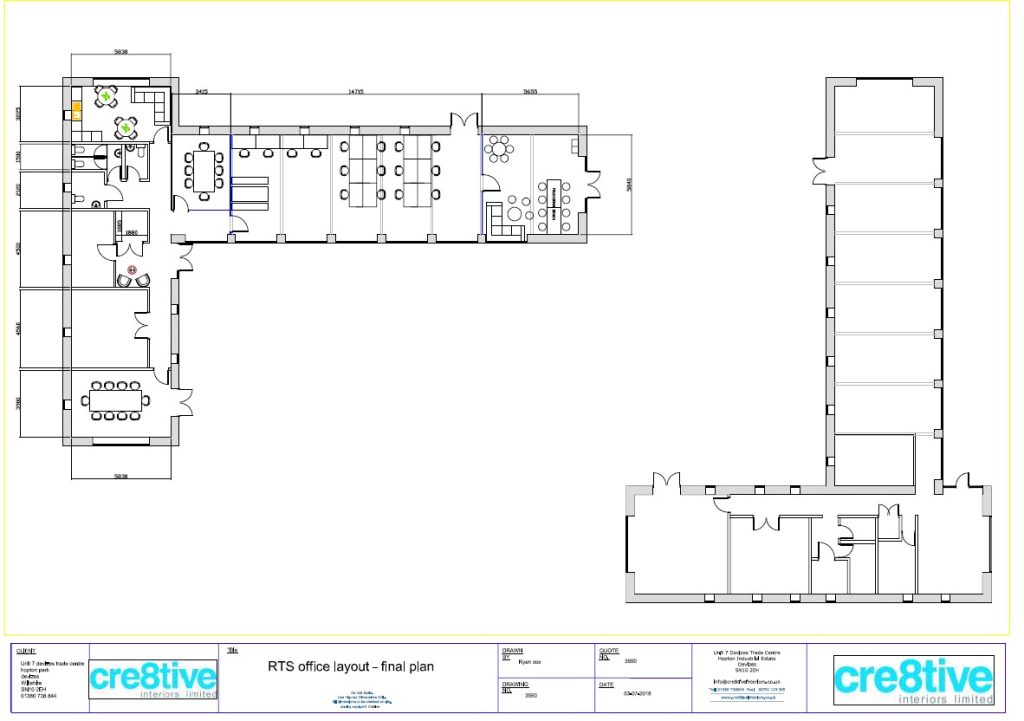
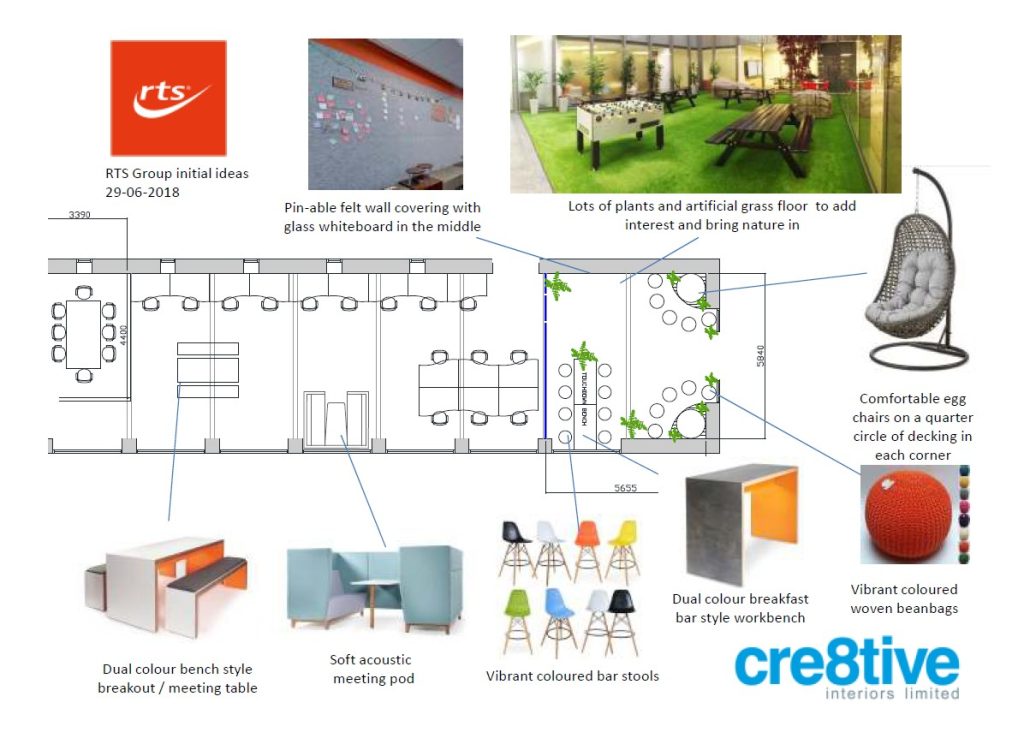
Initial Plans and Ideas
Existing office space
Existing timber meeting room
Overall layout idea
Ideas board showing colours
As always, we draw everything anyway. The main reason is so we can cost things accurately, and we do not always need to give the drawings to the client, but in this case, they paid us separately for the drawing and design work which was nice, and a bit unexpected but they were happy to do this. We also said that should they go ahead with the proposals, we would credit back the cost of the drawing work against the work which is what we did.
Infilling the Trusses and Glass Walls
Infilling the Truss
Creating the side wall
Working it all out
Meeting room glass installed
Meeting room glass installed
In two of the overhead trusses, we had to allow to infil these with plasterboard and steel which was always going to be a time consuming job. Each section of the truss is different, it would have been very difficult and expensive to get these infilled with glass and then there is the sound performance issue with glass. Each of the sections we added insulation into the gaps.
Remaining Construction Photos
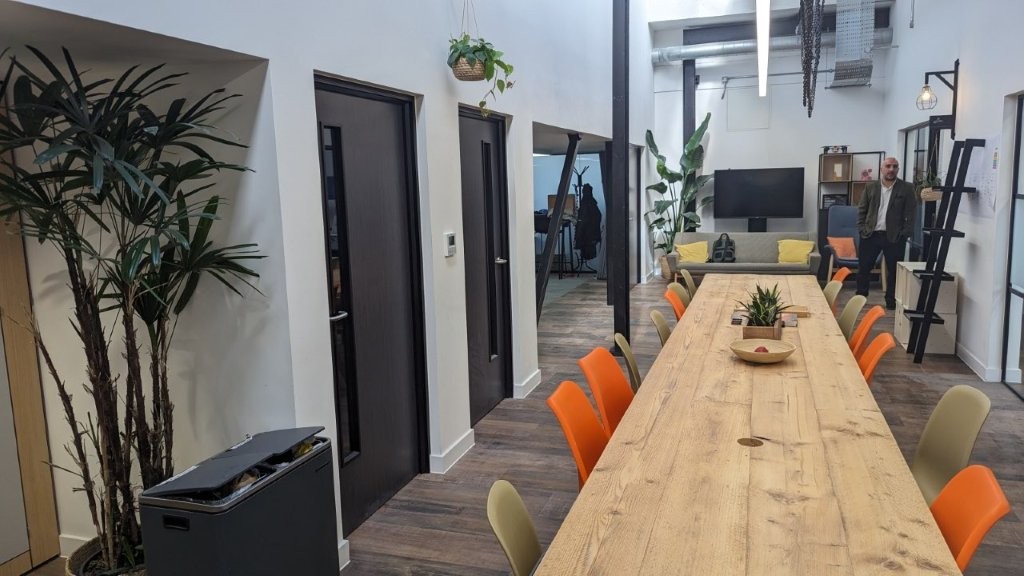
Below shows the remaining construction photos, some show the assembly of the desks using a ‘beam’ system, with shared leg frames. The main advantage in using a beam system is that the support leg frames are shared amongst adjoining desks, hence reduce the costs. Shared leg frames gives more leg room under the desks. The central spine of the desk cluster also has a cable management tray which keeps all of the power and data off the floor. The cabling can then be run from the edge of the walls, rather than worry about floor boxes near where people sit. Floor boxes would need cables running up from the floor boxes to the desks. Much neater to have cable management in the desks themsleves.
Also shown is the write on ideas wall, the glass writing board, the meeting tables, boardroom table and the other furniture in the rooms.
Glass write on board
Laying out furniture bits
Laying out furniture bits
Film applied to the glass walls
New meeting table
Banks of Desks
Ideas room Glass Wall
Kitchen furniture
Breakout seating
Bench seating
Ideas Painted wall
Coloured stools
Space Planning and Design Work
If you are unsure of what can be done with a space, we really like to do the space planning and design work, working with what space you have. Making the most of the features that are in the building and maximising the light using glass walls, introducing vibrant colours and having an area to stimulate ideas were all aspects of this project that were enjoyable to do. If you have a project similar, and have any questions we would love to be involved in your project. The first visit is always free and the advice is free as well. If you are not sure what is involved you are not sure on how things can be done, then we are sure we can help.
Please call 01380 73 8844 or email us via the contact form on this website, or at [email protected]
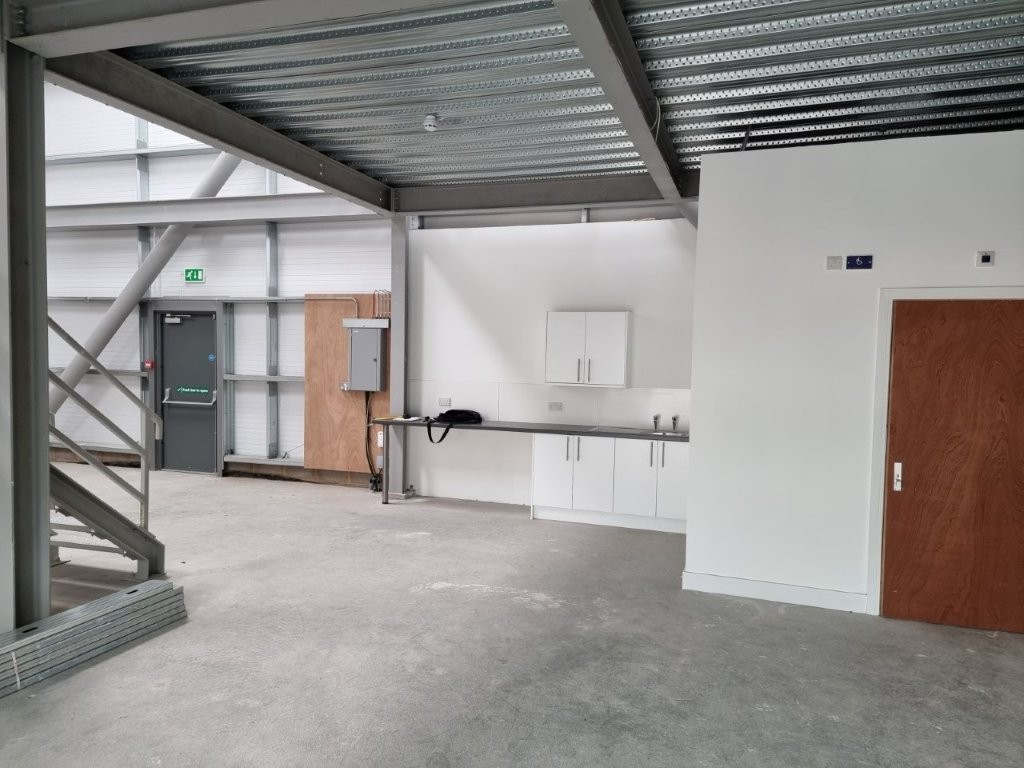
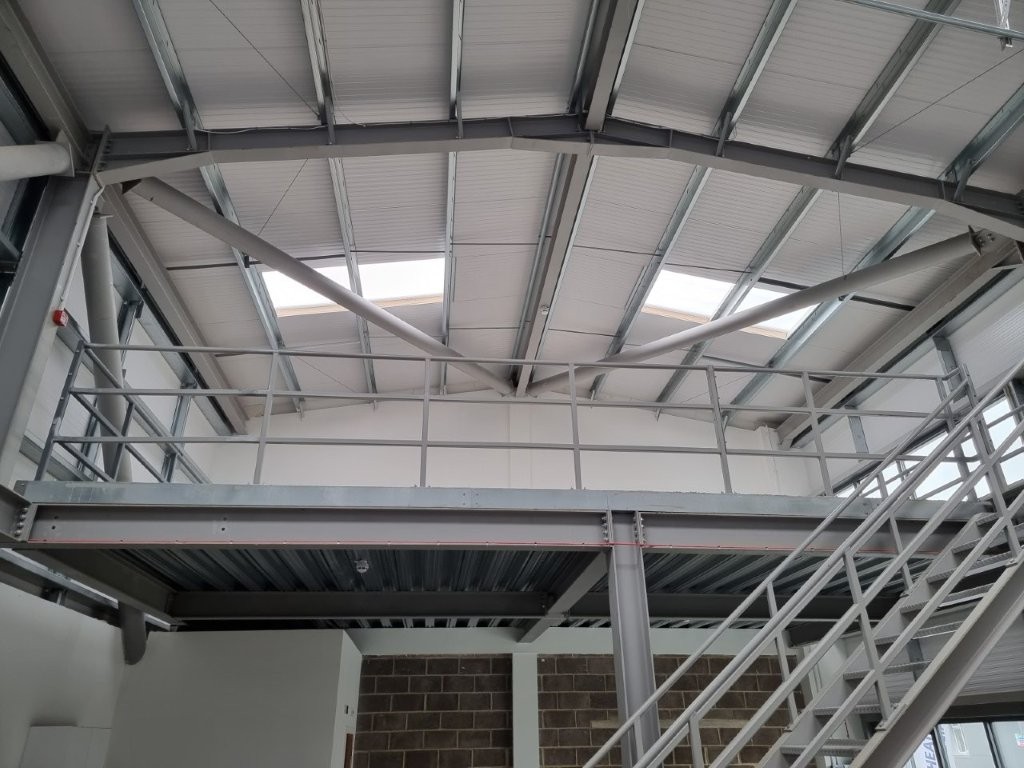
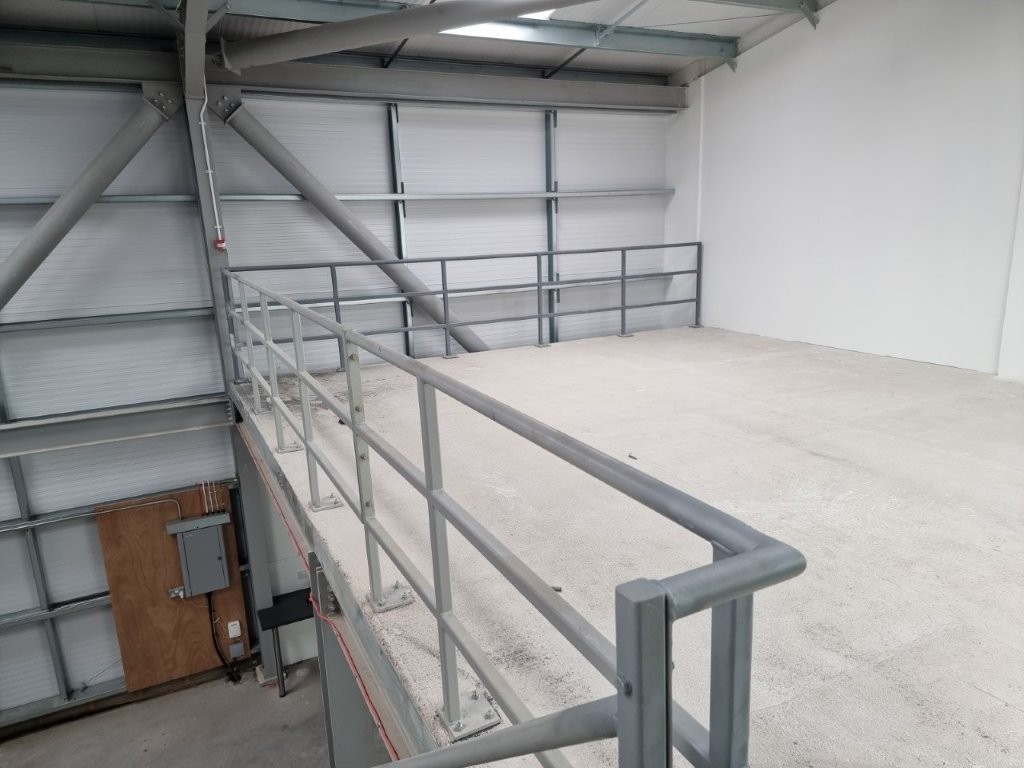
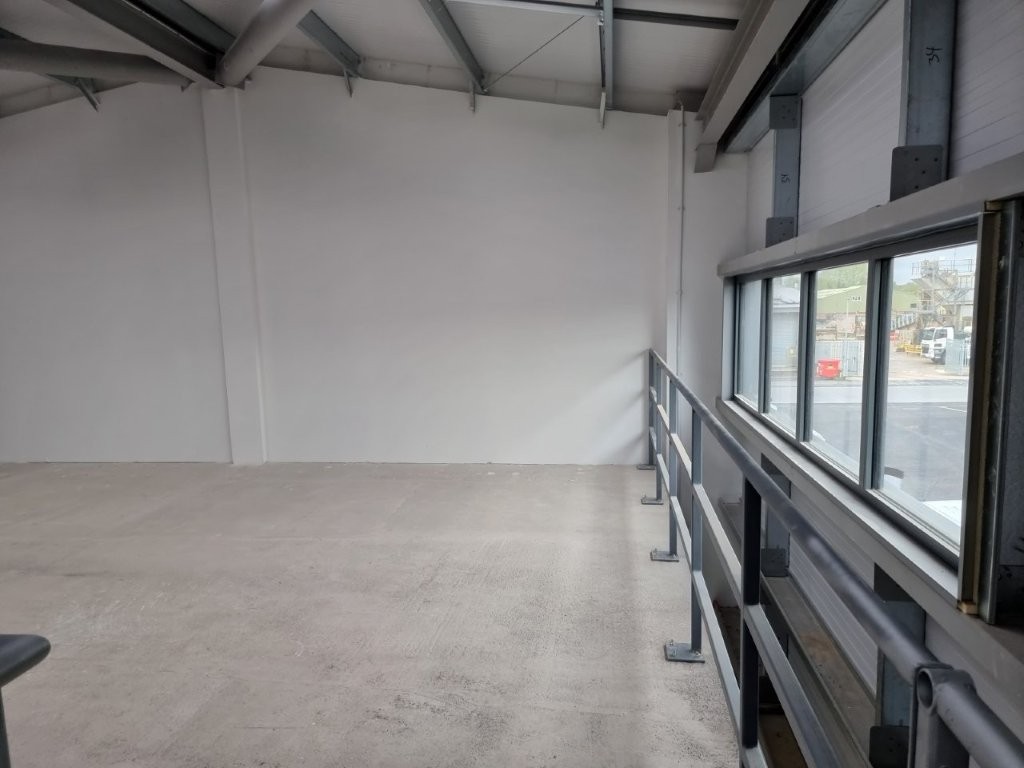
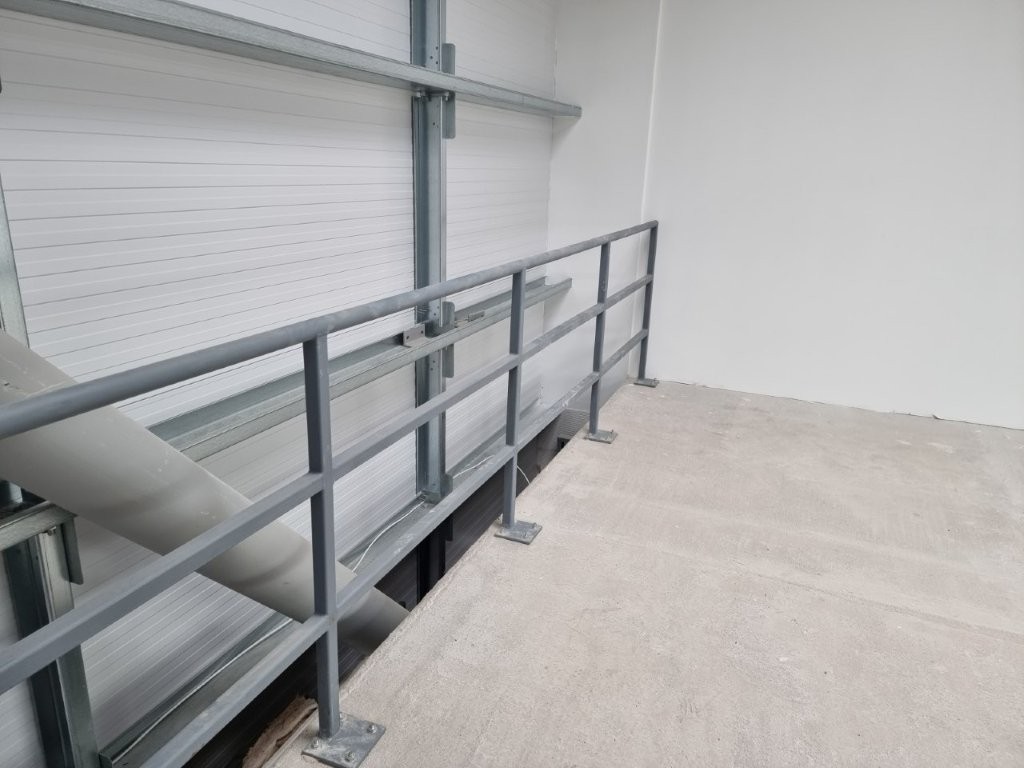
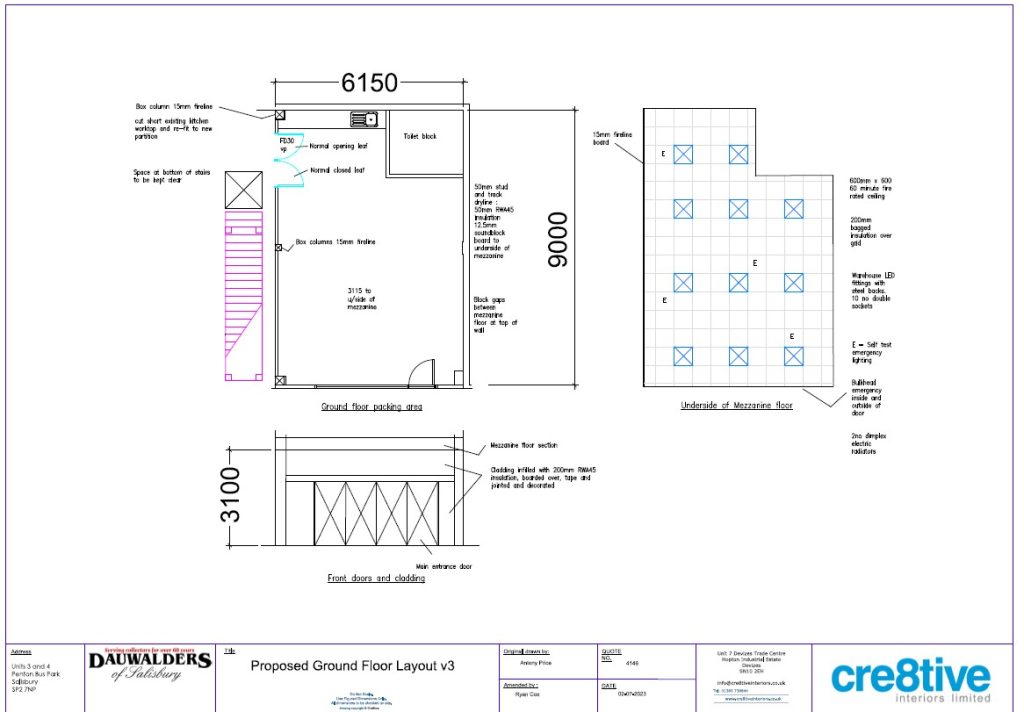
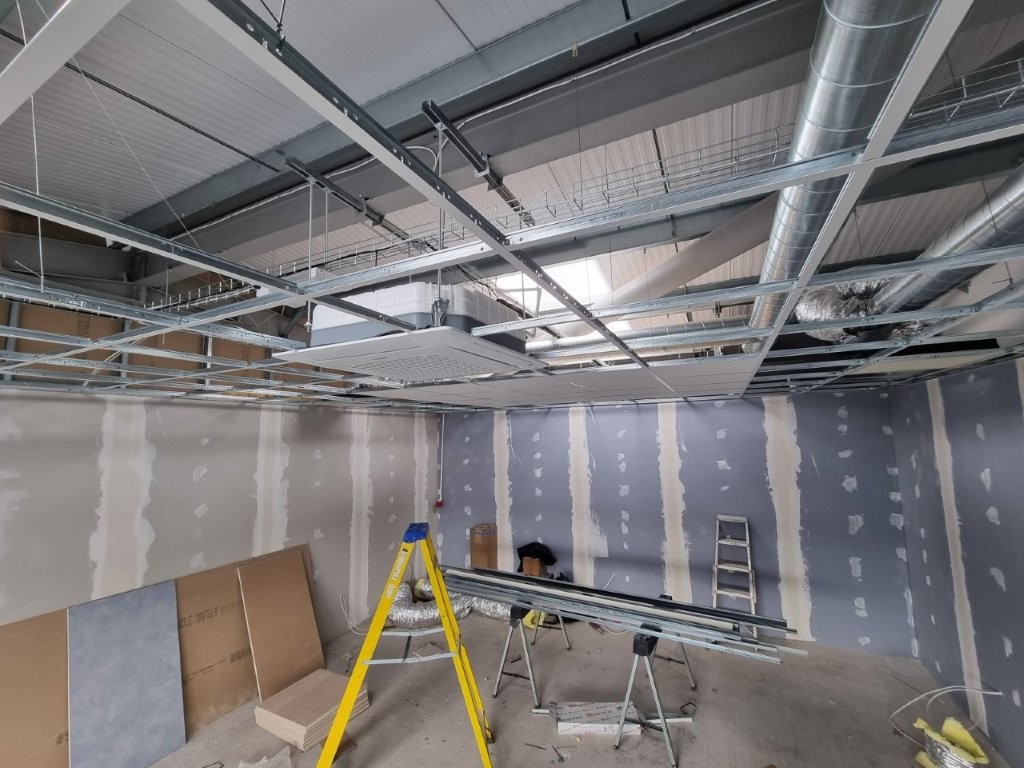
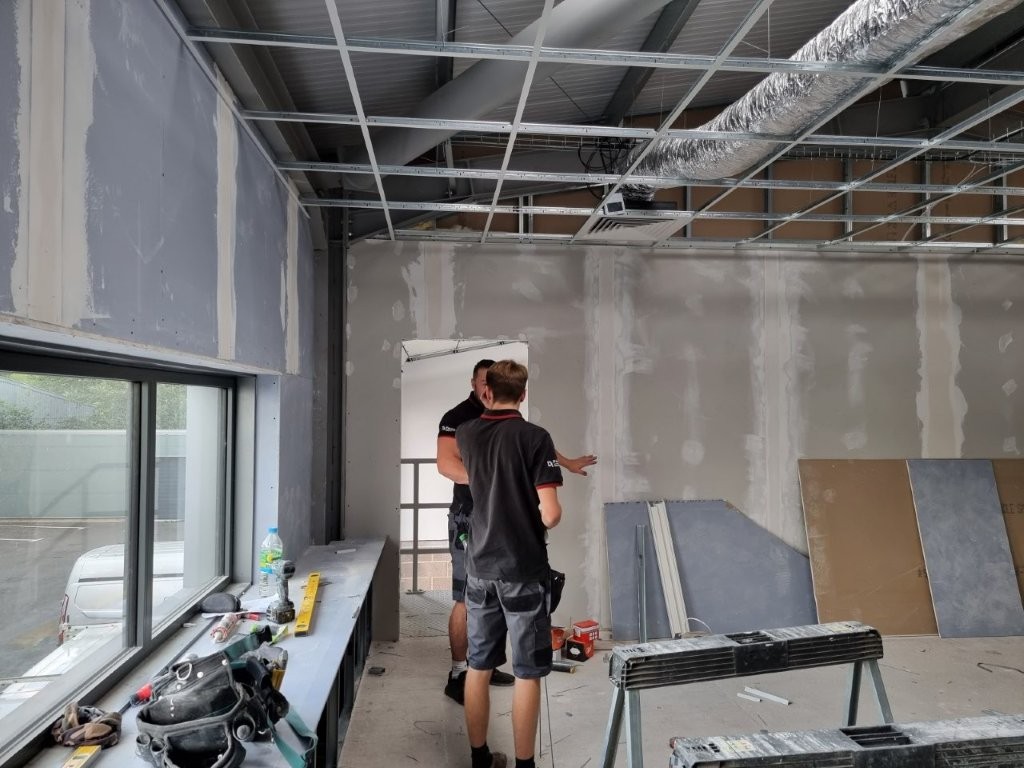
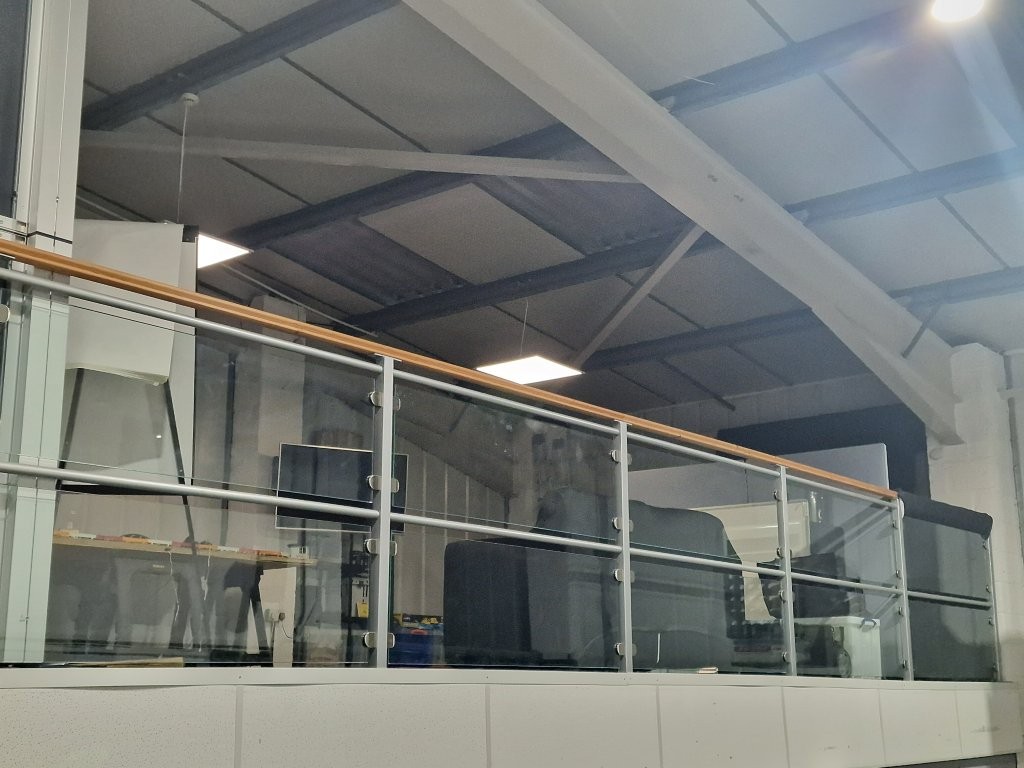
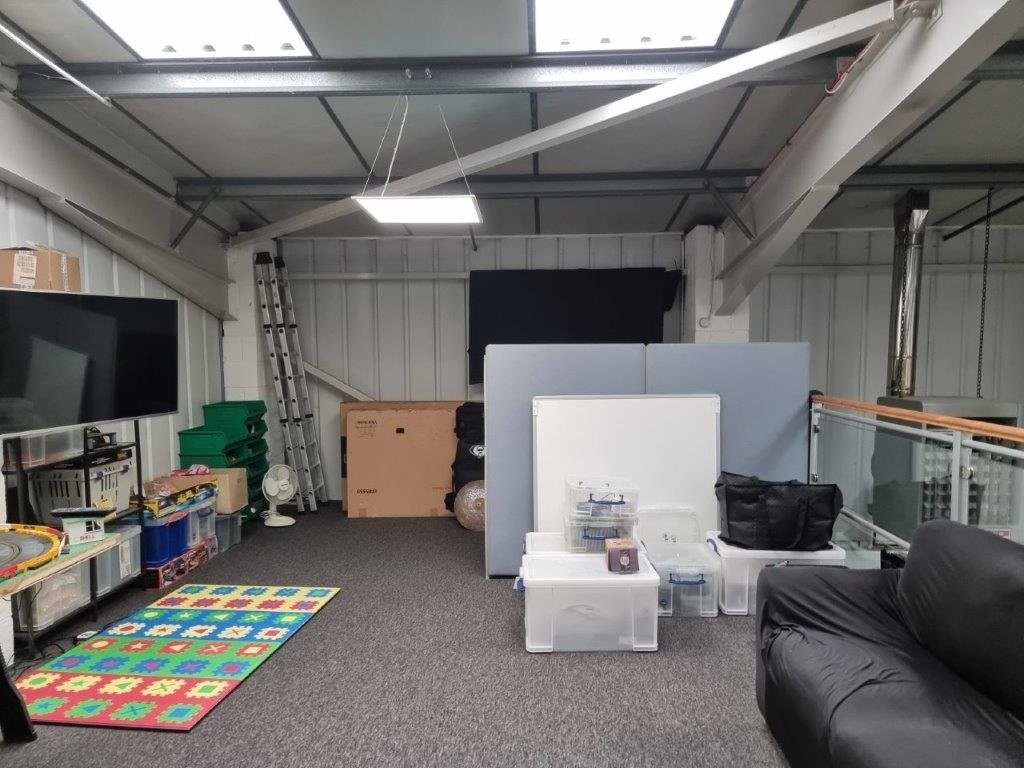
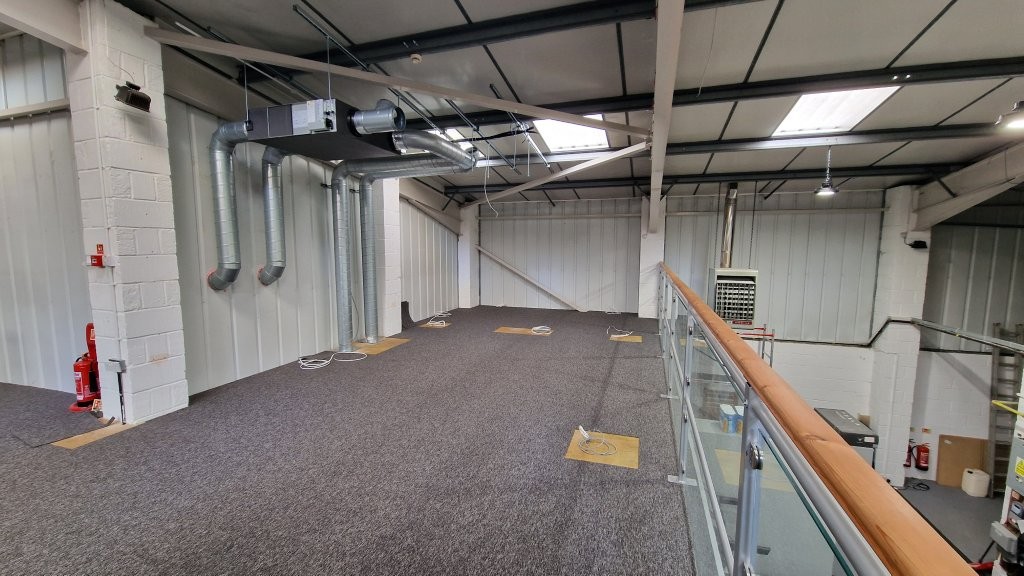
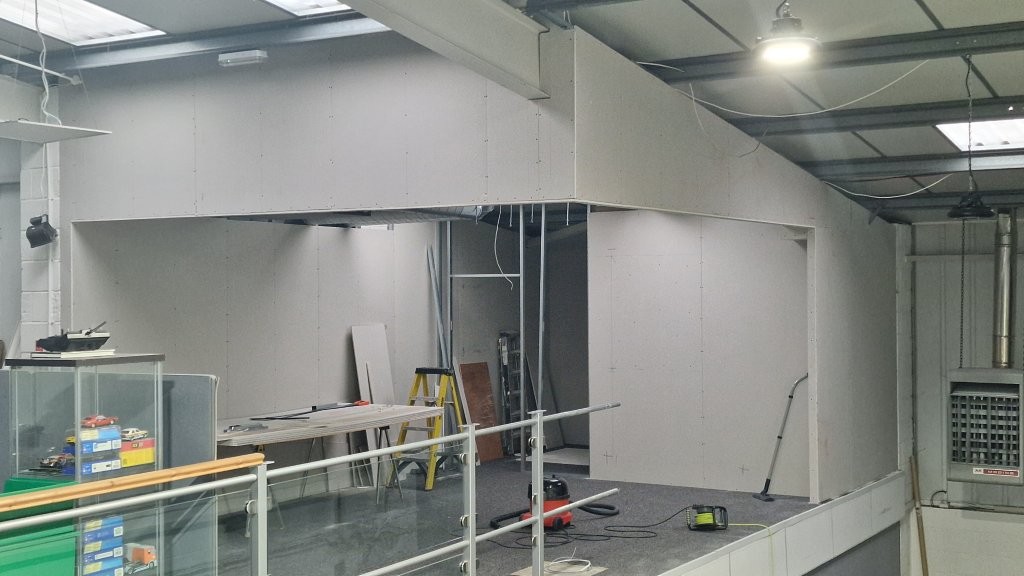
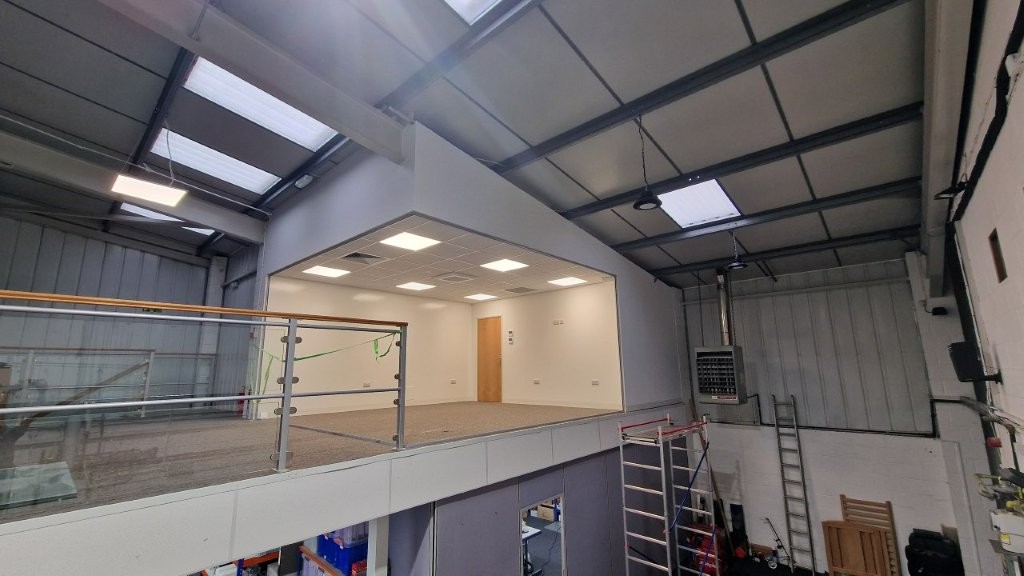
We were asked to look at this project in Salisbury for Dauwalders. They were looking to take on two units next to each other, but one needed to be an office. The obvious location for an office was on an existing mezzanine floor, which would allow a work area underneath, and separation from the main warehouse floor.
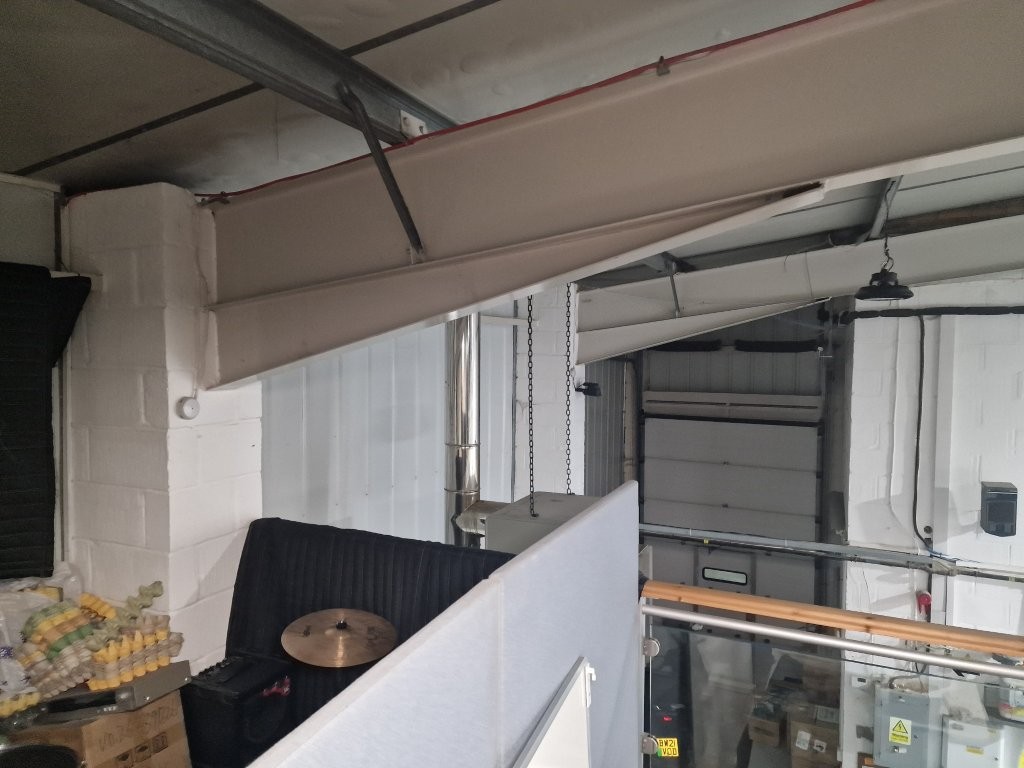
A nice new unit, nothing had ever been built in it, however we could hear absolutely everything from next door due to the way the mezzanine floor had been built. We certainly needed to minimise this as much as we could without going over board with it.
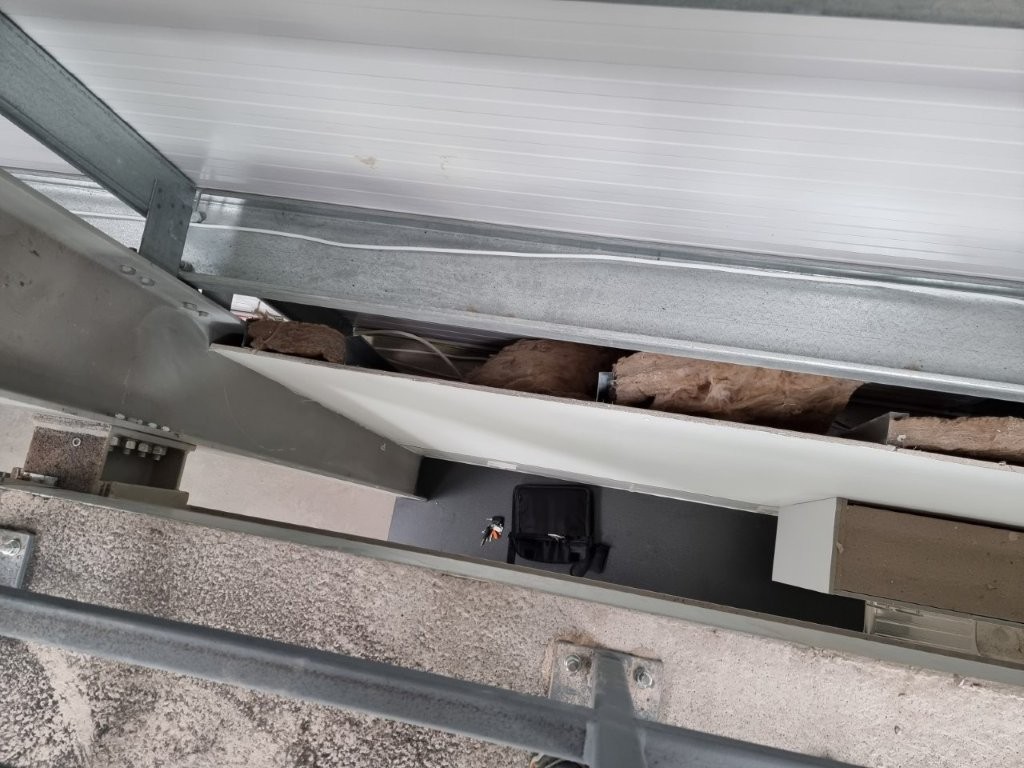
The unusual way the mezzanine floor had been built, was that the floor did not actually go right up to each of the walls leaving a gap. Clearly we had to box this, and make it safe for the people working in the space.
The requirements were around 4 people in the office upstairs, with power points downstairs for benches, and the downstairs space needed a pair of double doors on it. The next door unit had to be knocked into, with a fire alarm fitted to cover both units, and this was fitted for us by the Fire Alarm Consultancy, which we recommend on all our projects.
There was some stipulation with dates, and that allowed Dauwalders to plan on what to move where and all of that was fine.
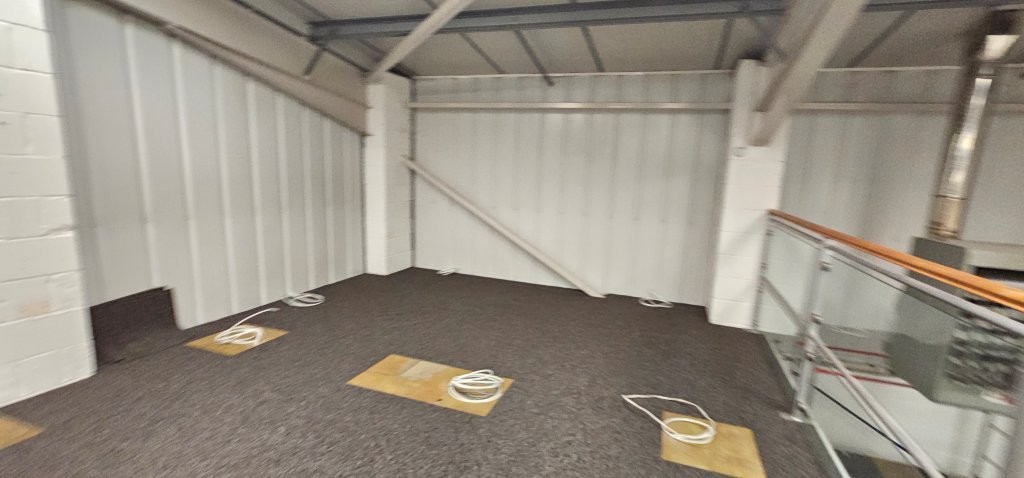
Empty unit photos
Empty unit photos
Empty unit photos
Empty unit photos
Massive gap at floor edge ?
Back wall downstairs
Overall view
Nice full size roller shutter
Roof lights we could not use
We left the kitchen as it was
Handrail to be removed
Handrail covering gap at mezz edge
Handrail covering gap at mezz edge
This was a bit of a mess
Nice open view
Wall to knock through
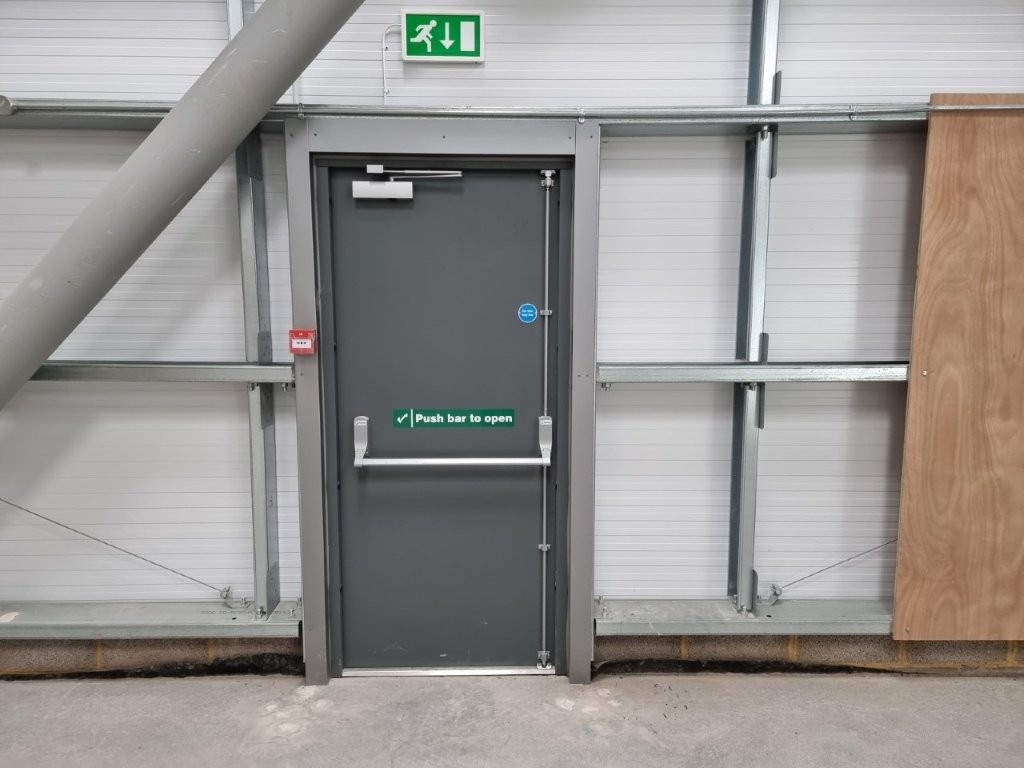
External fire door
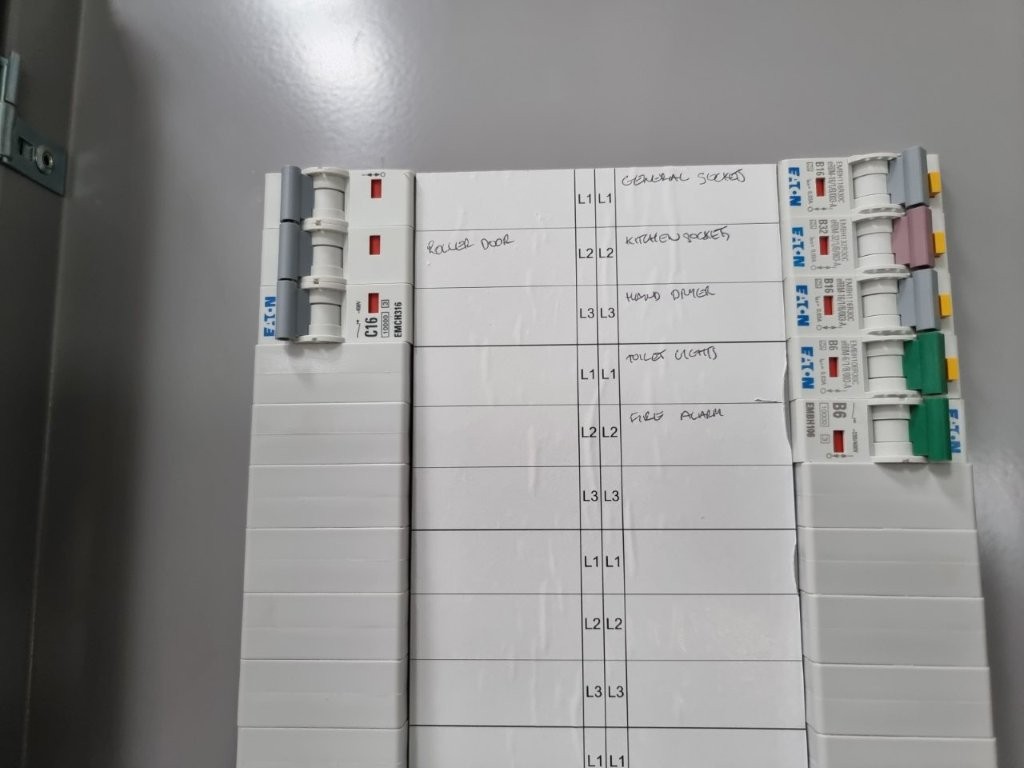
Uncluttered fuse board
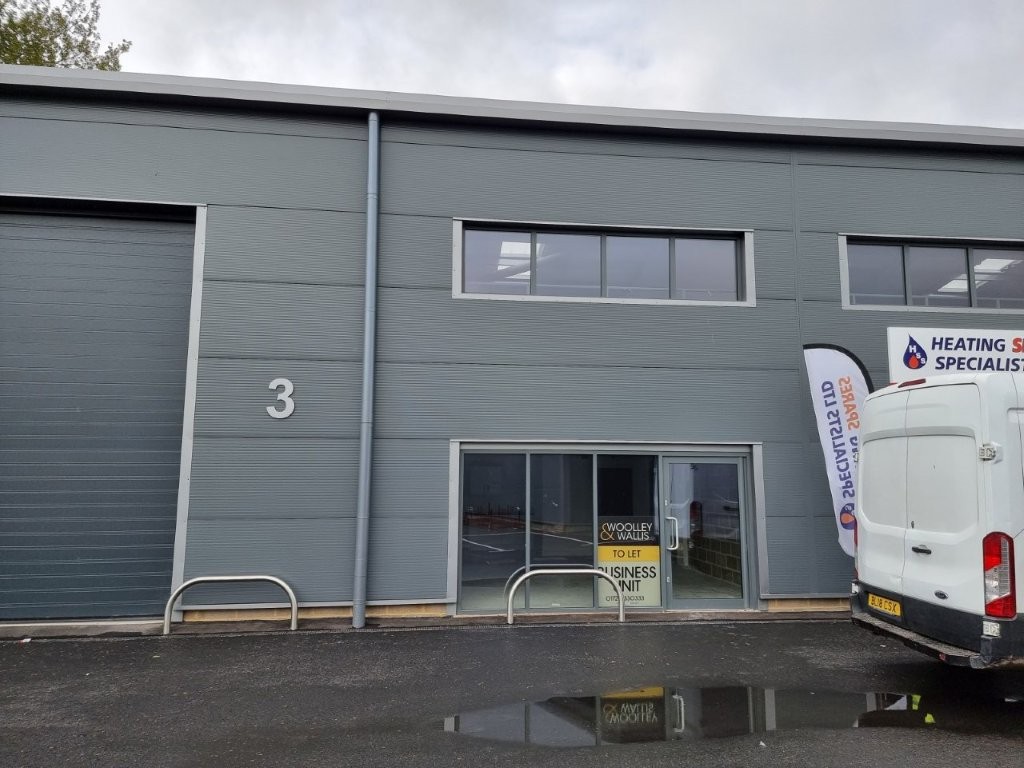
Looks pretty nice from the front.
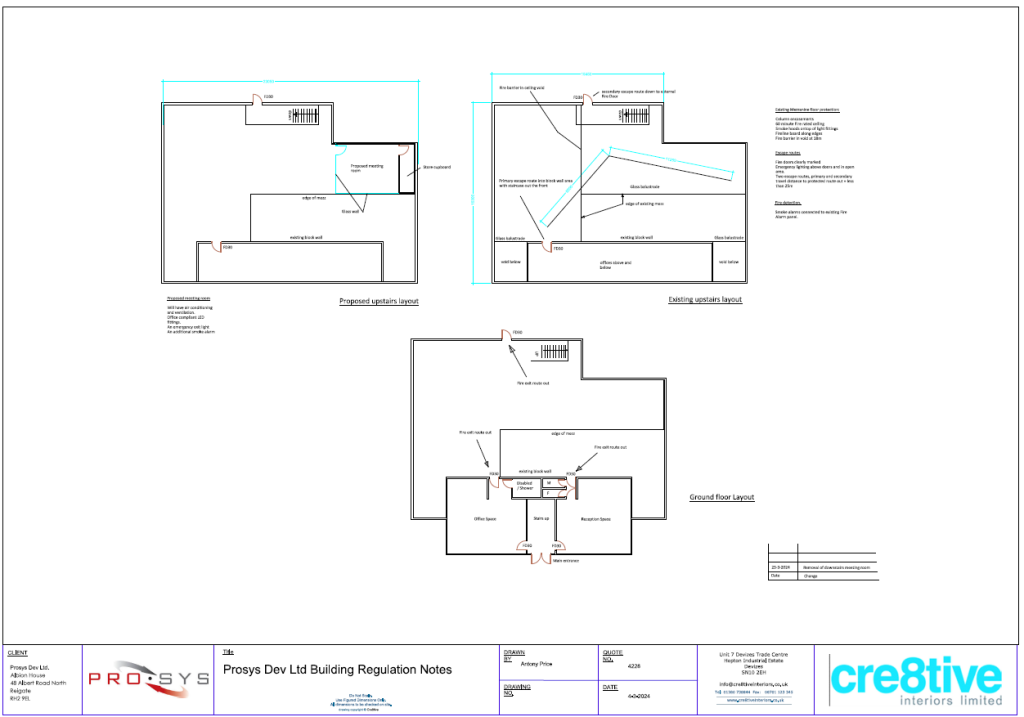
Building Regulations
The other fairly obvious item that needed to be considered was Building Regulations, particularly as there are people working on a mezzanine floor. The rules are that if people are working on a mezzanine, they need to have enough time to get out of the building in the event of a problem. The structure therefore has to be fire rated, to ensure it does not collapse, and the escape routes need to be clear, protected if required, with emergency lighting, fire alarm detection etc.
In this particular case, the travel distances to get out were not massive, and if we positioned the stairs where required, the exit is straight to a fire exit, as well as into a protected space underneath with an exit, as well as the roller shutter, and potentially into the other unit. Plenty of ways to get out.
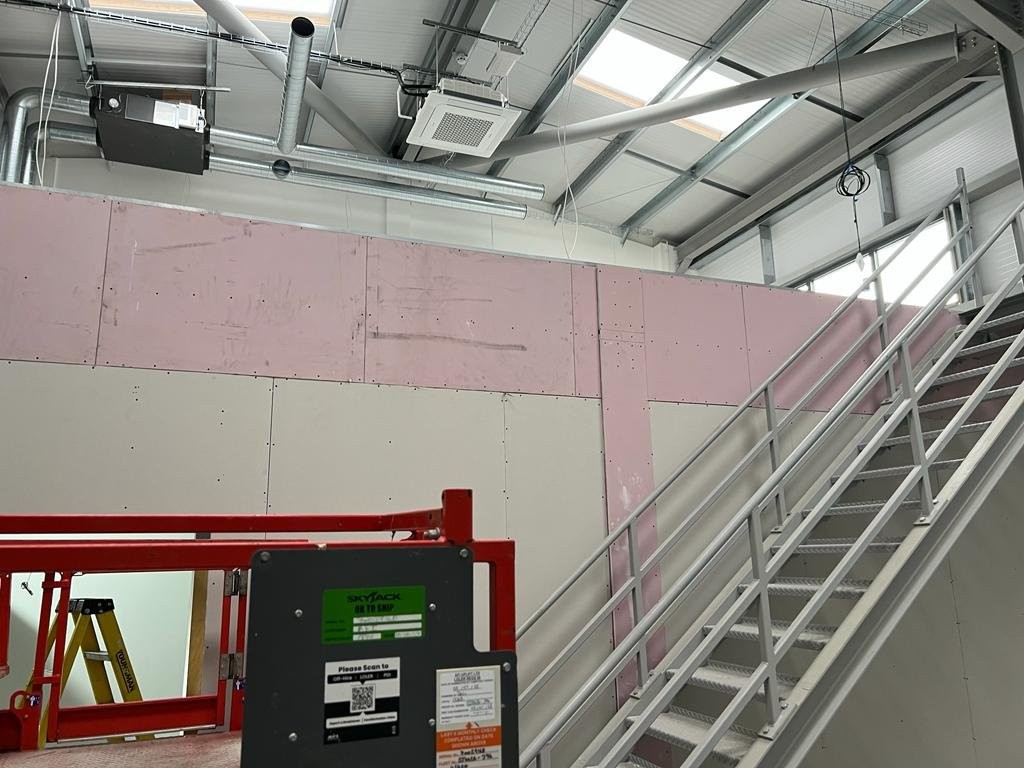
The main stipulation from the Fire Inspector is to make sure that the mezzanine floor itself is fully 60 minutes protected. There was no stipulation on the walls, but we would normally fit 30 minutes anyway, and the Inspector was happy with that.
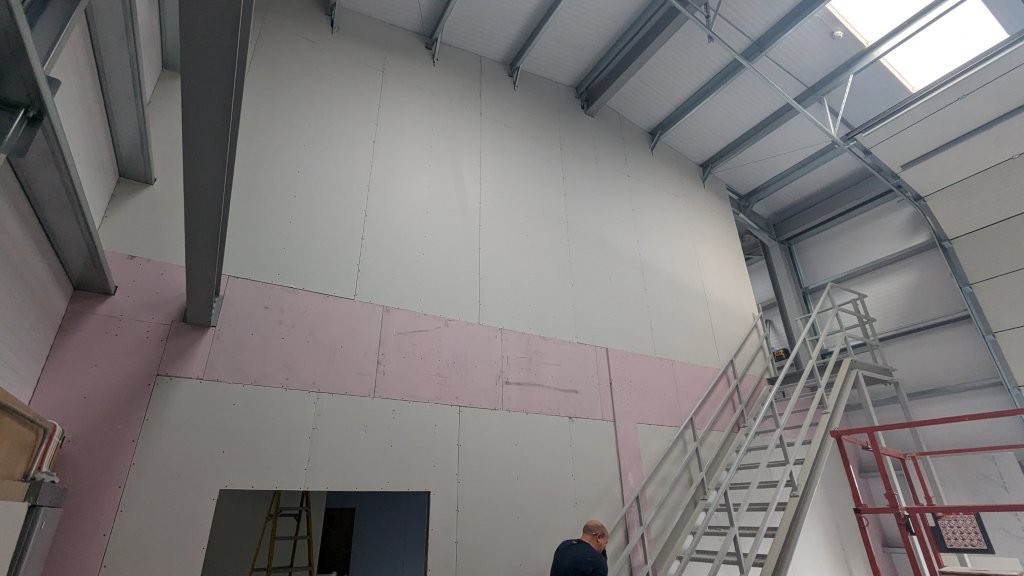
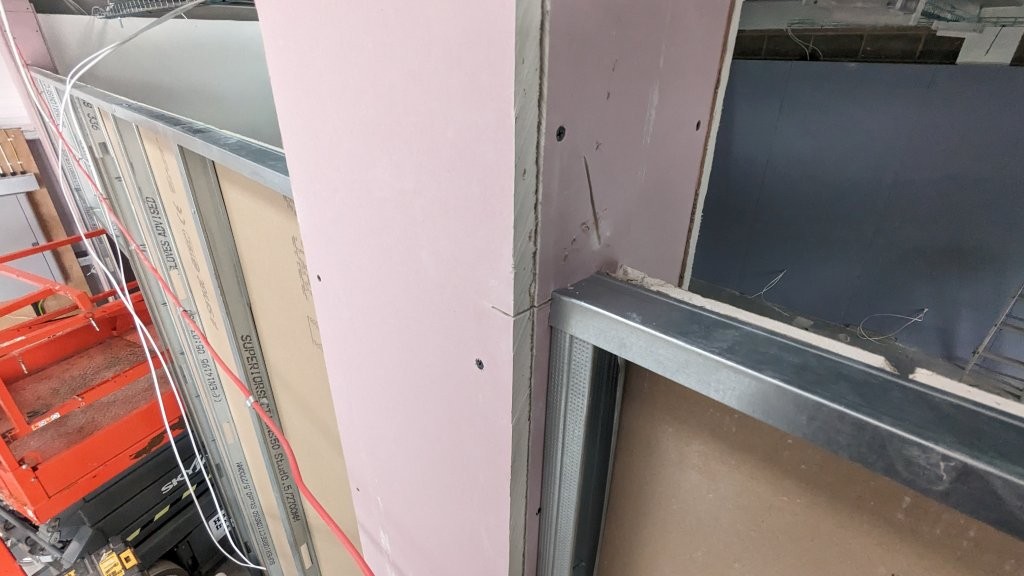
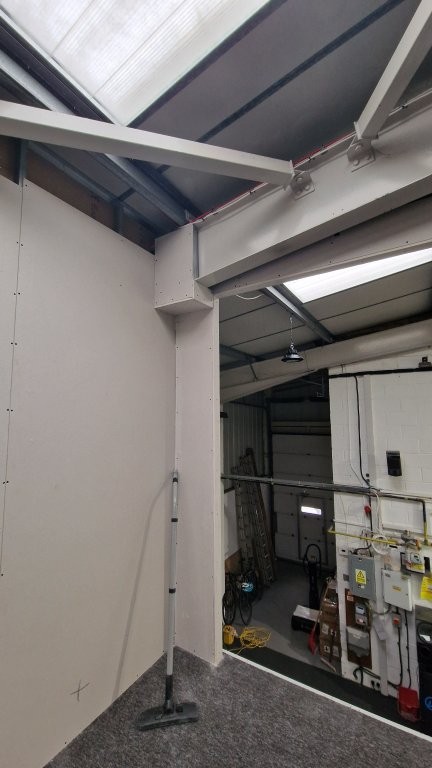
All of the steels therefore had to be boxed in 15mm fireline board, which is the pink board in the photographs below.
Building Regulation and Customer drawings and plans
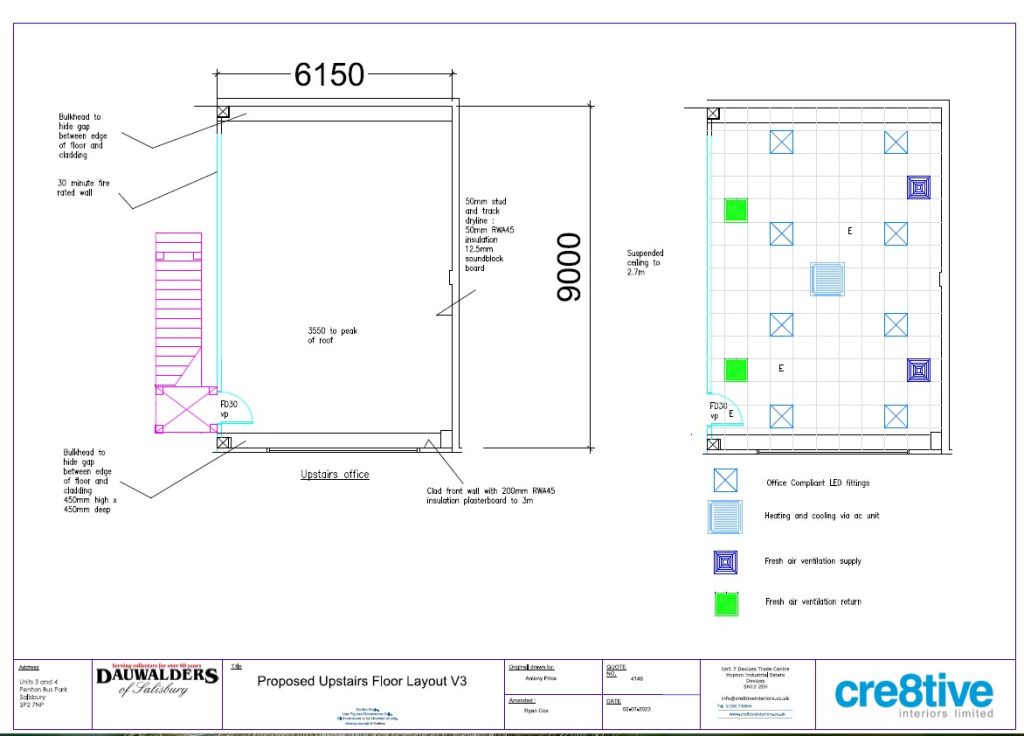
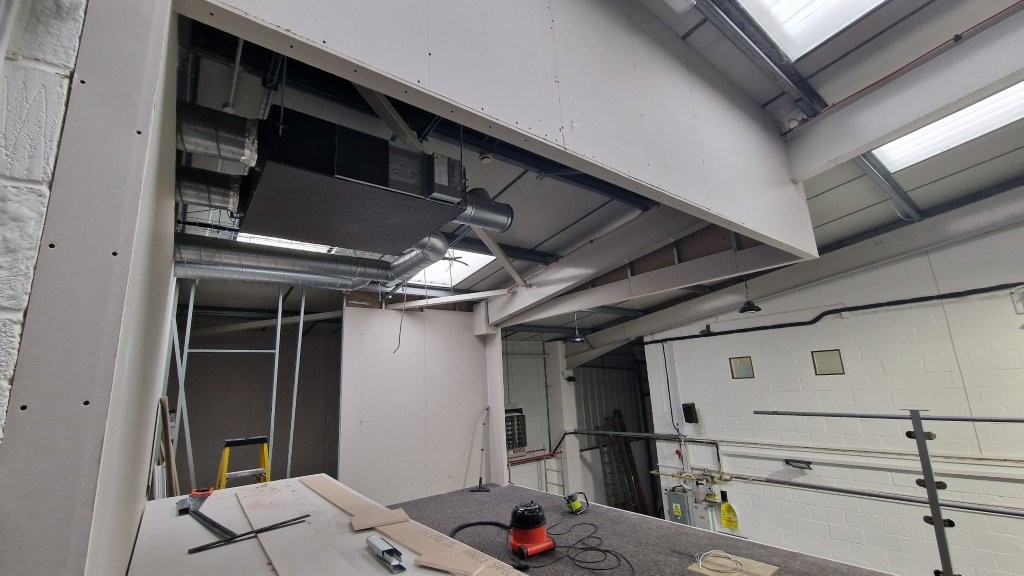
We always draw everything anyway, but these drawings needed a bit more detail for the Inspector to be clear about what was going on. The offices needed fresh air ventilation, and this is done with a VAM unit. They had air conditioning which provided heating and cooling, but in Building Regulations there is no requirement for air conditioning, just a means of heating the space, which an electric radiator would have been fine. There is a definite requirement for fresh air ventilation.
First floor drawing
Ground Floor drawing
Sound Problems from Next door.
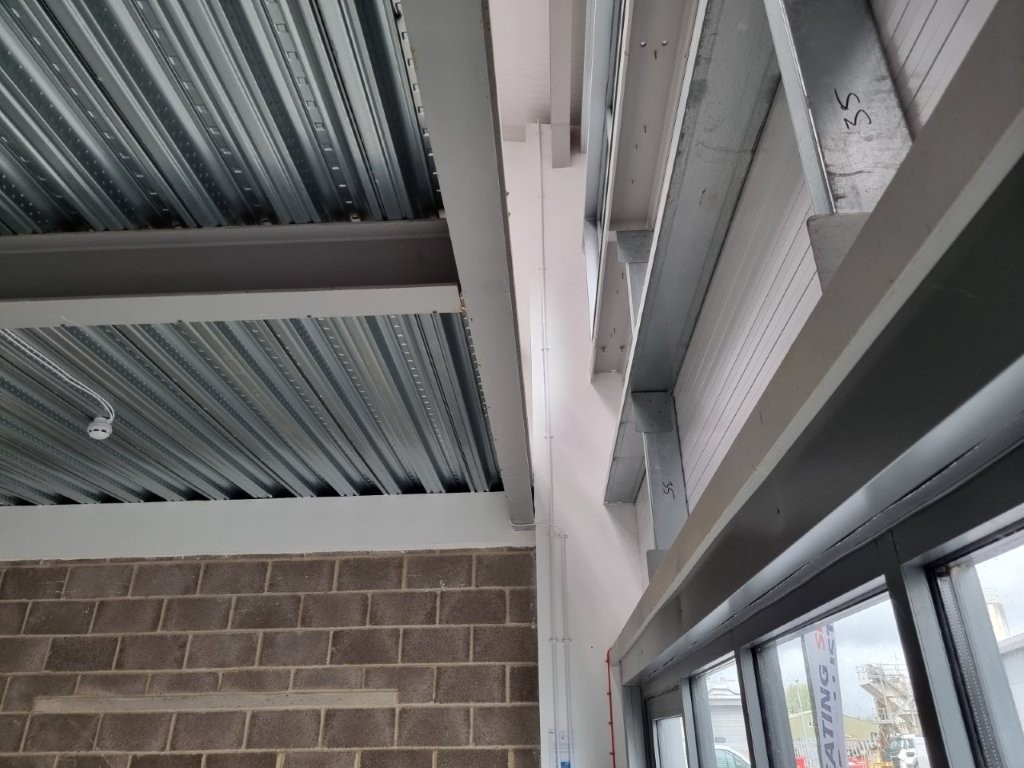
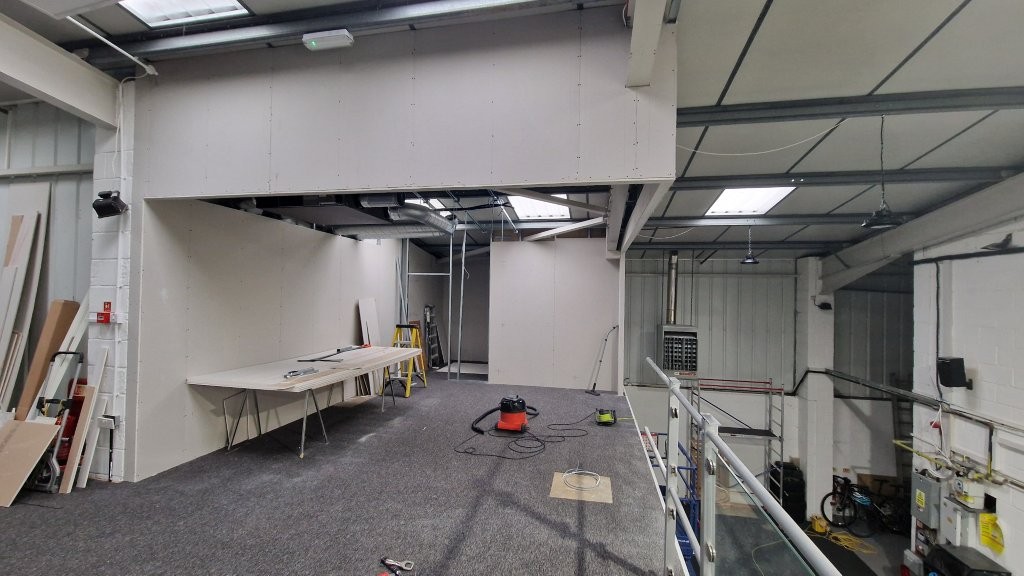
This was always going to be tricky. Even as we stood on the mezzanine floor before we did any work at all, you could hear everything. Part of the issue was the really bad design of the mezzanine floor. They had designed it so that the main floor ran through all of the units, right the way through, then plonked the dividing walls on top of the floor to split up the units. Any noise translating into vibration just carries on through any metalwork. There were also huge gaps between the edge of the floor and the outside of the building, any noise was going to go straight up through these gaps to the upper floors. Even though the noise next door was downstairs, in their unit it was going straight up and through the gaps.
In our unit, we can deal with the gaps at the edges, but really it needed RWA45 acoustic slab in the walls, and sound block board to try and absorb noise coming through, and then block it coming into the potential new office upstairs. It also needed decent suspended ceilings with bagged 200mm insulation over the suspended ceiling grid and that was probably as much we could do.
Construction Photos
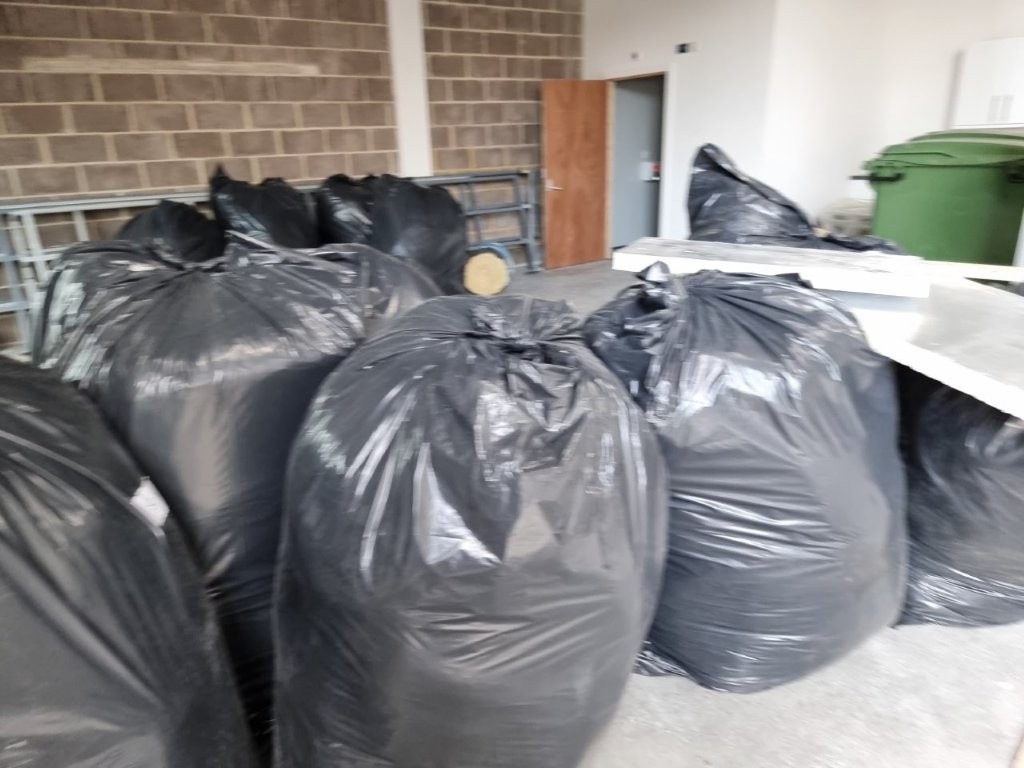
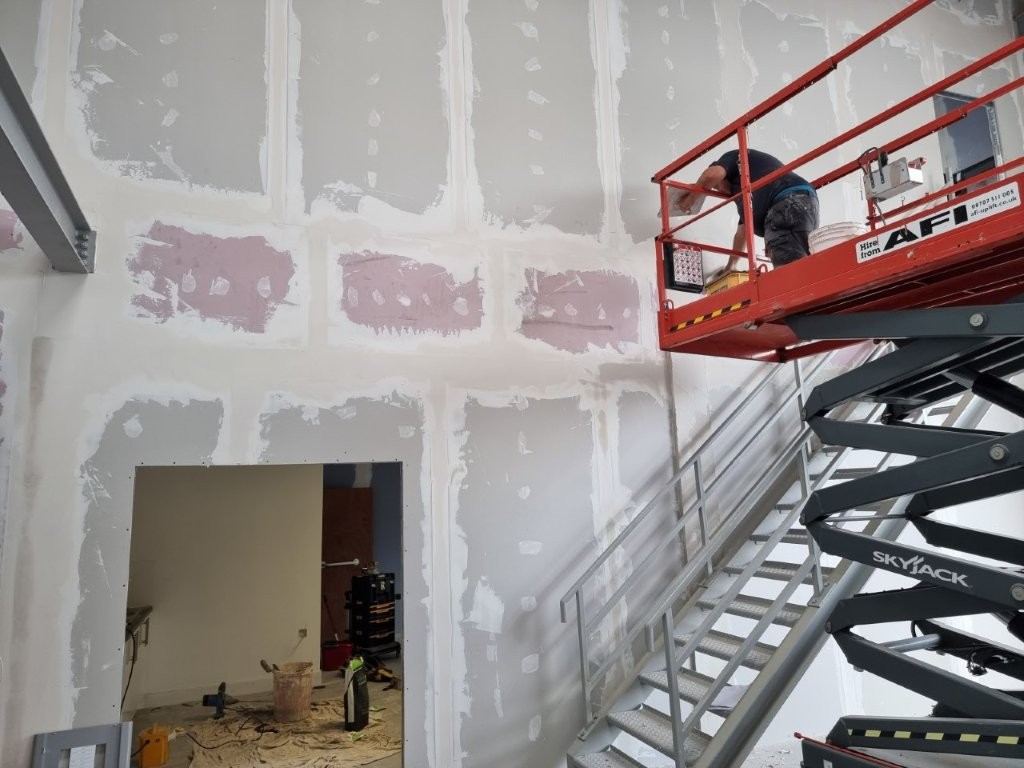
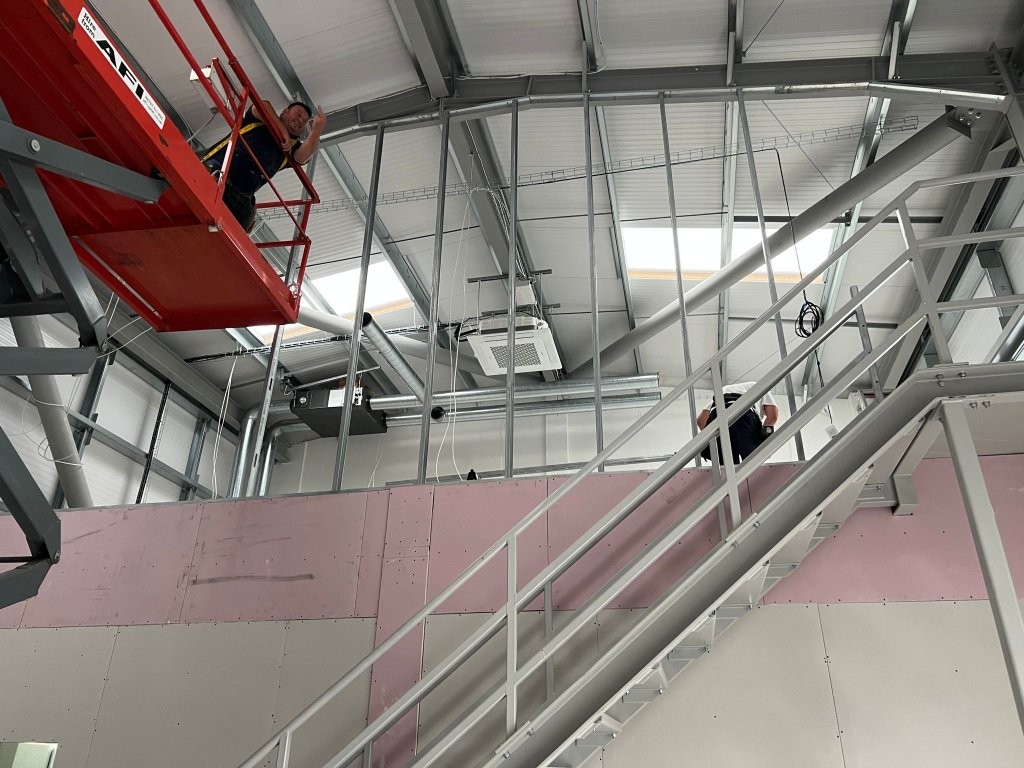
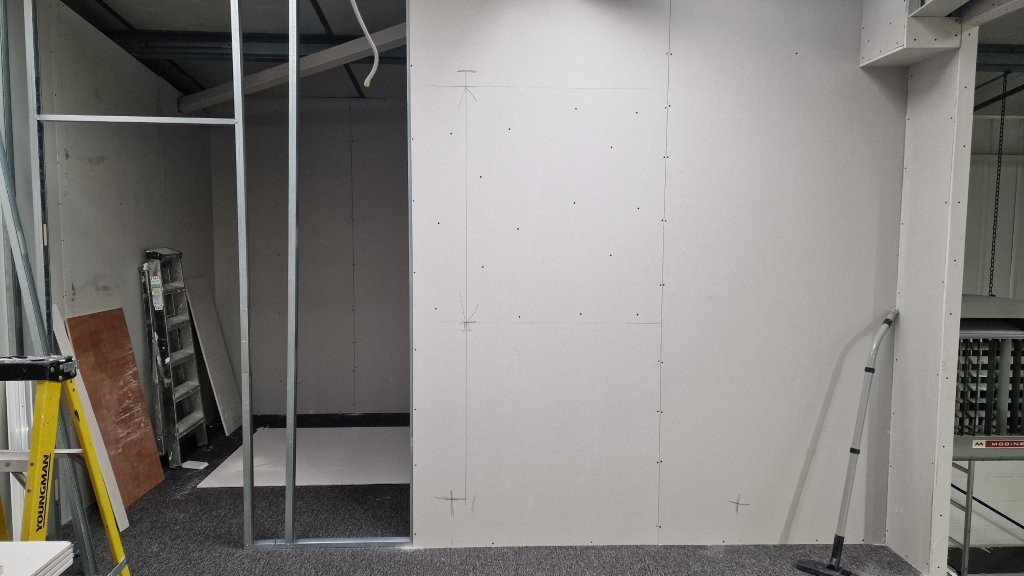
Please find below some construction photos. We needed to ensure that the mezzanine floor was 1 hour fire protected and as mentioned previously, we carried this out using 15mm fireline board, boxing all of the columns and the edges of the mezzanine floor.
We also had to build over the gaps at the edges of the mezzanine, to ensure any potential fire did not go up between the floors.
Bagged insulation over the grid
Knocking through next door
Fireline board on mezzanine edge.
Safety first!
Forming of opening in main wall.
Grey sound bloc board on party wall.
Air conditioning unit installed
Forming window reveals
Boxing mezzanine gaps
Boxing mezzanine gaps
Electrical work
Ground floor suspended
Fireline board on mezzanine and pillars
Running up studs for first floor
Boarding first floor
Boxes of steels
Boards fitting above the suspended ceiling line
RWA45 insulation in walls
VAM unit inlet and outlet
More insulation needed here
Ground ready for painting.
Ground floor waiting paint
Ground floor nearly done
Tape and jointed ready for painting
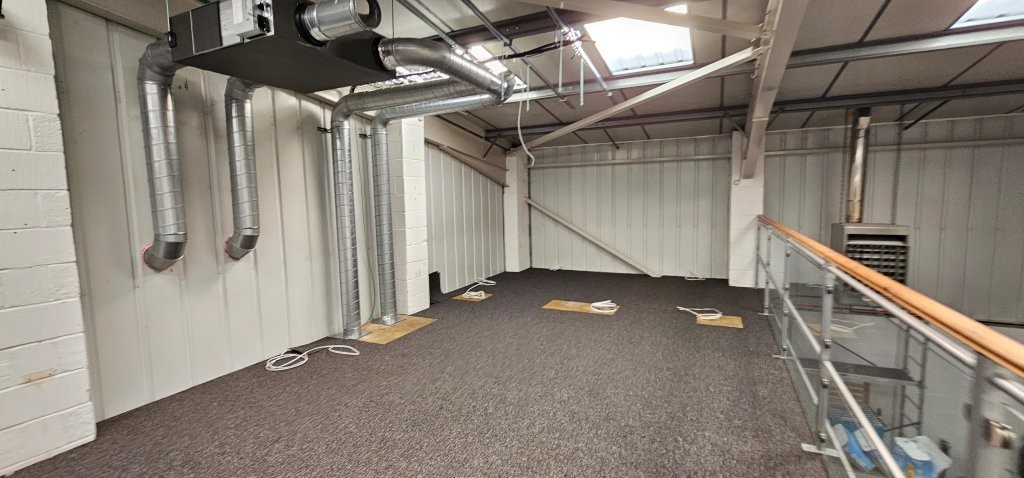
Some completed photos
Upstairs space nearly ready
Doors into workshop
Painting finished
Almost finished
Main wall finished
Opening into next door unit capped
New opening into next door.
Upstairs view out of windows
Initial furniture from customer
Main access door to staircase
A bit more furniture from customer
If you are thinking of taking on a new unit, and have any questions, we would love to be involved in your project, the visit is always free and the advice is free as well. If you are not sure what is involved you are not sure on how things can be done, then we are sure we can help.
Please call 01380 73 8844 or email us via the contact form on this website, or at [email protected]
We were asked to look at this project via an enquiry from our website, the customer had looked around and felt we could help. When he contacted us, our first reaction was that it was around the M25, and miles away, surely someone closer could build a partition. The problem was that the customer wanted a bit more than a partition as the new room had to sit on the edge of a mezzanine floor and he was unsure about Building Regulations. The people he had contacted just wanted to give him a price for glass walls, without listening to what else he needed and gave no reassurance that it would actually comply with regulations.
For us, it was unusual to find a client that understood that there were Building Regulation issues to be addressed. The customer wanted a piece of paper at the end of the work to say that it complies and everything is fine as that was the right thing to do. When they took on the unit we think it helped that part of the specifications was a mezzanine floor that had been fire rated and was suitable for offices above, and that must have triggered a question.
All the other suppliers of partitioning just wanted to build a wall and that was it. Didn’t even want to visit.
The Next Step
After speaking with the client, we decided to just have a quick look for him if he could send over some details and see what we thought and give some budget costs. We just wanted to see how we could help, so let us have a quick look.
These are the details that were sent to us, pretty good actually.
On top of the mezzanine
Angled roof, so a bit hard
About this size
Wants a store cupboard at the back
Something like this
Building Regulations
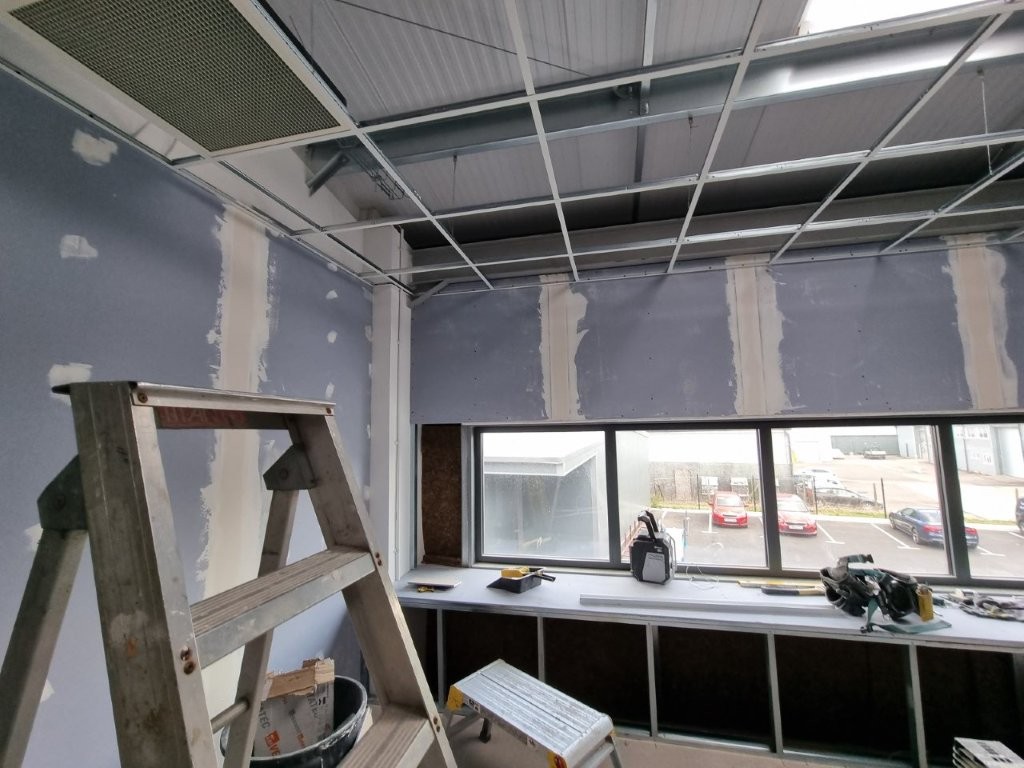
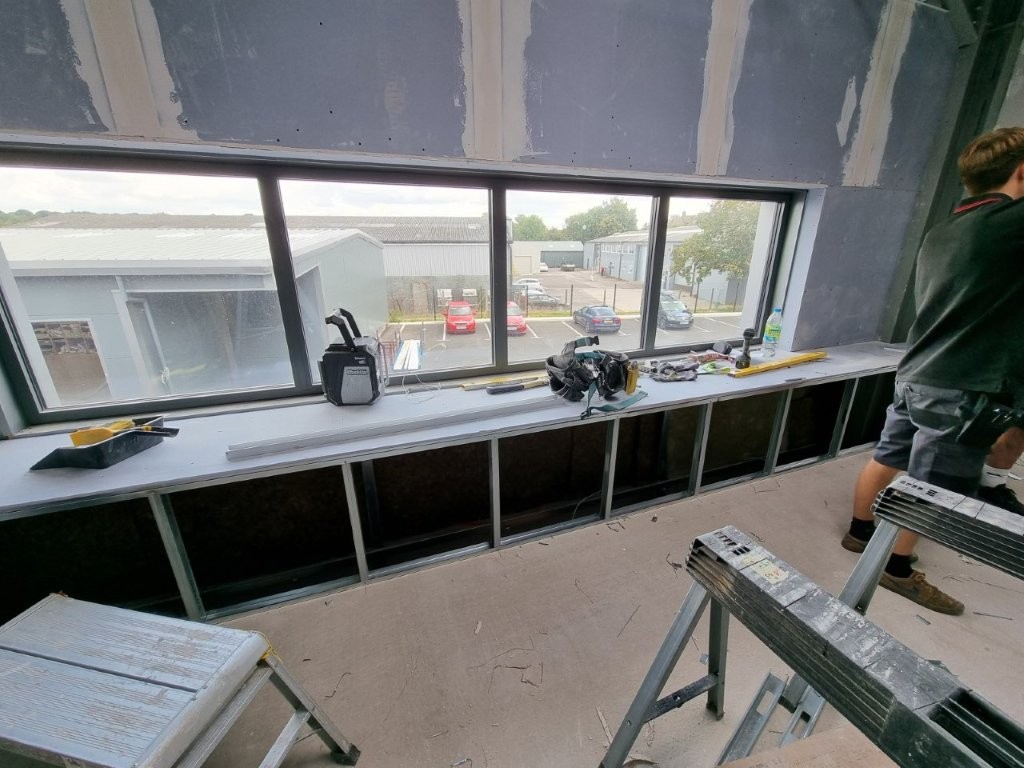
Looking at it initially, slightly tricky. The handrail would be in the way and we would have to remove it, and build the wall to the edge. The other bit that was quite hard was the sloping roof, we could have to build up to it and deal with the beams and make it look right. The customer was quite right, and we had to check with Building Regulations which is what we did, free of charge. The key things were that there were two means of escape with the 45 linear meters, so that was fine. The room needed fresh air ventilation, via a VAM unit, any glass to be fitted, which was our preferred options needed to be a special thickness as it is right on the edge at height. Again not a problem. We would also quickly need to check the mezzanine floor itself, to make sure it had the right fire protection. As it happened there was no cavity barrier inside the suspended ceiling underneath as the floor was long than 18 linear meters, and it needed one, so we put one in.
There are other things we did, but in essence, none of this was an issue.
We gave a budget cost, subject to a visit and that was ok, we visited and they also wanted their toilets refurbished. So we refurbished their toilets as well.
Building Reg plans
Design work, specifications
We always produce a drawing, initially we do this anyway so we can cost the project properly and not just guess everything which we know many people do.
The drawing needed to be tided a bit, although not to architectural standards, it is good enough to explain what needs to be done.
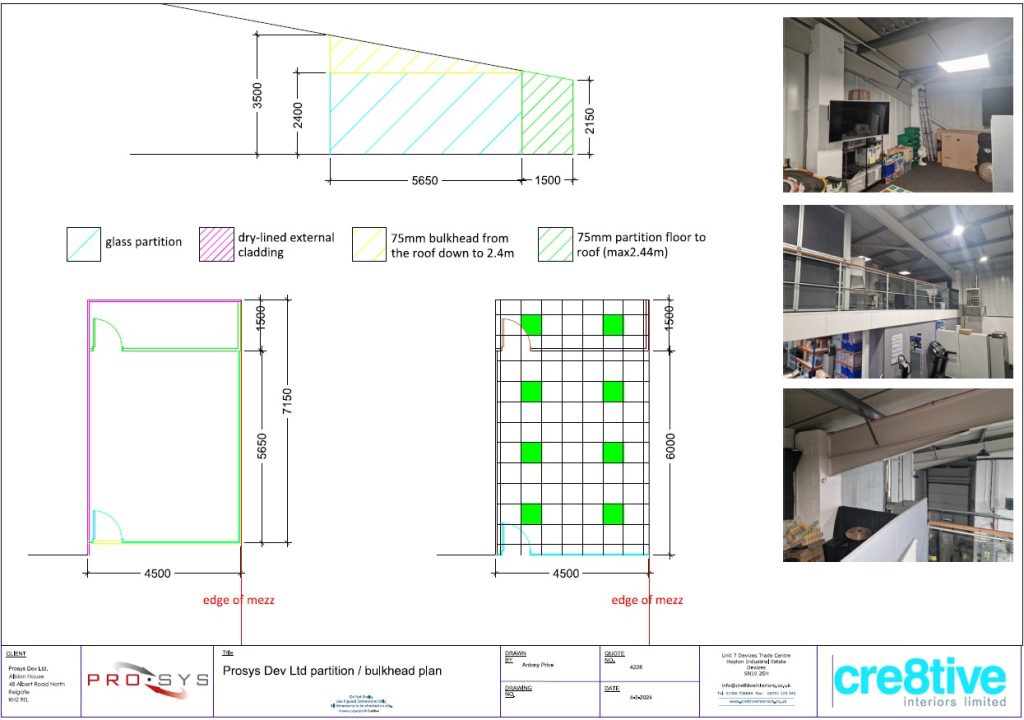
Bulkhead and partition detail
Construction, work in progress.
Installation of VAM unit
Balustrade to be shortened here
Position of end storeroom
Prep for the ac unit
Beams were difficult to box
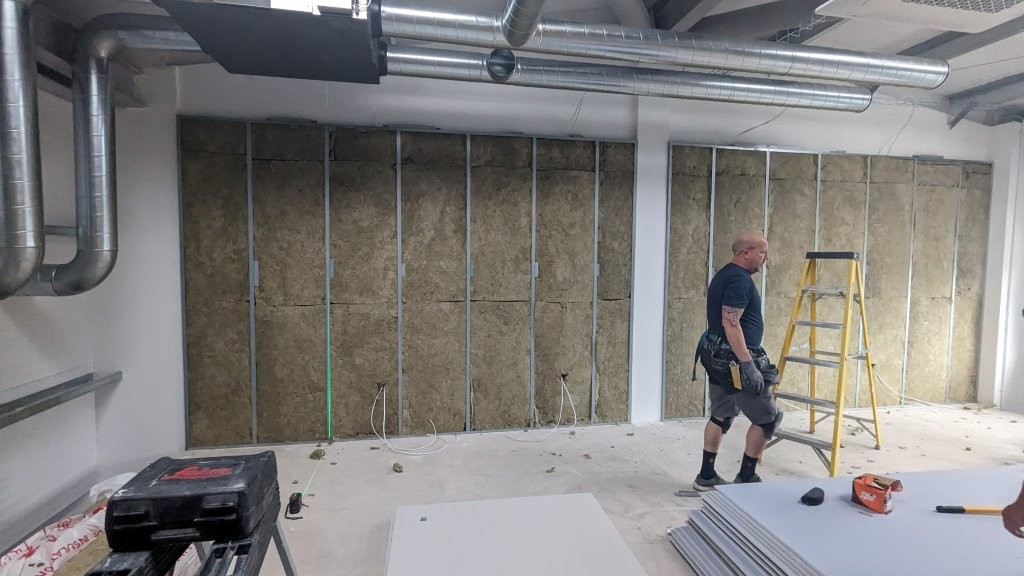
Construction of bulkheads
Forming the room at the back
Plasterboard mostly done
Plaster boarded, waiting for ceiling
Bulkheads and VAM unit in position
Bulkheads forming
Fresh air for downstairs
Just waiting for glass
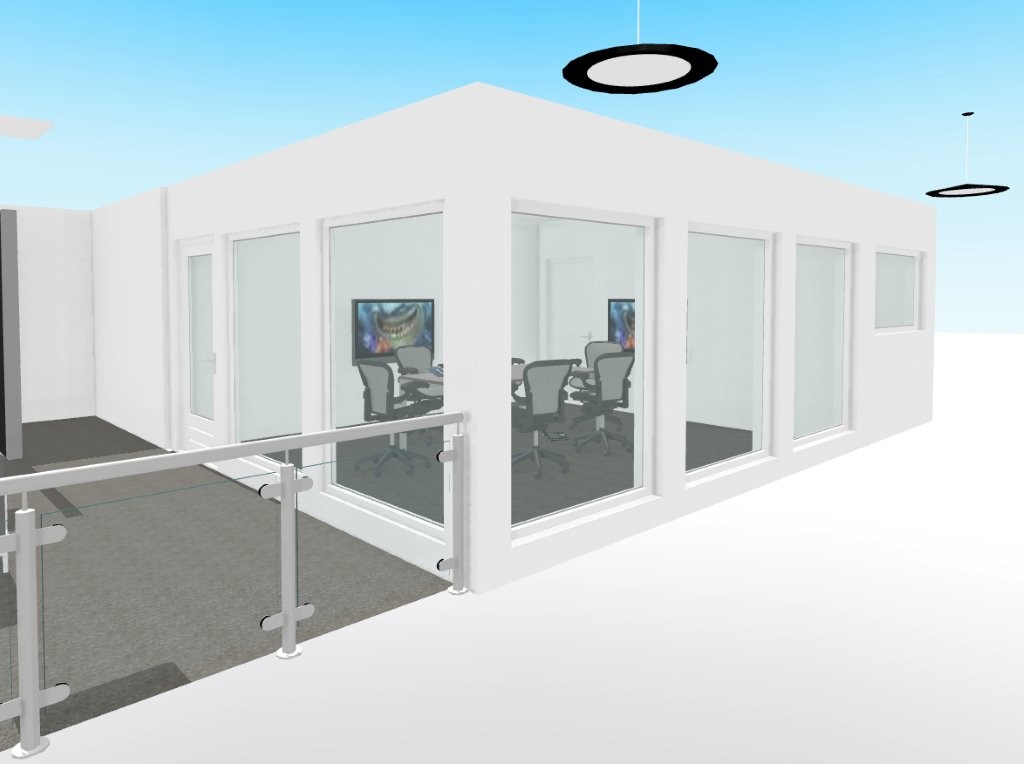
We liked the design of this project, the idea was to build a bulkhead suspended down from the roof which would form a rectangular opening to accommodate smart modern looking glass walls. Another tricky bit, as well as having to remove the handrail was to follow the shape of the roof and box the beams to make it look right. There were a couple of beams at different angles but we made it look right.
To build the walls around the meeting room out of tradition demountable partition systems, with plasterboard and double glazed windows would have actually been more expensive with what we were proposing, and certainly it would not look as good.
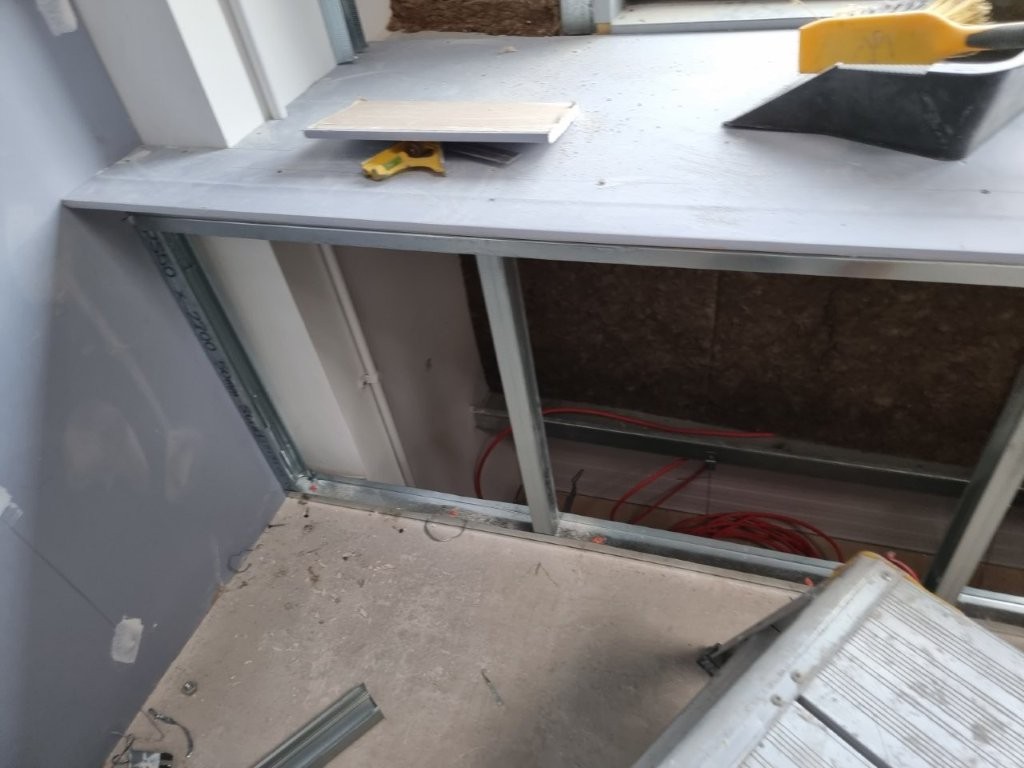
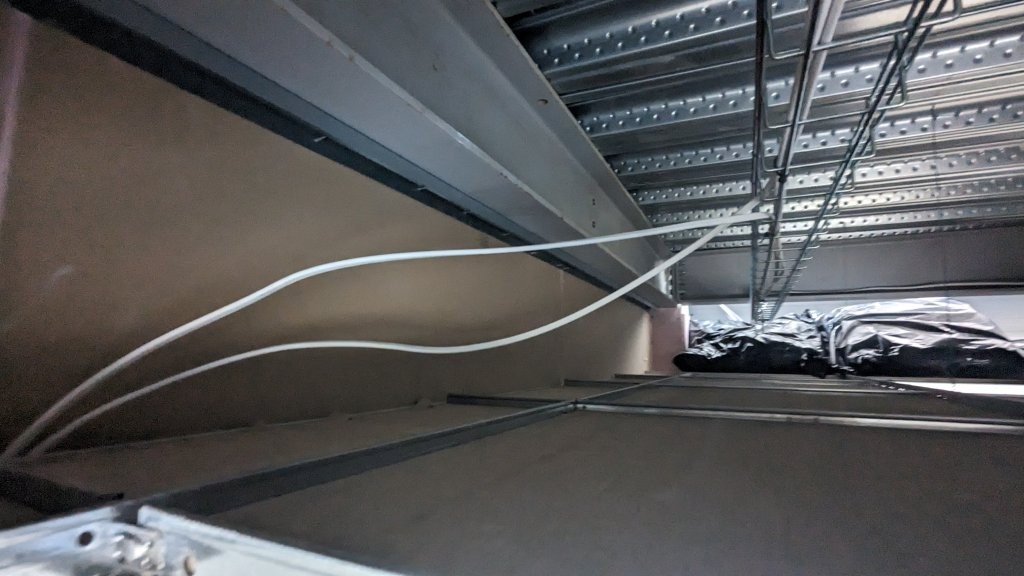
There was a small bit of detail in the construction that we quite liked. When we fitted the fresh air unit, the VAM unit, we prepared all of the ductwork which gets hidden by the suspended ceiling above, but also included extra ductwork to feed the potential downstairs office below the mezzanine.
The interior wall for the meeting room we built flush over the steel work, that give us a cavity where we could run the 200mm diameter ductwork down the walls, through the mezzanine floor and capped off ready for the room below. The ductwork needed fire dampers in them for fire protection purposes; preventing potential fire travelling from the upstairs to the downstairs through the pipework in the unlikely event of a fire. The dampers are also required to meet Building Regulations.
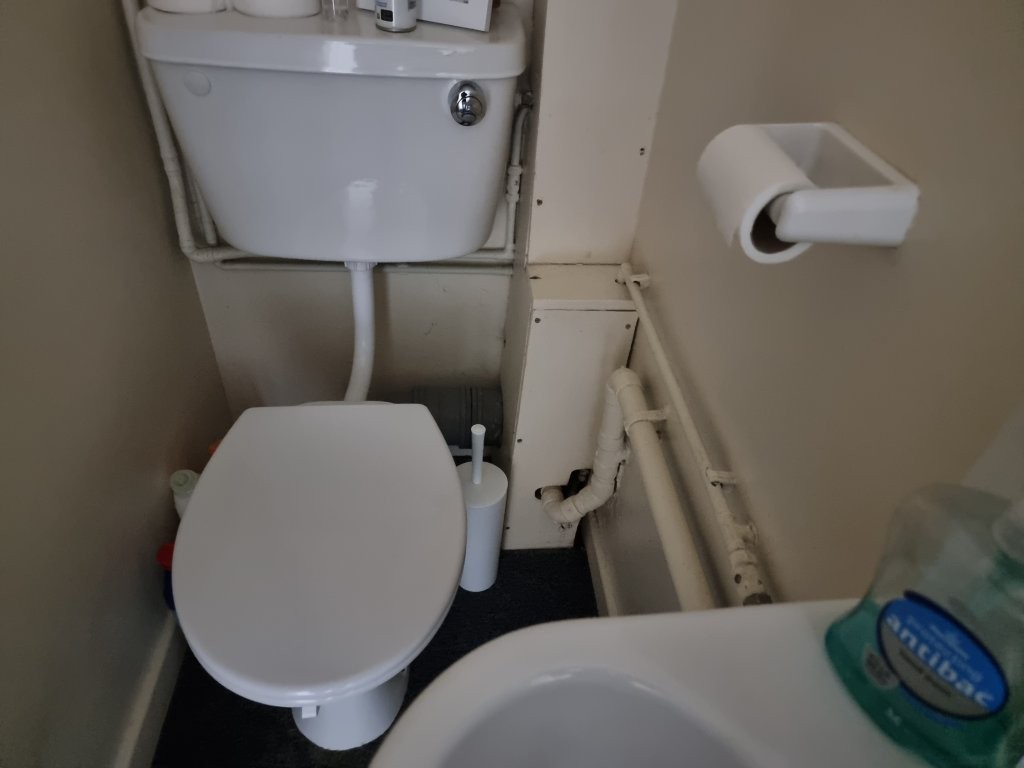
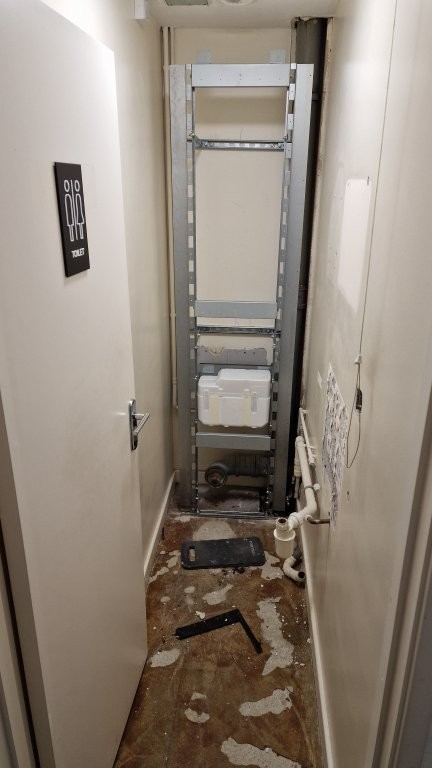
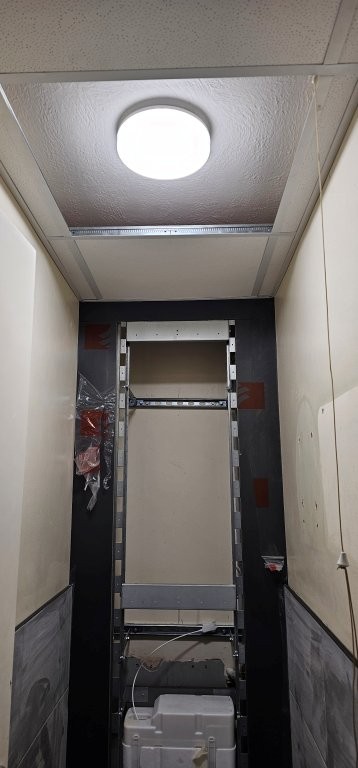
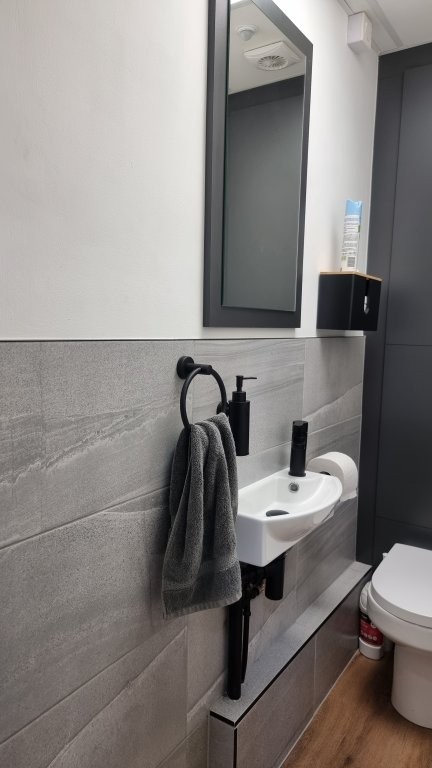
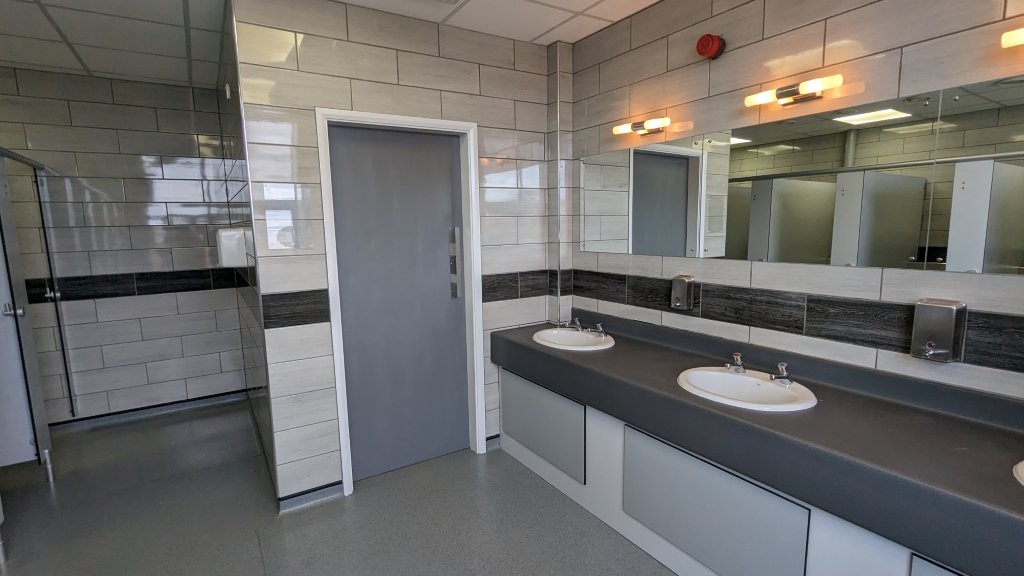
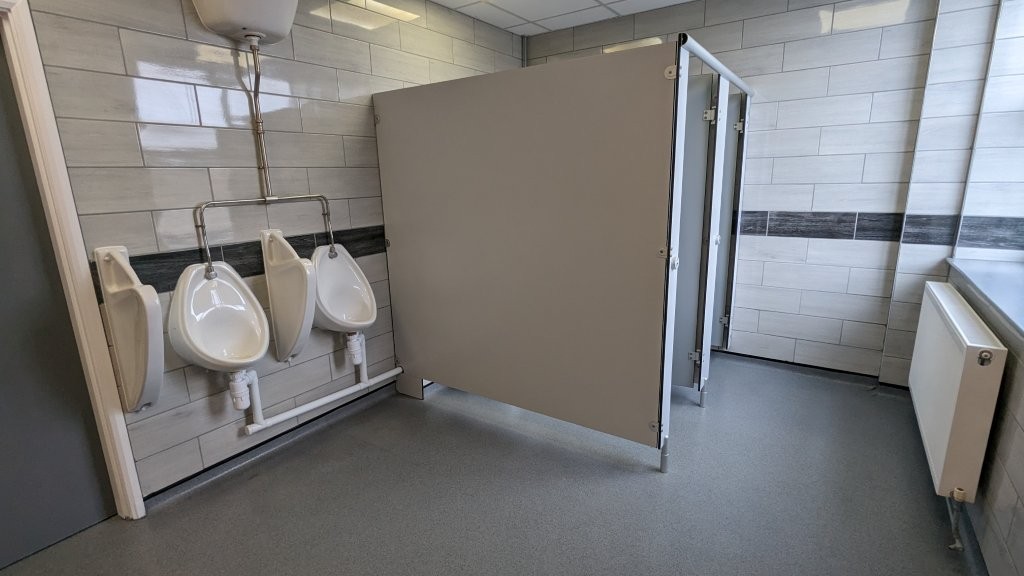
Toilet refurbishment
As mentioned previously in this post, the initial enquiry was not to refurbish the toilets but when we visited, we said what else we could do and they needed something doing to them.
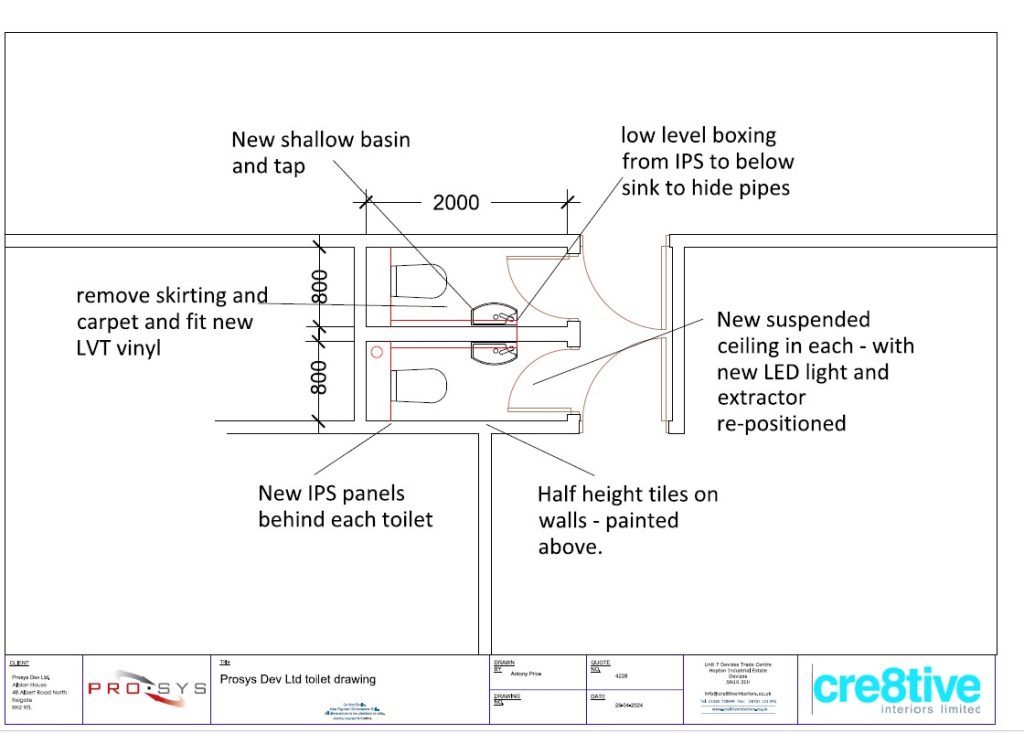
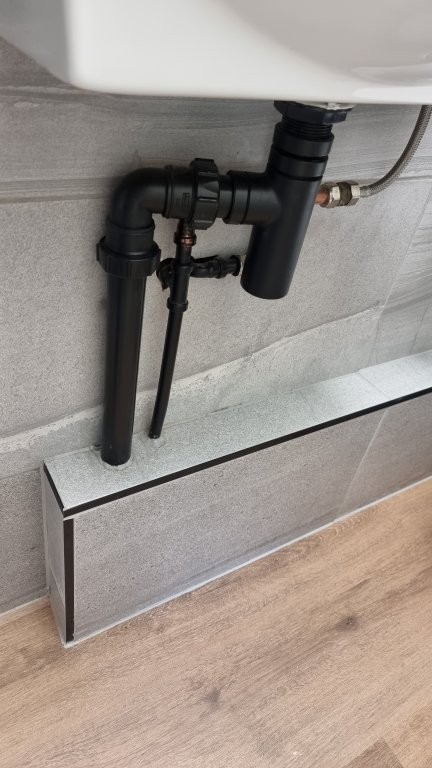
Although small, we could hide the plumbing by using IPS systems, which is a system of enclosing pipework and cisterns behind a closed panel. Often seen in commercial centers, like shopping centers, motorway service centers.
We could also box the pipework, tile the walls, paint it, change the flooring, fit a new suspended ceiling and lights. Quite a bit really for such small spaces.
It is not possible to get lots of trades to do this type of work.
Toilet drawing
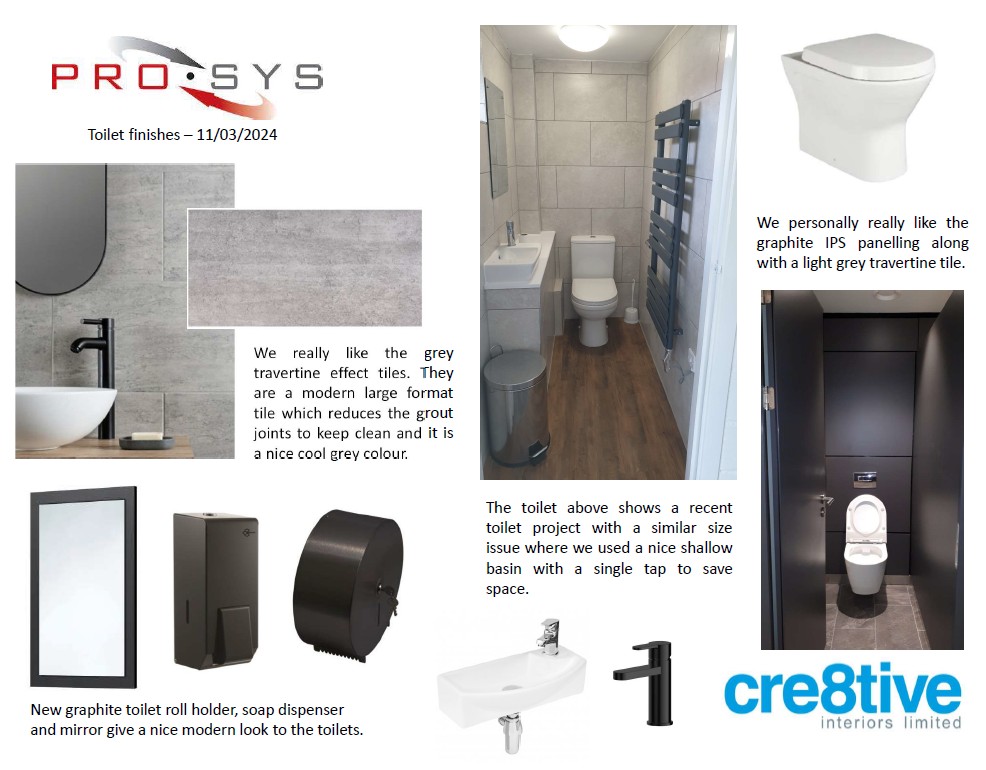
Toilet finishes
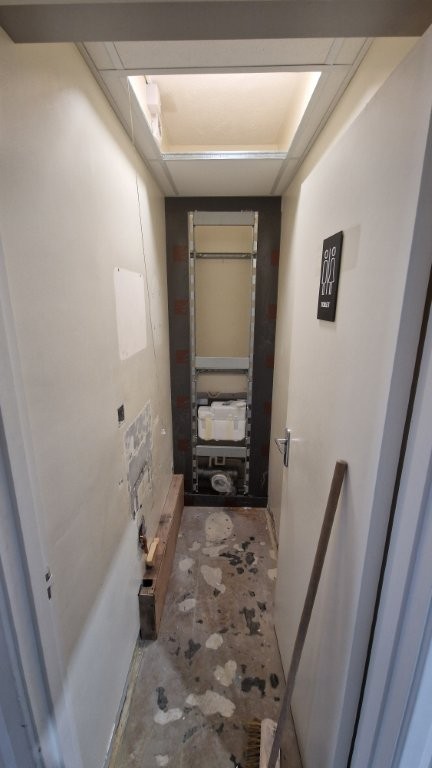
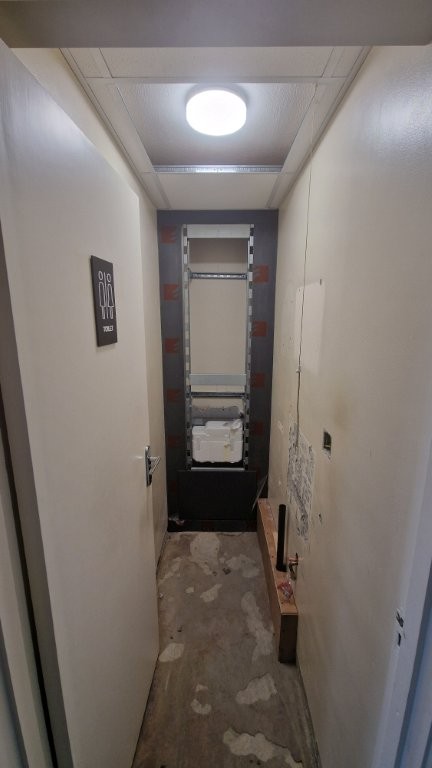
Toilet refurbishment progress photos
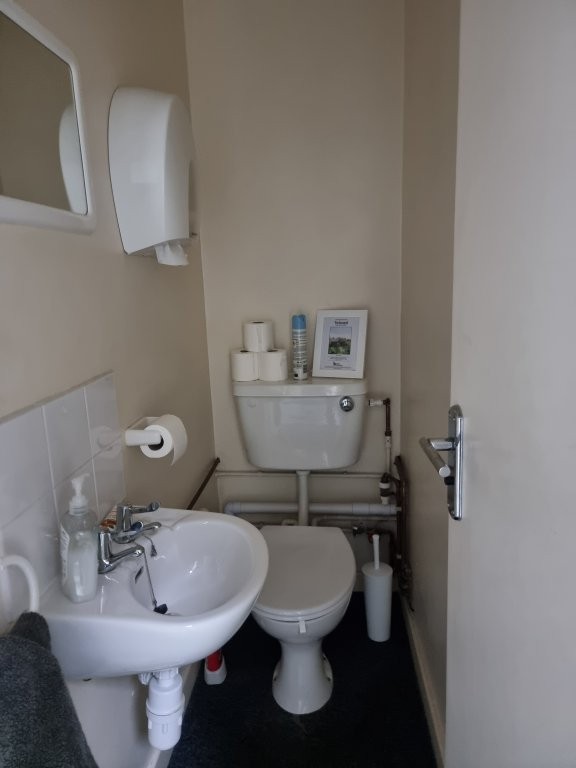
Existing toilet
Lights not great
Hand basin too big
All exposed pipes
Same for the other one
Stack pipe exposed
Pipes on the wall
Large basin again
IPS panels
IPS panels
A bit further
Basin fitted
New ceiling
Enclosing pipes
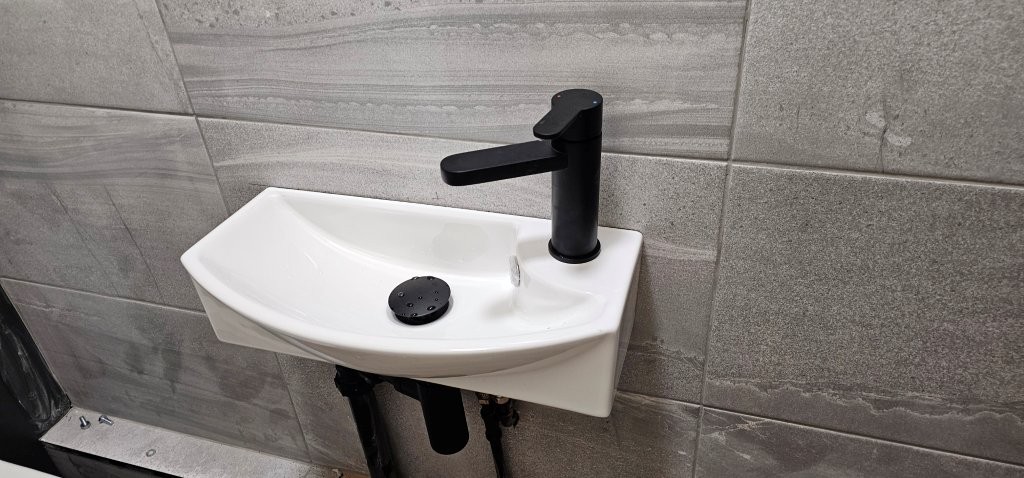
Slimline basin
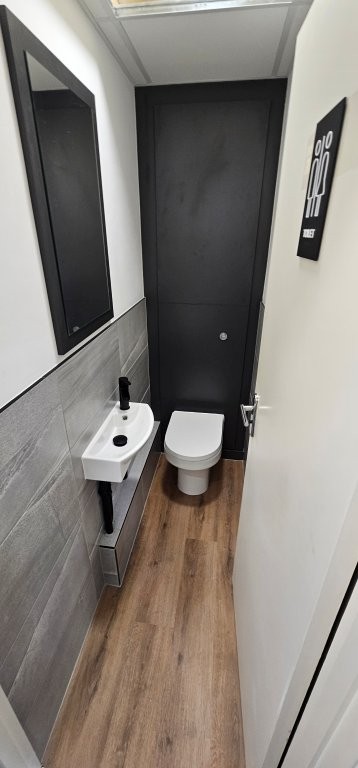
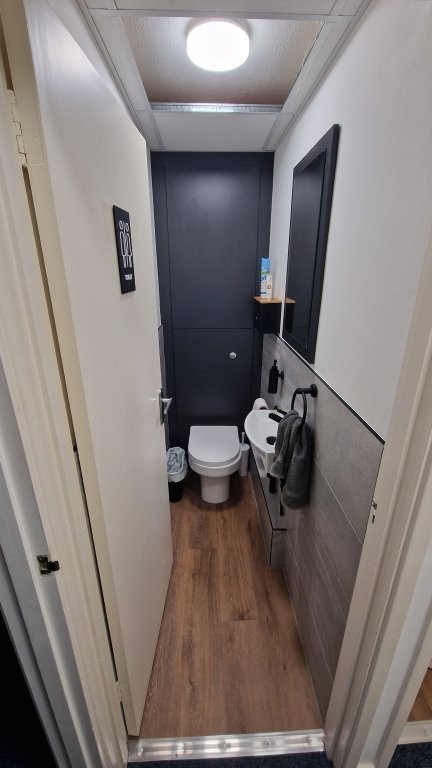
Much neater
The other toilet
Half tiled to reduce costs
New LED panel
Nice black pipework
Some work in progress and completed photos
One of the problems in refurbishing small toilets is that they need lots of different trades, and there is not enough room in them to have lots of people doing different things.
For example, in these toilets we needed:
a plumber to disconnect / reconnect the existing and new.
Someone to build and fit the IPS panels, (needs a carpenter to cut the panels to size, sit them squarely)
a plumber to fit the sanitary wear to the IPS panel as it is being fitted.
A tiler to fit new wall tiles straight and flat.
A decorator to prepare the walls and paint them.
A suspended ceiling fitted to fit a new suspended ceiling
An electrician to disconnect the existing light and fit a new one, someone to fit a new toilet extraction system.
A flooring contractor to uplift the existing and supply and fit a new wood effect vinyl floor planks.
Someone to fit the new towel rail, toilet role dispenser, mirror, door signs.
Larger toilets are much easier as all of the activities can be scheduled and planned in as the elements usually take longer than a day. In this case there is not enough work to allow to bring in separate trades to do individual elements, planning and timing of those events would mean that doing the toilets would take months and cost a fortune. Luckily we have a fitter that can do all of the tasks, including the plumbing works. We were onsite anyway doing the electrics for the new offices, so it was easy for them to drop over onto the toilets to sort out the light fittings and extraction. Not so easy for anyone to do this type of work. Most plumbers would not know how to deal with the IPS system as there are commercial systems.
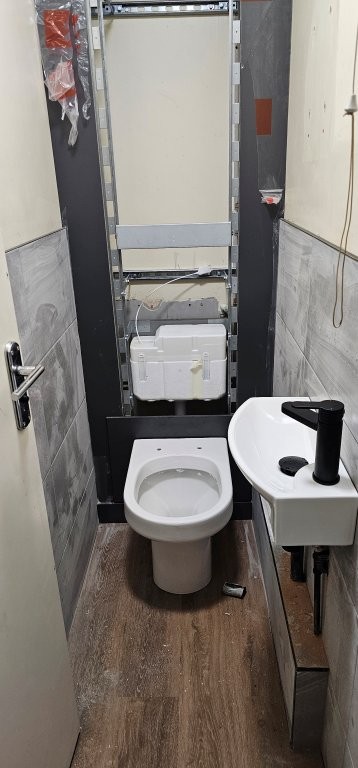
Some completed photos
The following photos were supplied by the client after we had left site. They show the boardroom table and chairs, and the comments from the customer is that they are very pleased with the final result and use the ideas wall along the long wall to good effect.
View from below
Room with table fitted
View from other side of Mezzanine
If you have any partitioning requirements that are perhaps a bit complicated and you are not sure on how things can be done, then we are sure we can help.
Please call 01380 73 8844 or email us via the contact form on this website, or at [email protected]
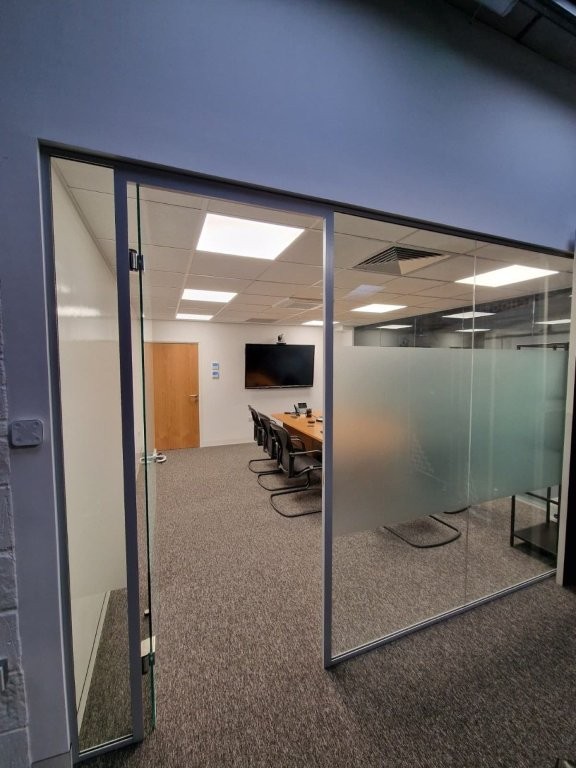
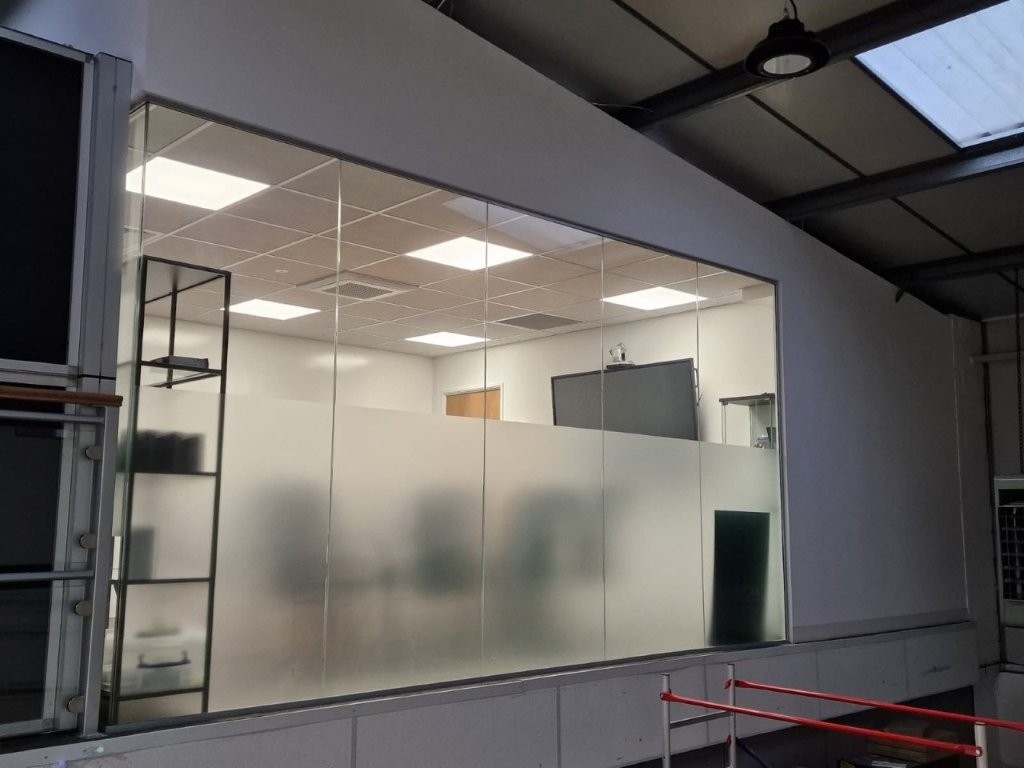
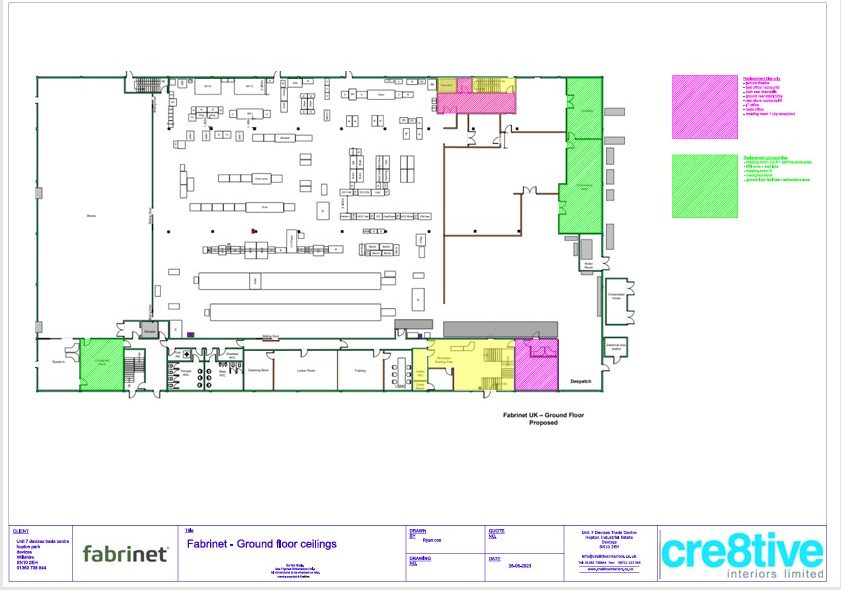
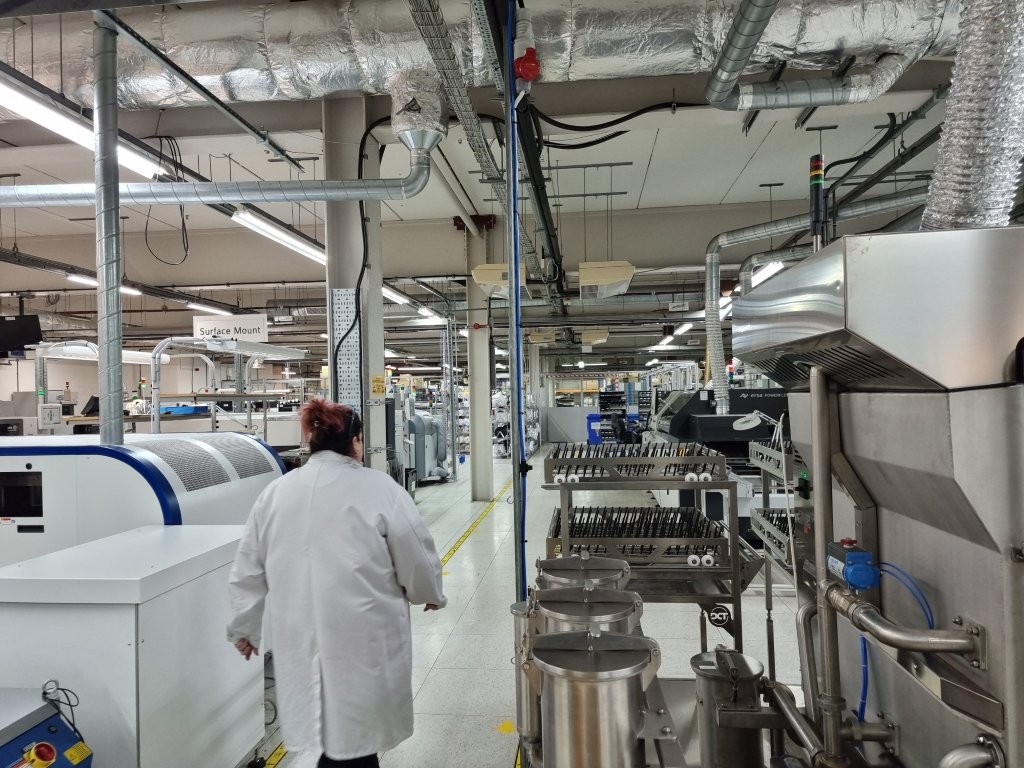
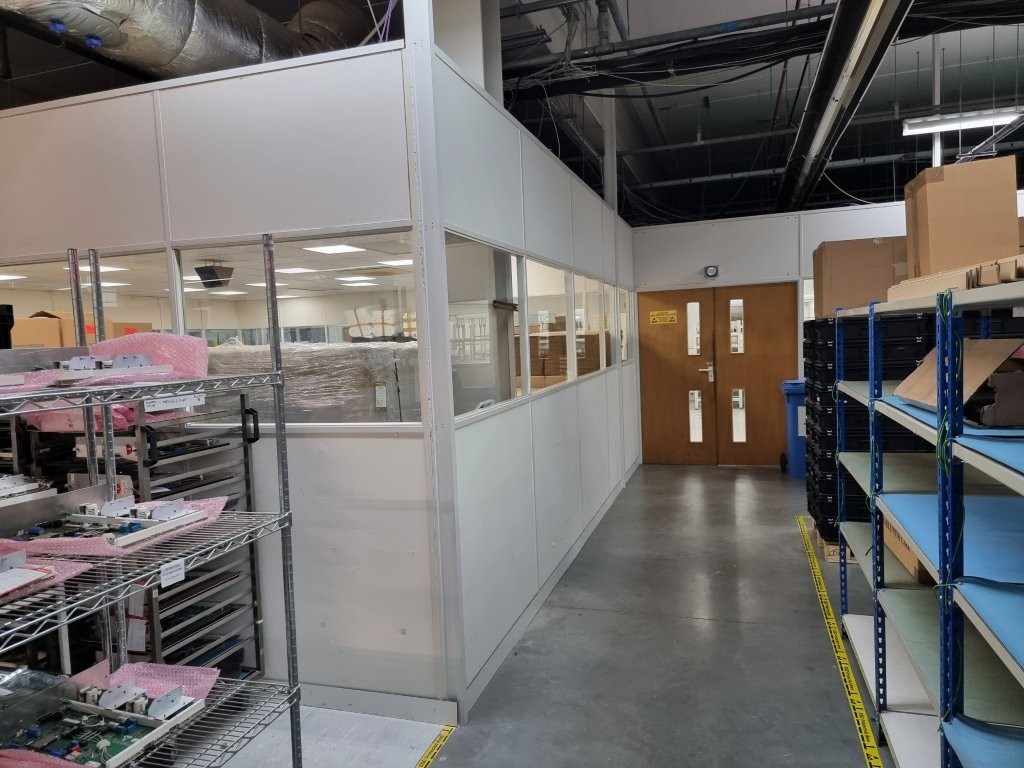
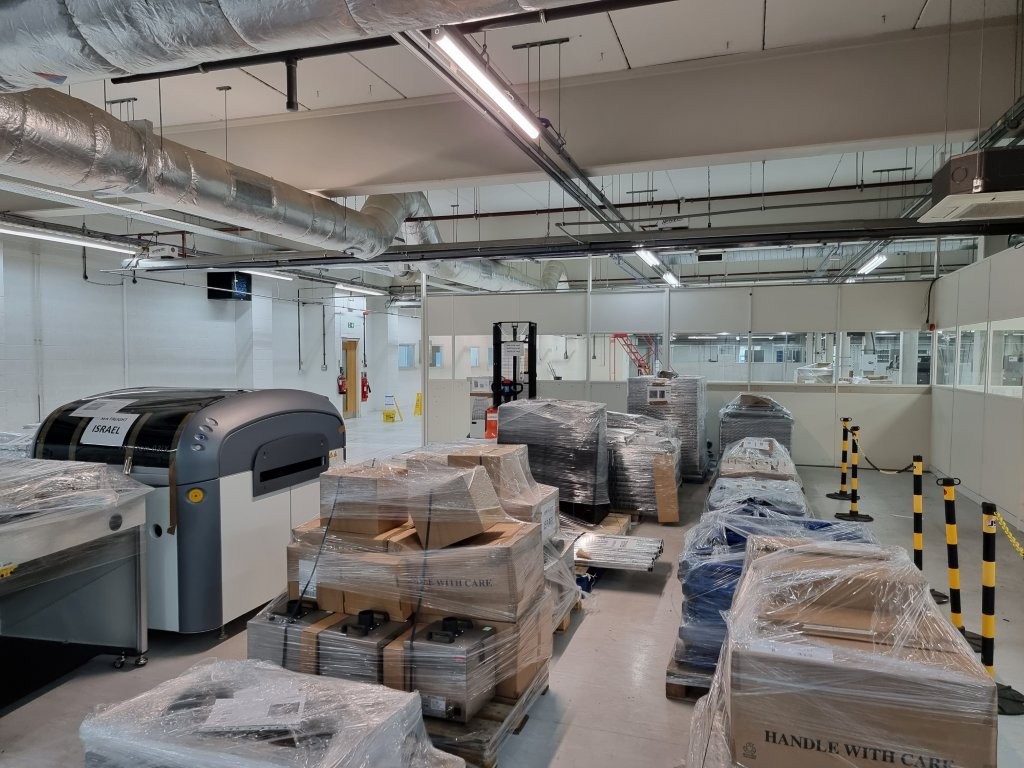
Cre8tive Interiors had been a provider of Office Interior fit out and refurbishment work over many years for Fabrinet in Calne. The previous name was Exceptions EMS and we had been carrying out work at the premises since 2014 to 2023. It was a complete surprise to find that the site was closing in 2023 with the loss of 100 jobs. For us, over the years we had carried out many projects, and actually knew the building and the people quite well.
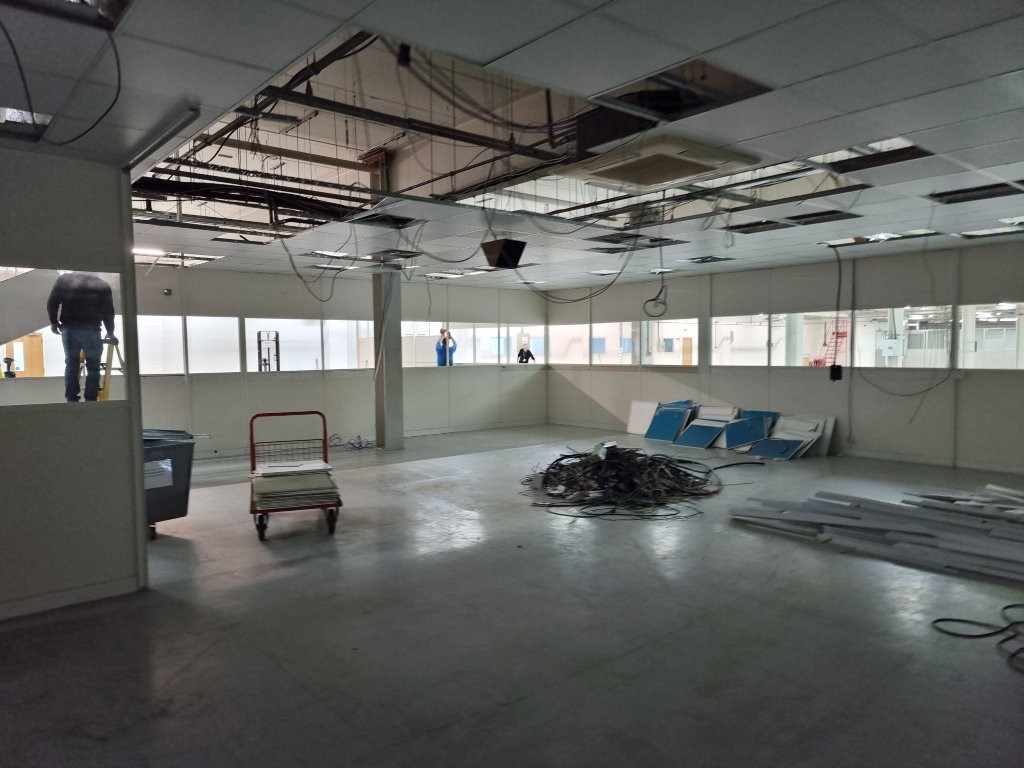
Dilapidation work
When we were advised of the close, the management team contact us as they were presented with a £1.2m dilapidation bill from the landlord.
Fabrinet only rented the space, and over the years had installed many things, much of which had to be stripped out. All of the equipment was going to Thailand where Fabrinet has another facility, there were centralizing production, having closed their factory in Germany as well, earlier on in the year.
The big issue really was that Fabrinet obviously did not want to spend that kind of money and as the business was closing the first priority was the staff. Once the staff were sorted there was a limited amount left. It was then a case of prioritizing, going through each section to make sure it is the best that could be done with the money.
Scope of work
There were a great many things we had to do. Below is a list which probably does not show the scale of what we did as the areas were huge.
Stripping out all of the partitioning we had installed over the years on the ground floor, with the suspended ceilings inside them as well.
Removal of the metal skinned secure assembly area.
Replacing of suspended ceilings in many rooms, some were replacement of grid as well.
Replacement of carpet
Painting the whole of the building inside, as well as underneath the first floor, all staircases.
Check operation and repair all 103 internal doors.
Repair of all external doors.
Stripping out of redundant cables, removal of the old air conditioning systems and replacement.
Servicing all of the existing air conditioning and ventilation systems
Repair of the gas fired overhead Ambi-rad heating system.
Replacement of window boards
Some drawings and documents produced..
In order to cost all of the areas properly, we had to create many drawings and detail all of the activities that needed to be done. One of them that was time consuming, was that each door had to be looked at and cleaned / replaced if the oil from door closers had leaked into the wood, replacing damaged kickplates, push plates, replacing door closers and checking for gaps in the doors. There were 103 doors. We produced a schedule and then costed the work on each door.
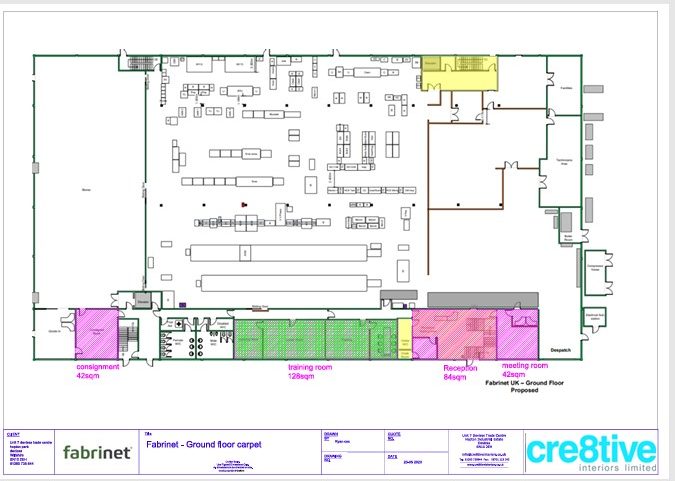
Ground Floor carpet mods
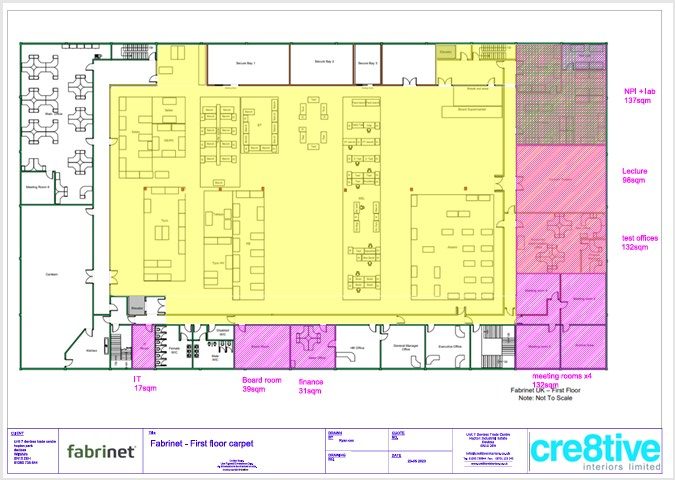
First Floor Carpets
First floor ceiling mods
Ground Floor ceiling mods
Part of door schedule
A few initial photos
Throughout all of the years of doing work at Fabrinet, we were not allowed to take any photos. The only ones we could take were when they were closing and we managed to take a few just before we started the stripping out work. All of the equipment seen was being removed and shipped to Thailand or being sold.
A sneaky shop floor shot
Partitions to come down
More walls to remove
Much stock to get rid of
End of metal
secure store
Upstairs factory area
Overhead pipework
Some work in progress and completed photos
It was demoralising to remove much of what we built on the shop floor over many years, not as bad for the employees losing their jobs of course. The key word with it all is of course demountable partitioning. It was all aluminium framed and easily removed, just a vast amount of it. All of the offices needed new ceilings, or replacement tiles, most needed carpets and decoration throughout.
Ground floor partitions
External doors to be repaired
Check of fire barriers
Painting underneath first floor
Stripping out
New carpets
New carpets in many rooms
Metal secure partitions out
Metal secure partitions
Metal secure partitions
Old ac units to be removed.
Overhead Ambi Rads repaired
More partitions to come out
All partitions to come out.
More partitions out
Replacement of ac lagging
This ceiling needed replacement
All stairs, handrails, nosings, landings, walls painted
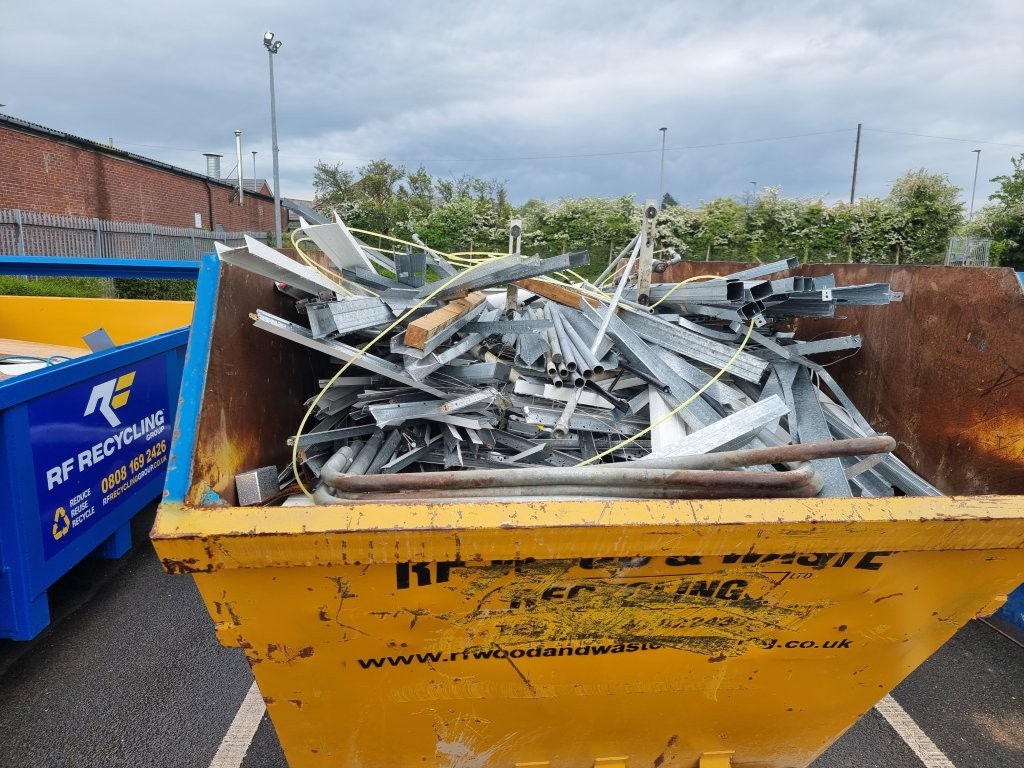
Waste management important
This was the metal skip
Some completed photos
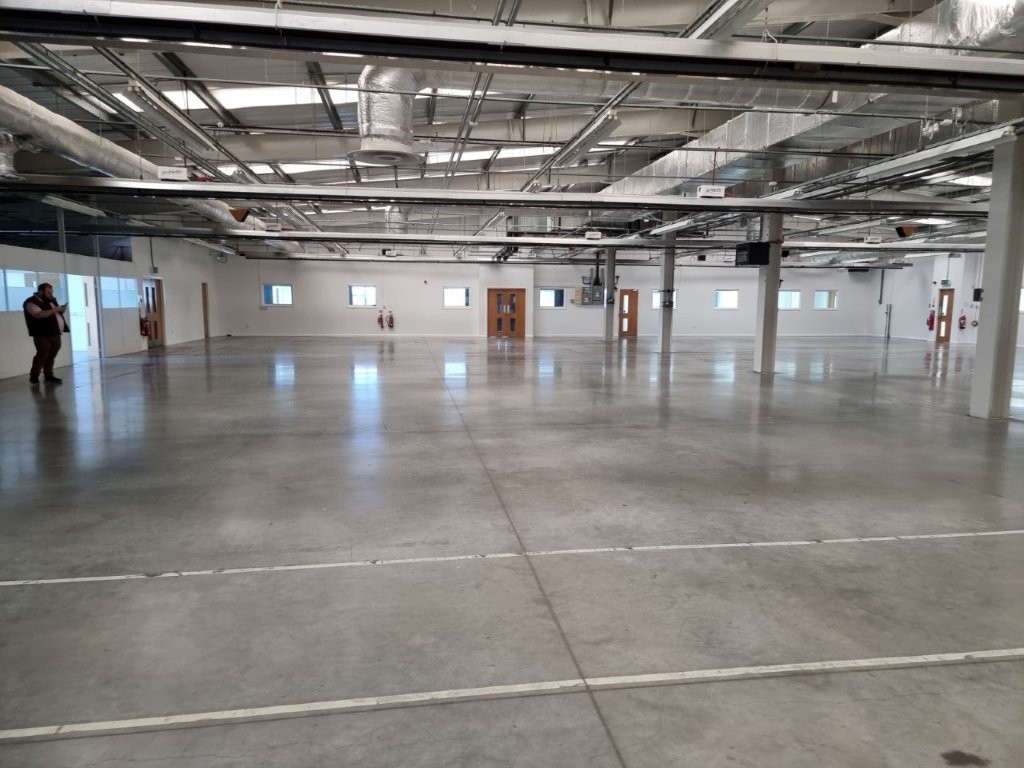
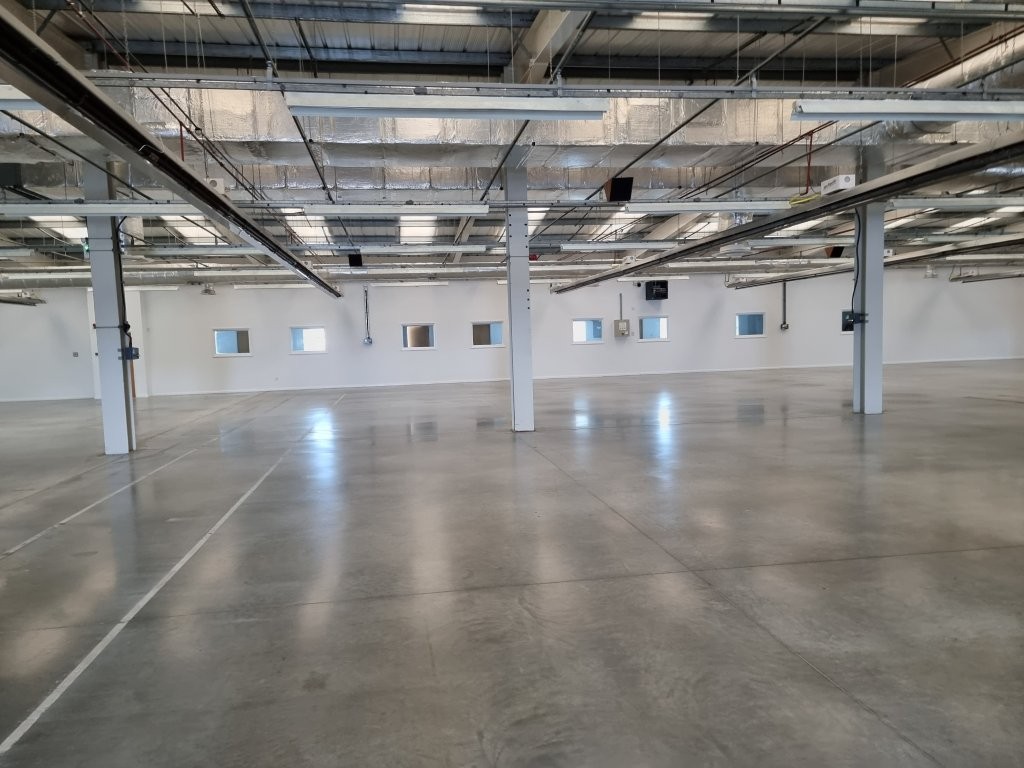
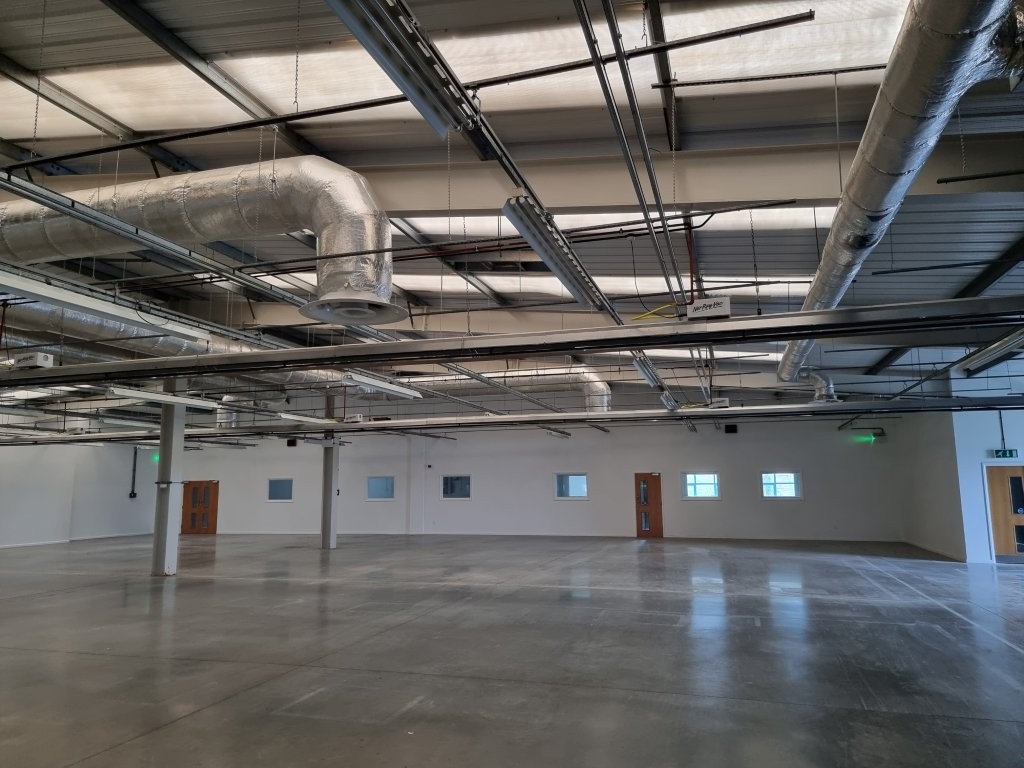
Upstairs empty
All internal walls painted
Upstairs all clear
Cleared upstairs
Other corner clear
Upstairs offices complete
Original office kept
Canteen area painted and cleaned
Upstairs clear
Empty downstairs
Reception cleared
Main staircase a challenge
Other view of reception
Staircase was difficult to do.
Toilets cleaned
Flooring replaced in toilets
Dilapidation Schedules
Over the years it never ceases to amaze us how much surveyor costs are but fully appreciate they are to a particular code of estimating, which they all have to follow. As Cre8tive Interiors actually does the work and does not subcontract the majority of work we can actually do the work much cheaper than many traditional builders. All they would so is sub to us for the partitioning, ceilings, ac and ventilation work, so we may as well just do the work anyway.
Always interested in looking at leases at the time to move, if we can help in anyway and save money, please do not hesitate to contact us.
The aim of this partitioning project for Frome Business Park , was to make the private office feel more open to the central meeting area by removing a solid wall and installing a glass partition.
We used and industrial style glass partition to match the existing glazing throughout the building.
Preliminary work
The first step was to measure the partition being removed and work out how to make sure the new partition would like like part of the original building scheme.
We were made aware that the existing partition housed a steel cross brace support for the mezzanine floor which could not be moved and we did not know exactly where it was positioned.
We planned to paint the steel in the same dark grey to match and worked on the basis that the new industrial style glass partition would need to be positioned in front or behind of the steel.
Existing office
Existing office felt secluded
Work in Progress photographs
We took out the solid partition wall and re-plastered the opening and painted white to match the walls around giving a nice square opening ready for the new industrial style glass partition to be installed.
The newly exposed steel cross brace was painted in the same dark grey ad the existing frameworks and doors making a feature out of it.
The existing vinyl plant flooring was uplifted and re-laid in offset cut formations to make good of the gap in flooring where the partition was removed without leaving and obvious joint line in the flooring.
New opening with steel exposed
Make good of vinyl flooring
Much more open from inside
Office looks much lighter
Office feels and meeting space
Completed partition
The finish office partition looked like it has always been part of the building allowing more natural light into the office and encouraging integration between the office and meeting space.
The black crittal banding gives a really nice industrial look especially with the exposed cross brace behind.
More integrated with the meeting area
Industrial style glass partition
Would you like to remove a solid partition and install glass partition in your office?
If you would like some advice and inspiration on how glass partitions can make a difference in your office, please do give us a call on 01380 73 88 44, or email us at [email protected] and we would love to help.
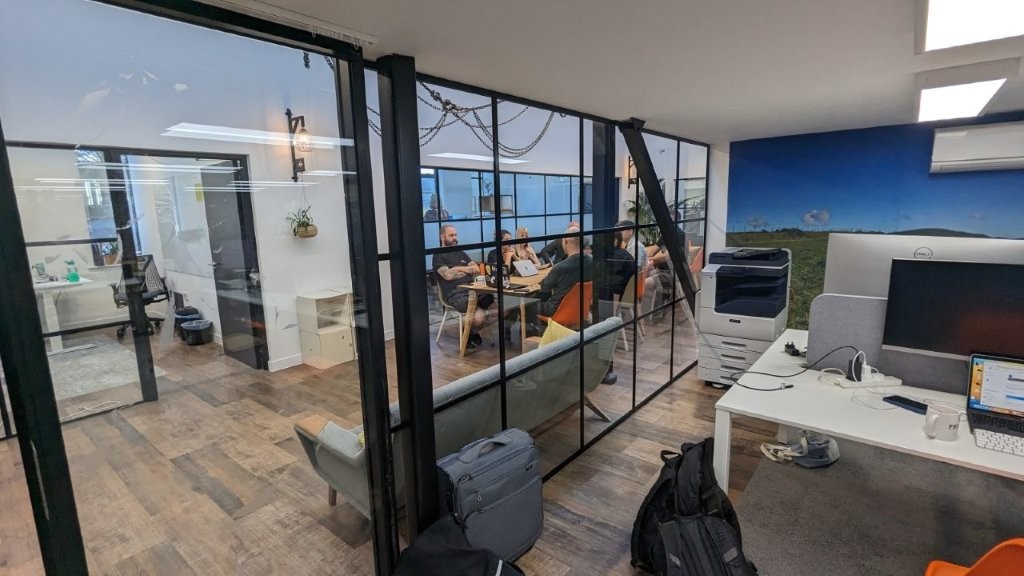
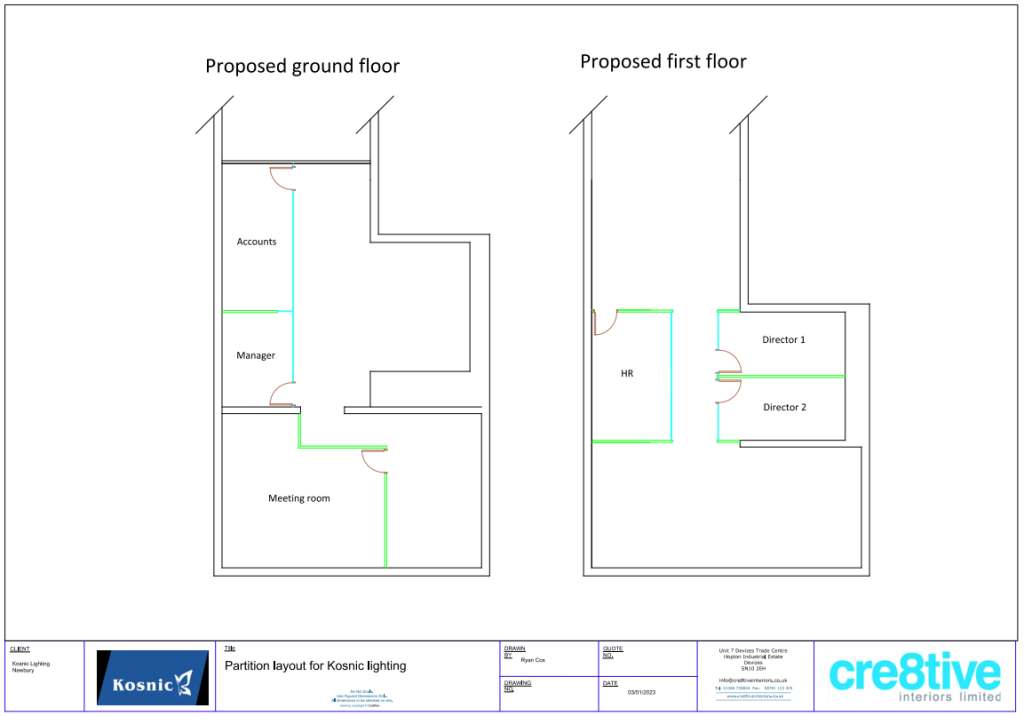
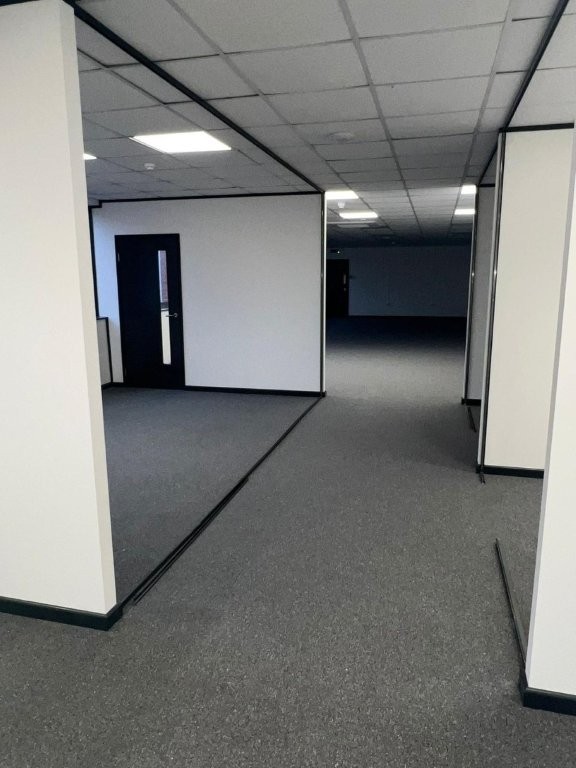
The aim of this Partitioning project for Kosnic lighting in Newbury, was to create defined offices for key members of staff and a meeting room.
We used glass fronted offices to give a good level sound performance and privacy while maintaining natural light for the remaining open plan office areas.
Preliminary work
The First step was to measure the new office space and draw it positioning offices where the client wanted them.
It is important when laying out an office to look at which teams work together and what the flow of the office / customer experience might be. Positioning key roles like directors and HR who usually work closely together made sense. Sales and marketing teams not only also work together but also tend to create the most noise in an office so positioning them away from directors or confidential meeting spaces can be beneficial.
The partitions used are still called ‘demountable partitions‘ and are often a requirement by a landlord owning the property.
Glass fronted Partition layout
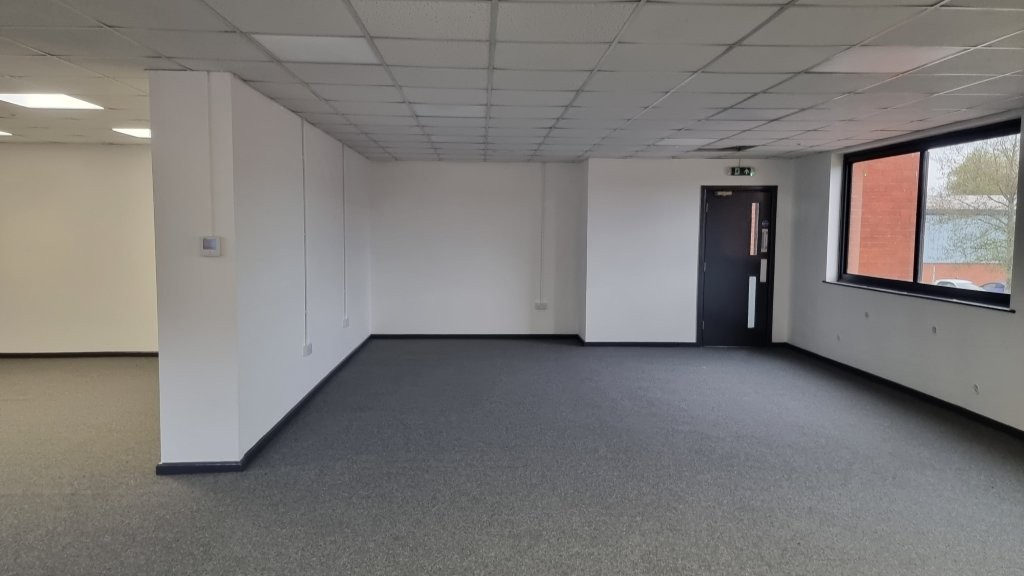
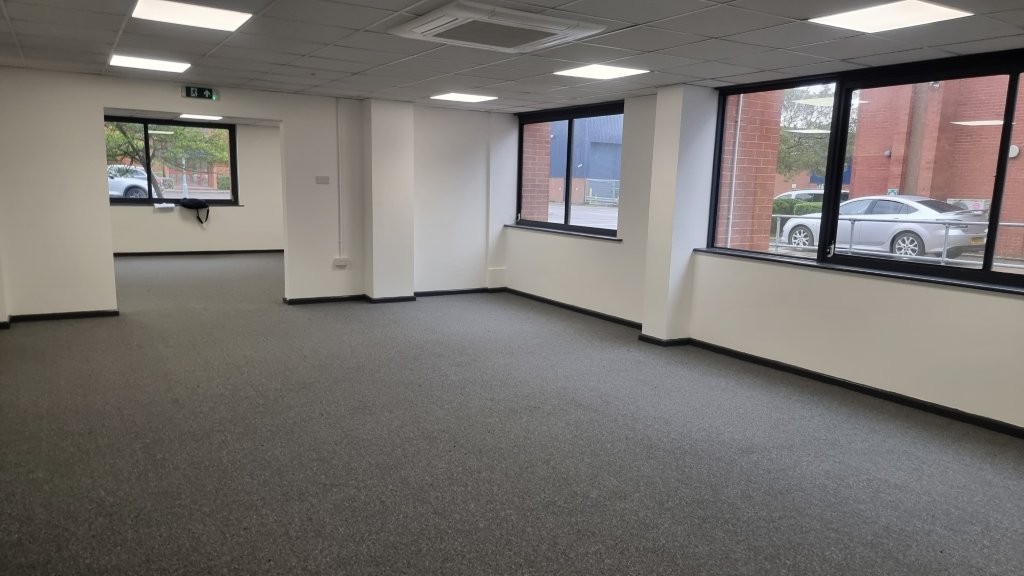
Existing office
Clean but empty
Empty office
Neutral white and grey
Empty office
Work in Progress photographs
Getting the plasterboard into the building and up the stairs was a bit of a challenge as it had a very tight stairwell and required 2.7m plasterboard due to the ceiling height.
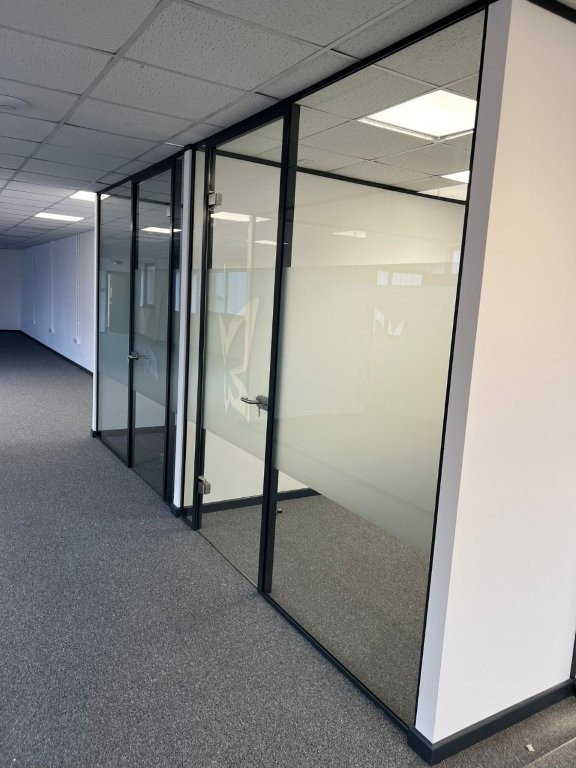
The new building had anthracite grey skirtings, doors and windows so we had all new partitions frames, doors and glass tracks powder coated to match the same RAL colour which we think looks really nice.
Once the plasterboard was in the meeting room and dividing walls were quick to install. The glass tracks were installed and final glass measurements taken to be manufactured.
lots of plasterboard to be brough in and up stairs
Awkward stairs for plasterboard
Meeting room partitions
Dividing partitions in place – glass tracks installed
Tracks ready for glazing
Completed partitions
The finish offices looked clean and modern ready for the client to move their furniture into.
By colour matching the RAL anthracite grey on all the skirtings, doors and framework the new partitions tie into the existing building seamlessly.
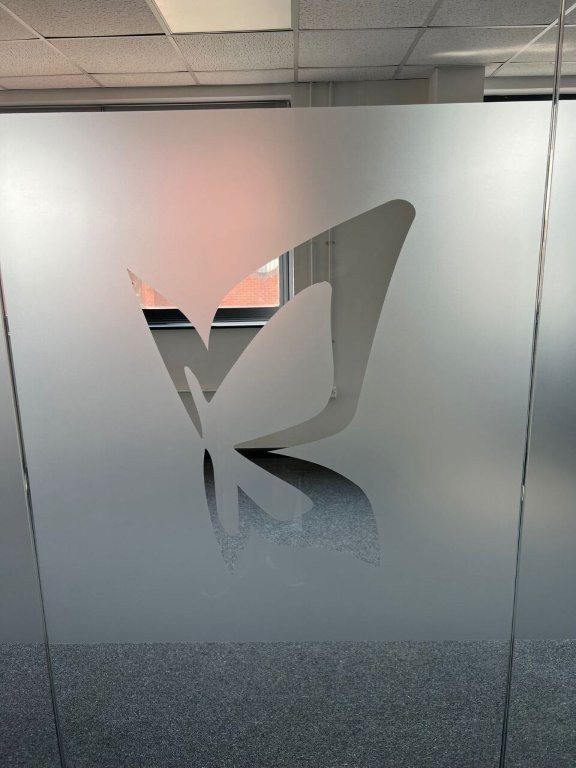
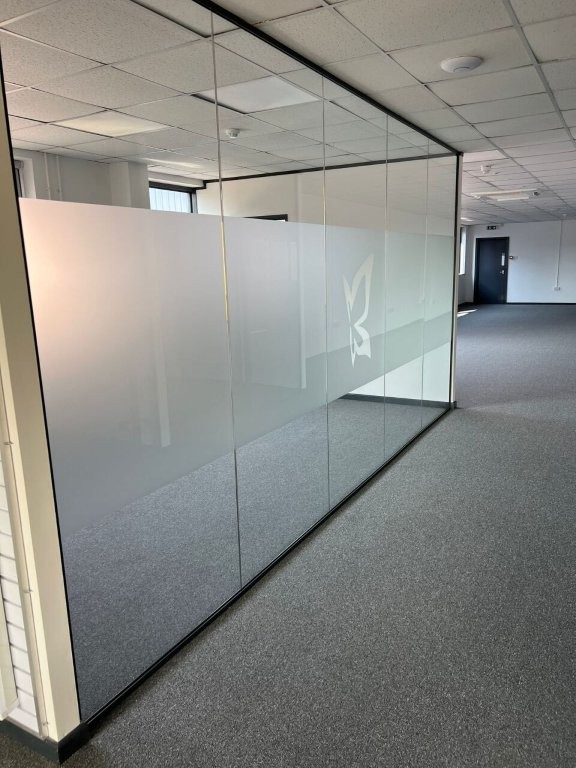
A 1m frosted band manifestation provides a good degree of privacy in the rooms while allowing natural light to fill the offices. Bespoke logo cut outs on the doors adds subtle branding throughout the space.
Bespoke logo cut out
Custom manifestations
Glass fronted offices
Full height glass doors
New doors painted in RAL gloss to match existing
Do you want open plan and natural light in your office but also concerned about sound performance?
If you would like some advice and inspiration on how glass fronted offices can be used throughout your office, please do give us a call on 01380 73 88 44, or email us at [email protected] and we would love to help.
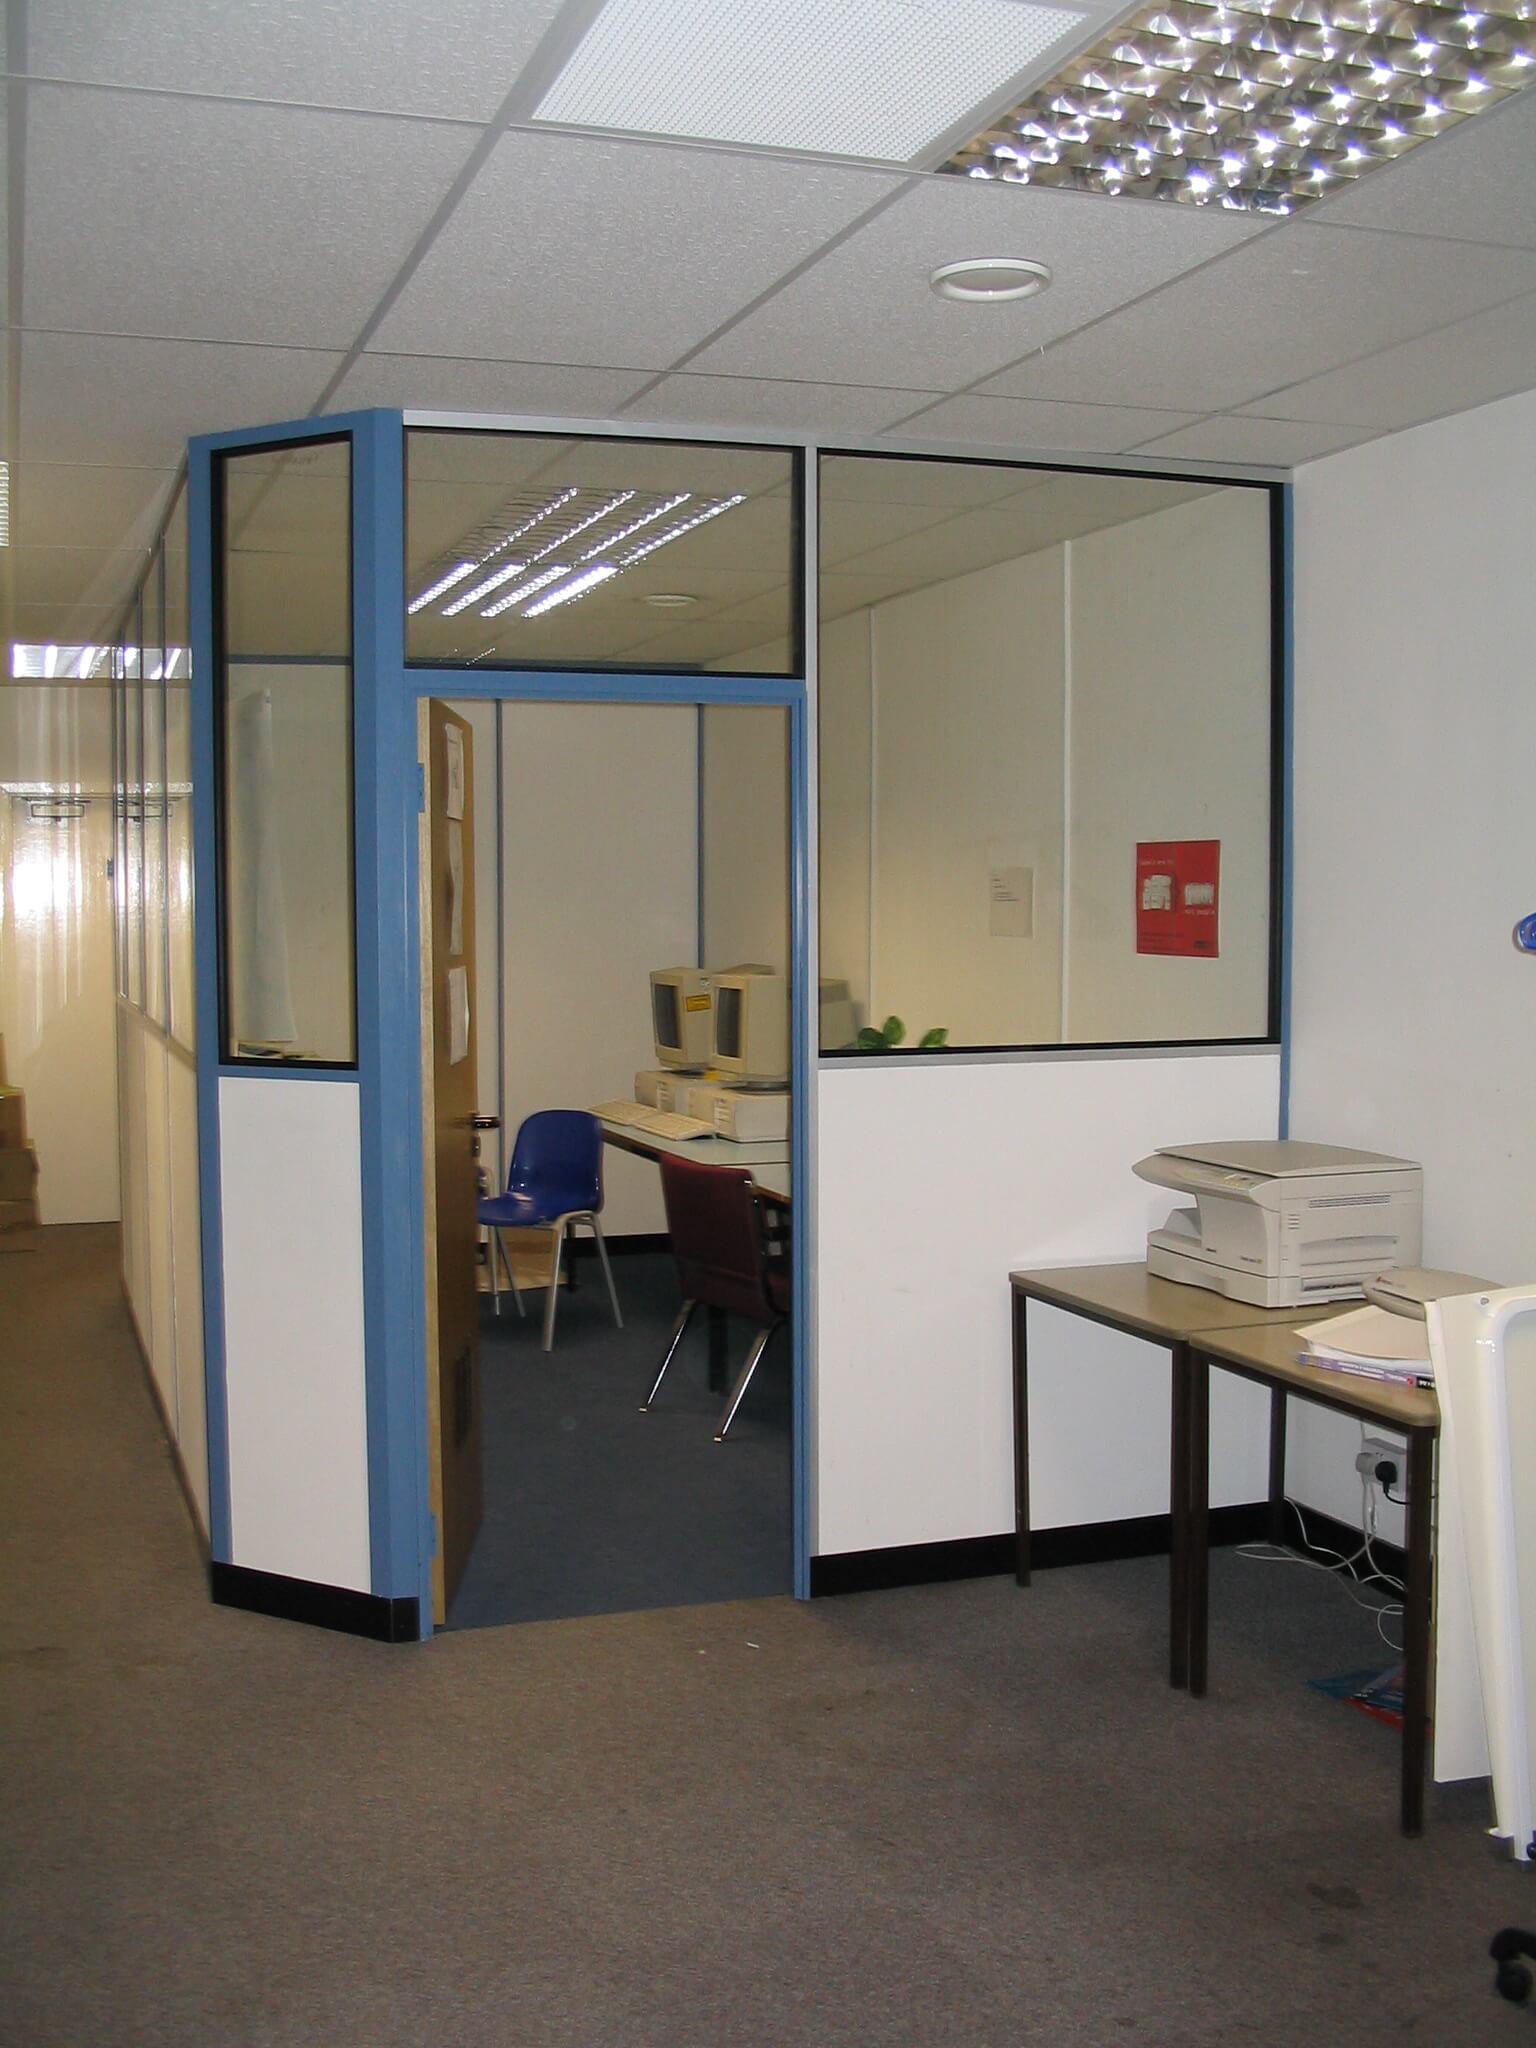
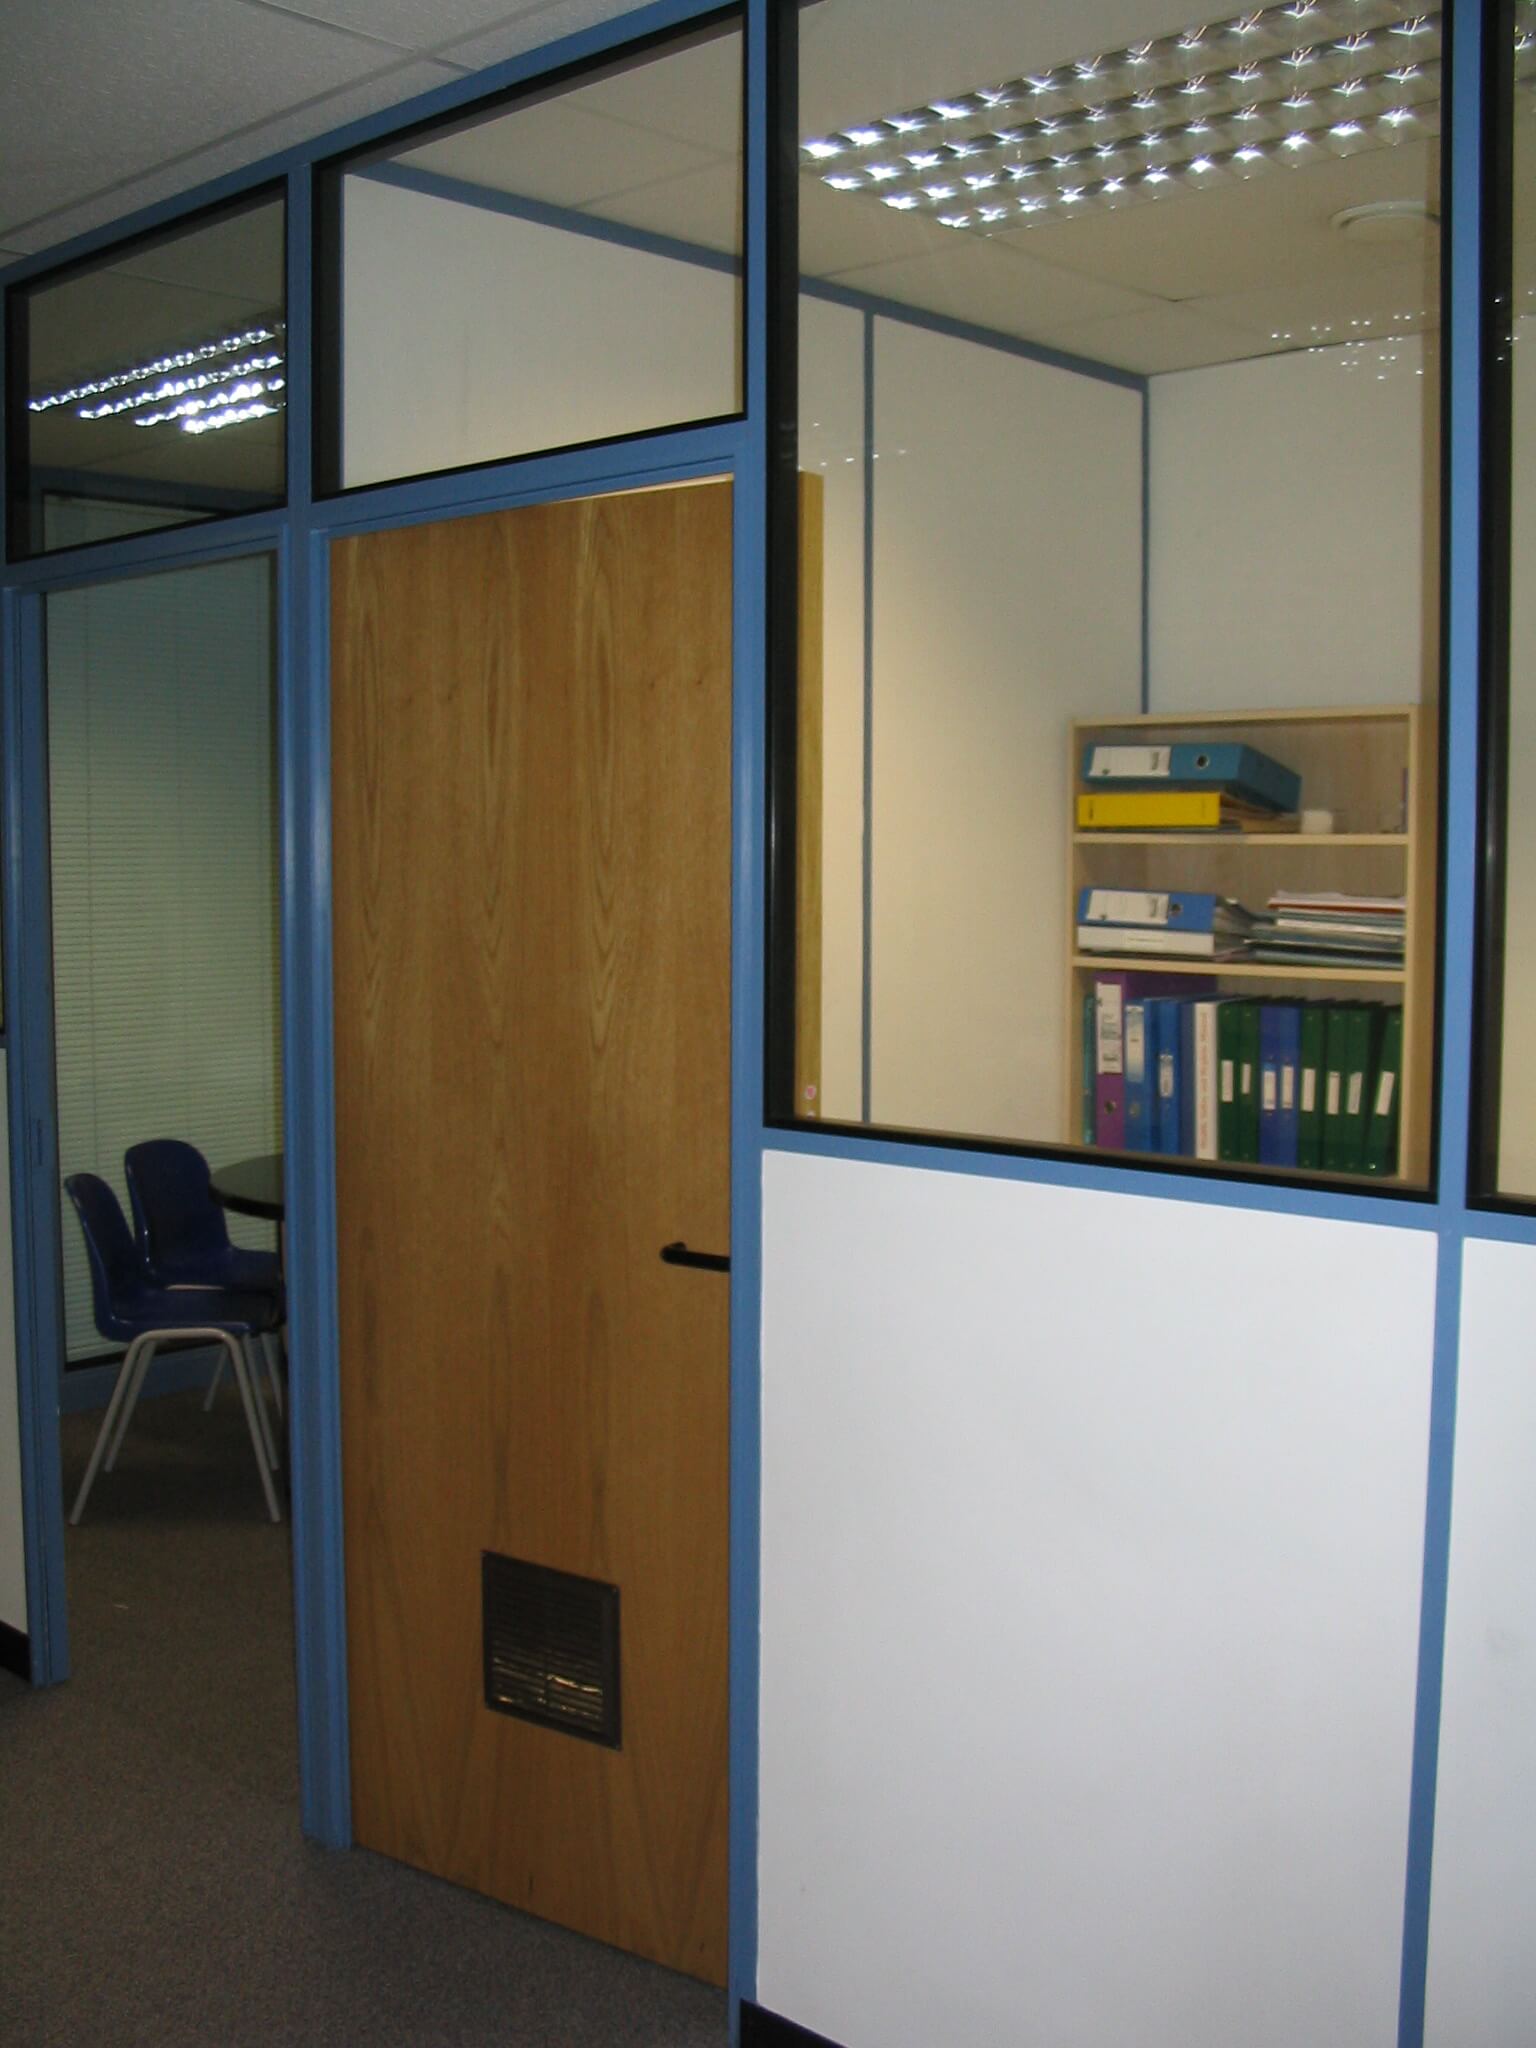
This demountable partitions project in Swindon consisted of two areas. The first partition had to consist of two new glazed screens around a central pillar and to match the colour of a partition system that was already installed. The second part of the project was a take down and reconfiguration of the existing layout, with new rooms and further partitioning which was new.
The beauty of using demountable partitions is in the name, the partitions can be demounted and moved elsewhere without them being completely destroyed like a normal plasterboard and stud work wall. Further information is on our page describing demountable partitions, please click this link if you would like to know a bit more. The partitions are built by skilled fitters and cannot be constructed by anyone, or a general builder as they are a specialist product requiring unique skills. The system we used in this instant was manufactured by Komfort, and was their 50mm komfort kameo 50 system. The first area needed colour samples that were sent to the customer to try and match the RAL colour of the partition system. We also matched the colour of the blinds and skirting. The difficult part of this project was that the central pillar was miles out of plumb which meant special trims had to be made to hide the gaps. You cannot see this on the finished result. The door was also made with a large window and some privacy film which matched what the customer had already in the rooms.
The second phase of the project was a different coloured system on a different floor. The requirements were to take down one wall, and re–use the materials with some new materials to make a larger offer and create a new office with lots of glazing.
The other slight difficulty was carrying all of the materials up two flights of very narrow stairs which is always a problem, but we allowed for this in our costings and our quote.
Initial site photographs.
As you can see from the photographs below, the first area needed partitions that had to fit around a central pillar and join onto an existing office. The colour of the aluminium frames presented a problem as even though one can powder coat the aluminium partition frames to a RAL colour, RAL colours have a tolerance on them so with the old and new frames butted up to each other there was a very high chance that there would be a shade difference. The existing partitions had also been in place for about 10 years, and the colour can fade over time, so the chances of getting an exact match was pretty remote. As always we ensure that we make the customer aware of this and when we received the go ahead for the work, the customer stated that our honesty and clarity of what we were doing as well as the price swayed selection of who they wanted to do the work in our favour. The first two photographs below show the first area, the second area showed the general space, many of the existing walls seen would need to be taken down and re-used in a different configuration. The practically of using demountable partitions cannot be over estimated as although there is an initial high cost with the frames, they can be re-used making them really flexible. The other factor of course is that they look pretty good as well, and you can introduce window frames and door combinations much easier than a conventional plasterboard wall.
Central pillar to fit partitions to.
Base skirting to be matched as well as the colour
Second area partitions to go here.
All these glass walls to come down and be rebuilt elsewhere.
Working out the materials and sizes.
The first area was a bit difficult to do, and in this case the materials had to be specially ordered to the particular RAL colour. Once the colour is run, it is not possible just to get another piece in case it is cut wrong as a whole new production run would have t be made which would be very expensive to do. Getting it right right time was very important. In this case we took lots of measurements and produced a drawing just to be sure. In this situation it was not necessary to carry out any space planning or design. If you would like to know the difference between drawing work, space planning and visuals please click this link. The second area used many parts of the existing office layout, and was more of a taking down and rebuilding exercise, and the colour of the partition frames were a stock colour, so if we needed some more trims or head channel we could get them next day so we were more relaxed with the second area.
Detailed drawing
Construction work.
We decided to deal with the two areas in separate phases using the same gang of fitters, so they could complete one area and then move on downstairs to the second without any delay or disruption. We also saved on the delivery costs by having all the materials delivered in one visit, getting the materials into the building was not easy. The first area was on the second floor, and the second area was on the floor below. The entrance to the offices was via Barclays bank shared lobby, so we used the rear fire escape to get the materials into the building without having to go through the main office which was quite a considerable distance from the main road. Getting rid of the waste material also presented the same problem. Although you may think this is minor detail, it is actually really important to minimise the disruption to the client, so we did collect all of the waste off cuts and rubbish together in one area, and when both areas were finished got it all out the fire escape in one go.
Frames installed waiting for blinds and glass
New door installed to same size as the existing one further in the office.
Two screens can be seen either side of the pillar.
Pillar was not vertical, so we had to cover the gaps
Much of the existing walls had to be taken down.
Rebuilding in new positions
The rebuilding included re-position doors and frames.
Windows frames taking shape
Door and frames being re-hung
Re-positioned door
A better view showing the extent of the take down and rebuild
The earlier photograph above showing the gap between the new screen and pillar is nothing unusual. In order to keep costs down we try and make the glass and frames perfectly square, so if the pillar or wall is out of vertical alignment which they often are, we can make up any out of plumb situations by providing a cover trim to cover any gaps. Optically it is better to keep the frames square, we could actually rake the glass to make it fit, but it would make your eyes funny when you looked at it, you could see something was not quite right. It is surprising how much your eyesight can detect. Raking the glass is also much more expensive. The other reason for making the frames perfectly square is that in one of the elevations we have a door frame next to one of the uprights, all door frames need to be put in perfectly square anyway, as if you make it slightly out of plumb with the ground the door will swing of its own accord due to gravity. When you open and close the door it needs to swing (open and close), without any tendency to close or open, so a neutral situation.
Completed photographs.
View showing final result.
The new door matched the existing one including the graphic.
The old and new join of the two systems shows that the colour was not far off.
The bottom part of the partition join was also good.
The cover strip covered the out of square pillar
Completed enlarged office space.
Why Demountable Partitions?
They look much better than conventional stud and plasterboard partitions. Glass can be introduced greatly improving the way light gets into an office space.
Demountable partitions are tax efficient in that they are seen as movable items and so can be treated differently in writing down allowances in the accounts.
We can also lease Demountable Partitions as they are movable, this spreads the costs of having the work done as Demountable Partitions always cost more than customers think.
Leasing of demountable partitions is very tax efficient and Cre8tive can provide illustrations, please contact us for further information.
Most landlords insist on demountable partitions being used for offices as it is much easier to take them out should the tenant renting the space leave for any reason. The benefit is that is saves making a huge amount of mess and destruction that would be need with a conventional stud and plasterboard constructed wall.
Questions on Demountable Partitions or on how to reconfigure your office space?
If you are not sure about anything we love to talk about projects and sort out problems and issues with space, please give us a call on 01380 738844
Take down and rebuild is a common activity with demountable partitioning. The existing office space was very small and as well as re-positioning a door, we had to build a new office in the opposite corner to match the existing design and colour scheme. The first task was to draw what they had, so measure everything, take lots of photographs, look at what the wanted to do, and then work out how many bits we create by talking the walls down, and then work out how many new parts we need in order to create the new. The system used in this project is a 50mm wide demountable partition system, offering a good value product which visually can still look good. In this case the partitions had to match the existing, but all of the frames and solid panels can be made from a wide range of colours and finishes.
This project is exactly a take down and rebuild project, but with a bit more added. Although this sounds complicated, it is exactly what demountable partitioning is designed to be, you do need not destroy the partition when you take it down, as you can re-use most of the parts. The only provision is that the re-built demountable partition needs to be in the same area with the same ceiling height.
Completed Photographs
Demountable Partitioning half glazed – 50mm wide
Demountable Partitioning half glazed – 50mm wide
Demountable Partitioning half glazed – 50mm wide
Demountable Partitioning half glazed – 50mm wide
Why Demountable Partitions?
Demountable partitions are tax efficient in that they are seen as movable items and so can be treated differently in writing down allowances in the accounts. Please click this link for a bit more information we have written in a blog.
We can also lease Demountable Partitions as they are movable, this spreads the costs of having the work done as Demountable Partitions always cost more than customers think.
Leasing of demountable partitions is very tax efficient and Cre8tive can provide illustrations, please contact us for further information.
Most landlords insist on demountable partitions being used for offices as it is much easier to take them out should the tenant renting the space leave for any reason. The benefit is that is saves making a huge amount of mess and destruction that would be need with a conventional stud and plasterboard constructed wall.
This project included the installation of a new Timber Demountable Partitioning System in order to create private meeting space while giving a clean professional look to the existing corridor. The project was fairly unusual in that the partition system although demountable; is actually made from Timber. the basic framework is still metal stud and plasterboard and the timber trims are fitted around the walls, as well as full timber door frames used to match in with the rest of the product.